Togami - AMD Ryzen 9800X3D + Radeon RX 9070 XT in the NCASE M2 Grater
This is Togami, a 9800X3D/RX 9070 XT Fedora Linux 42 workstation. Named for Fedora Project founder Warren Togami, it signals my departure from Windows for personal computing. At some point you get tired of being a guinea pig, a data mine, and a target for ads all at once. Between constantly installing software I didn’t ask for, and changing defaults every time I blink, I needed a change. I’ve used Linux as a server operating system in a homelab setting for years, and various forms of KDE Plasma on laptops. Daily driving on a desktop, however, is a completely different experience. It took a while to hunt down a decent sum of minor inconveniences, but with those worked out, the experience has been great.

The Hardware
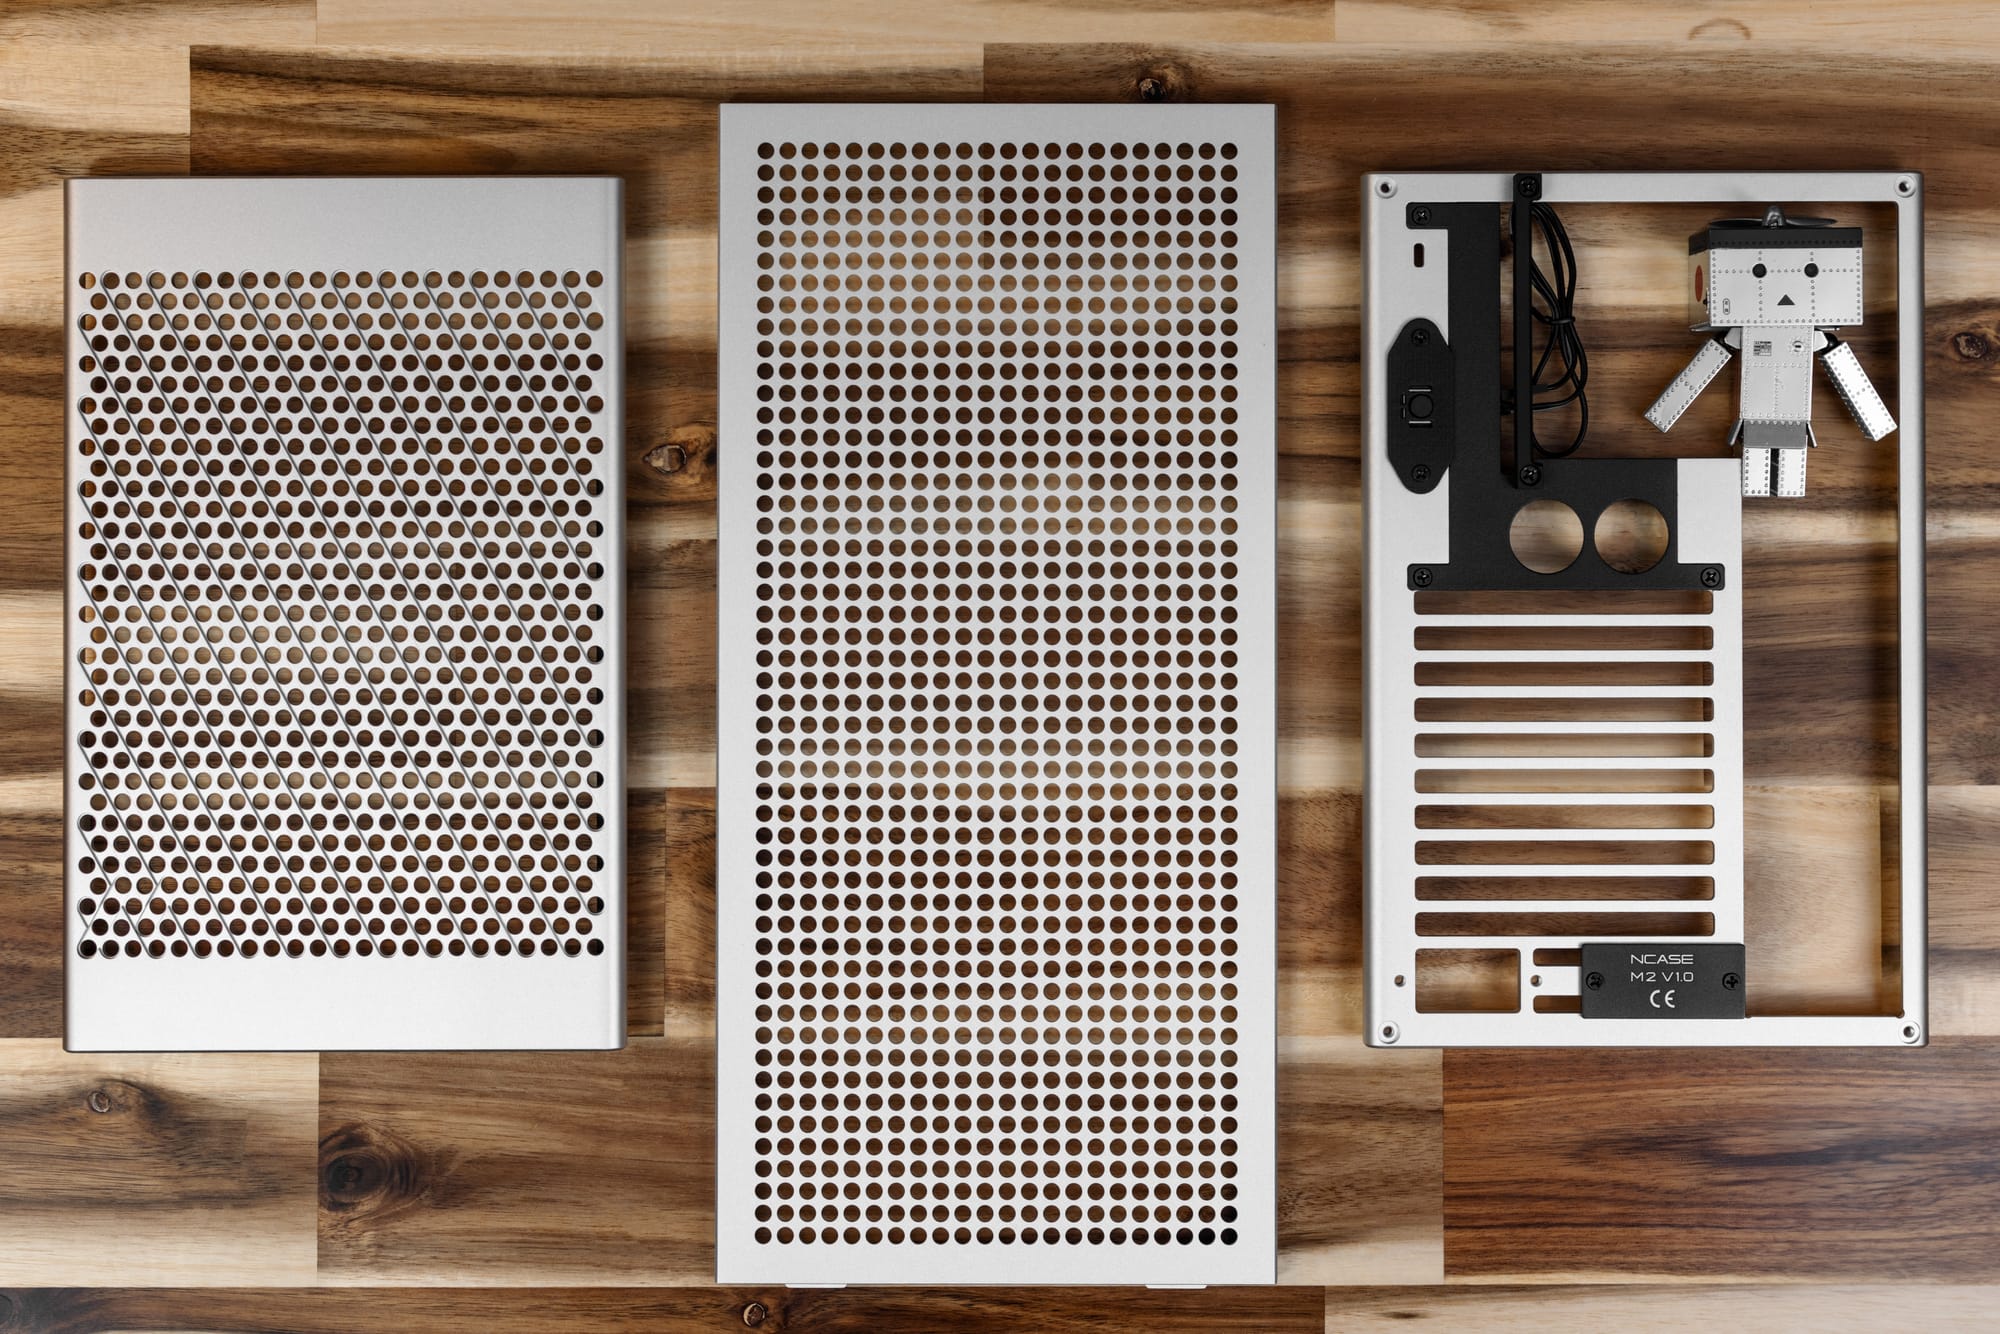
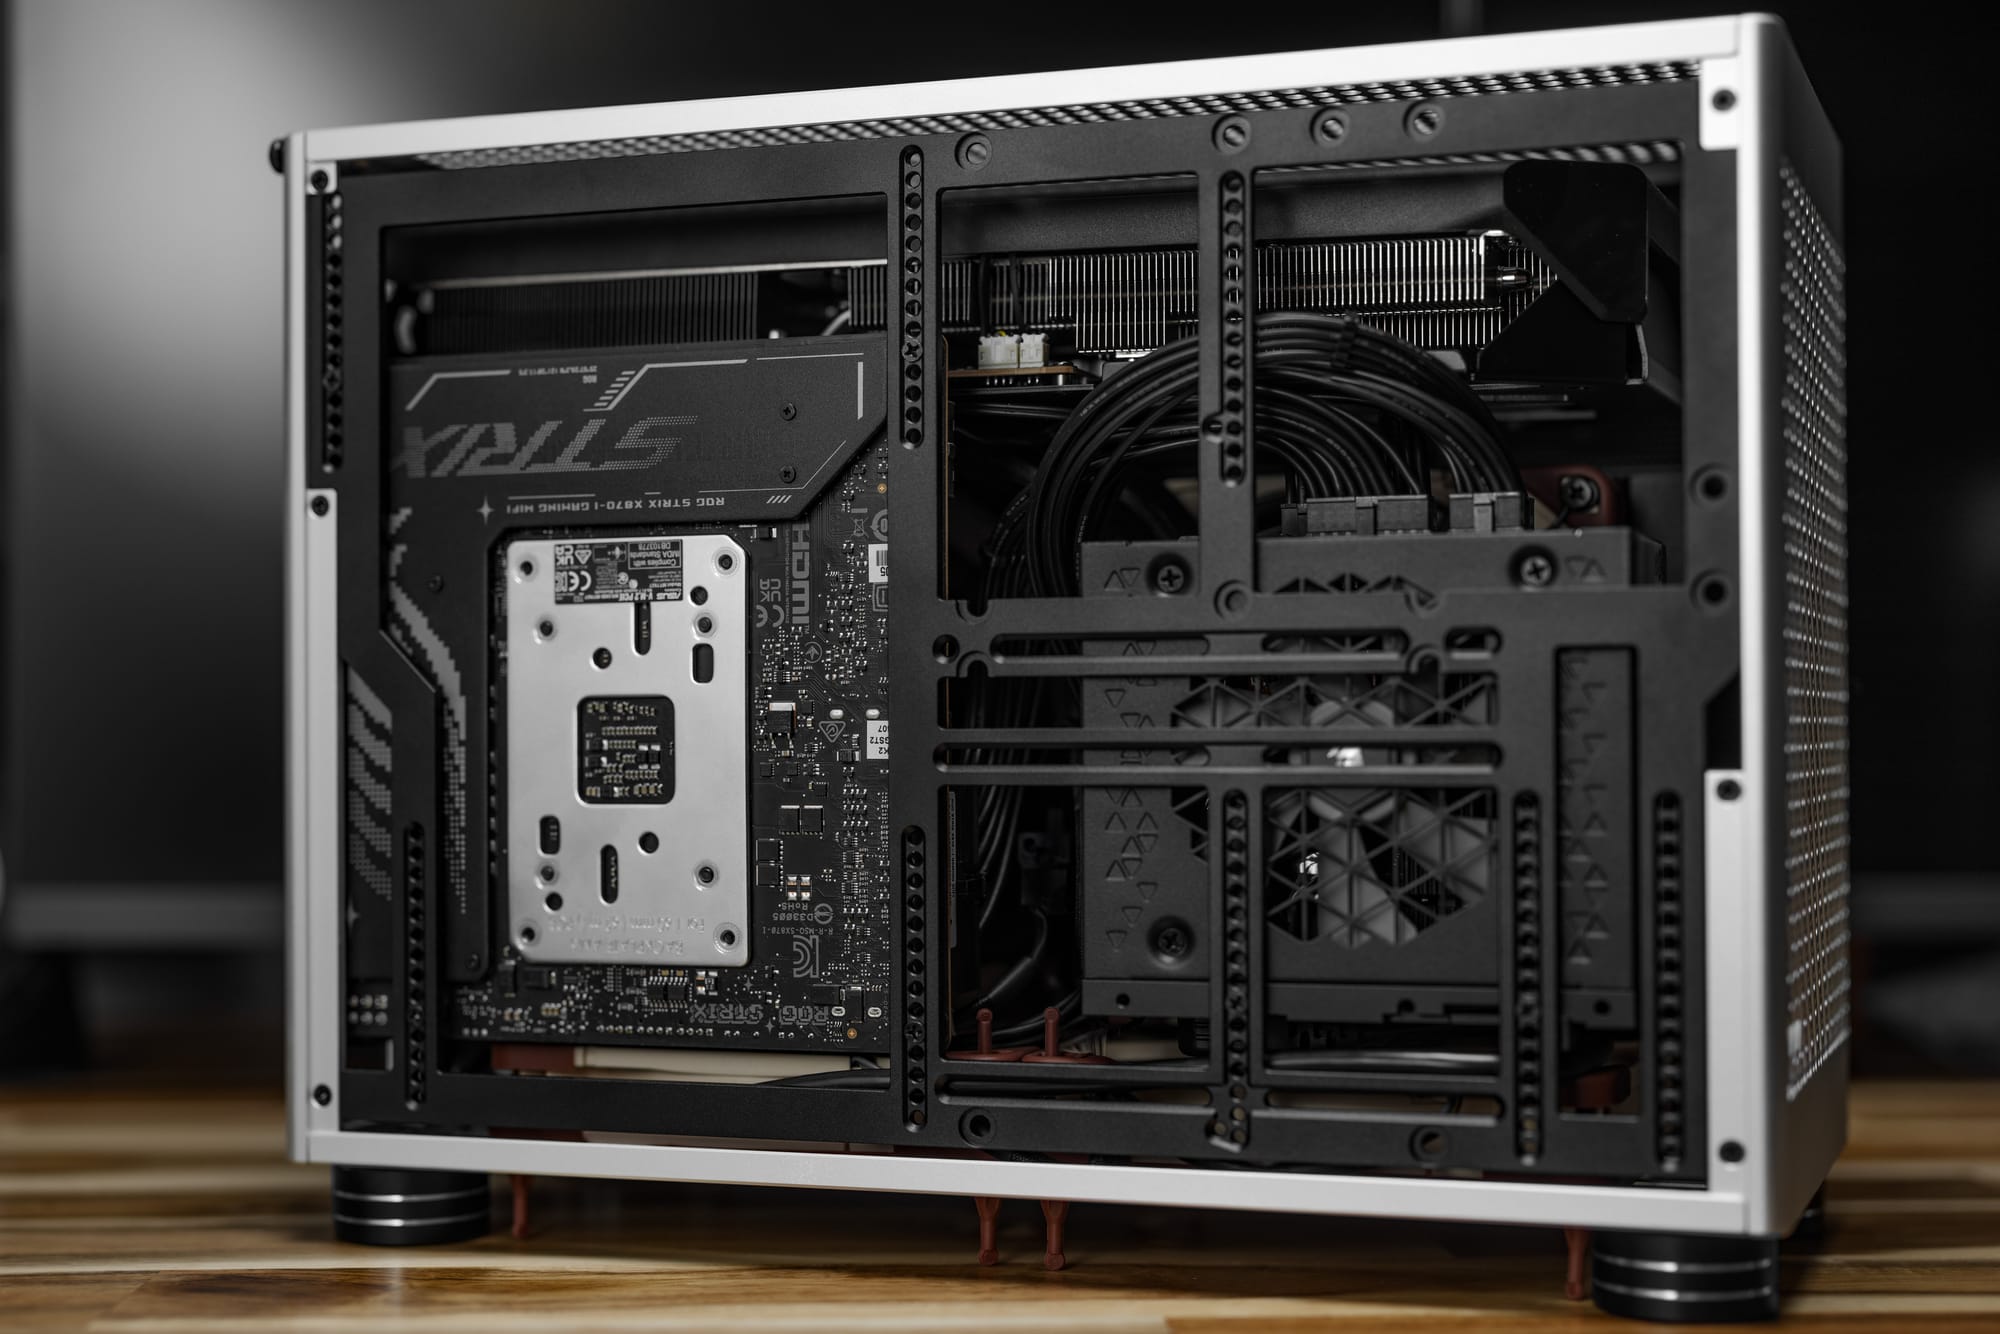
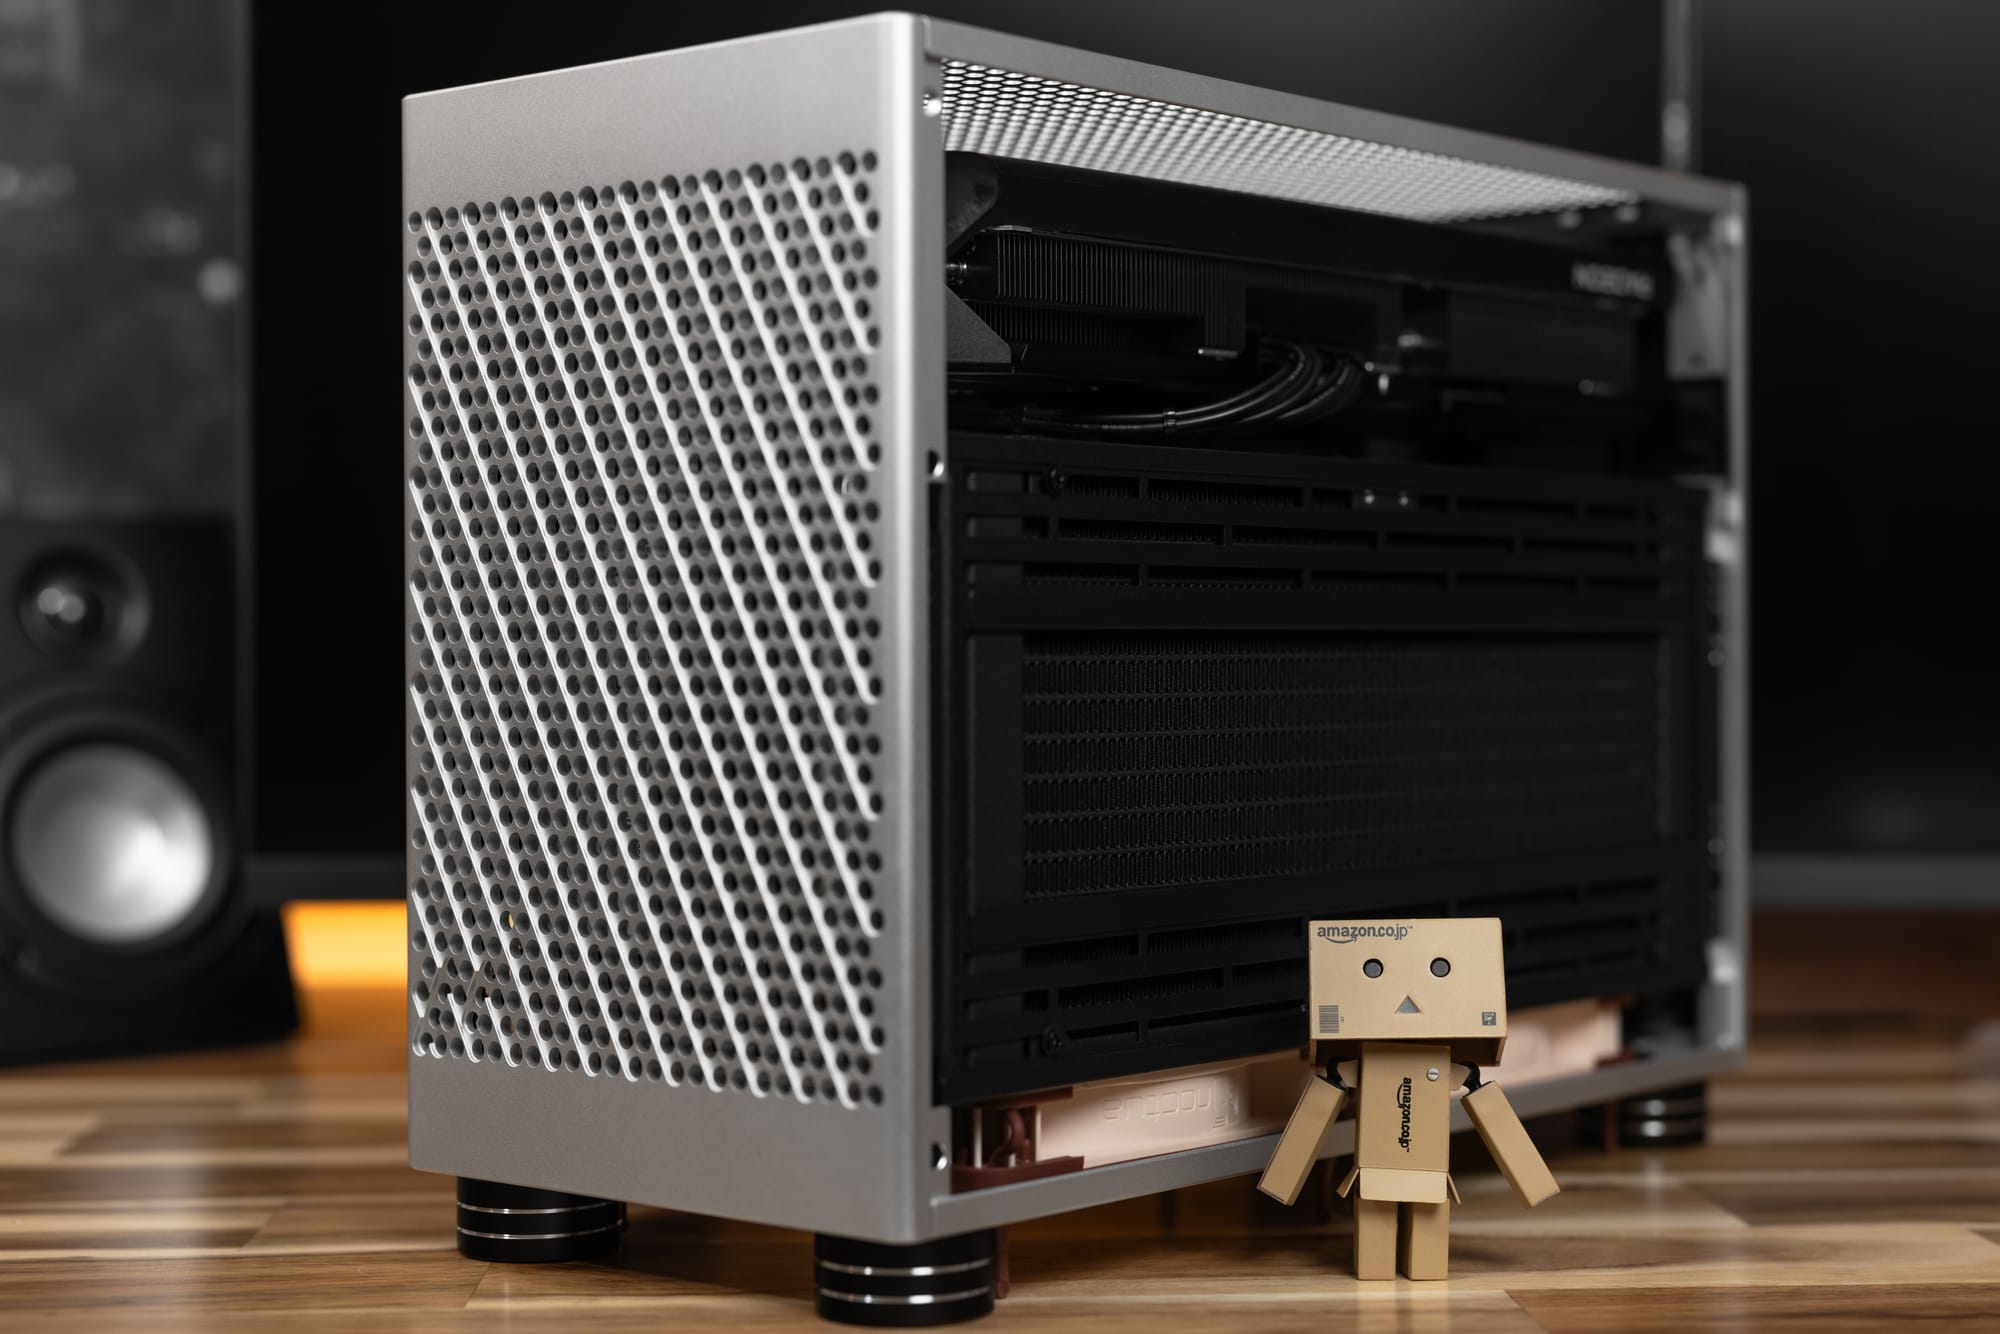
Case - NCASE M2 Grater (Silver)
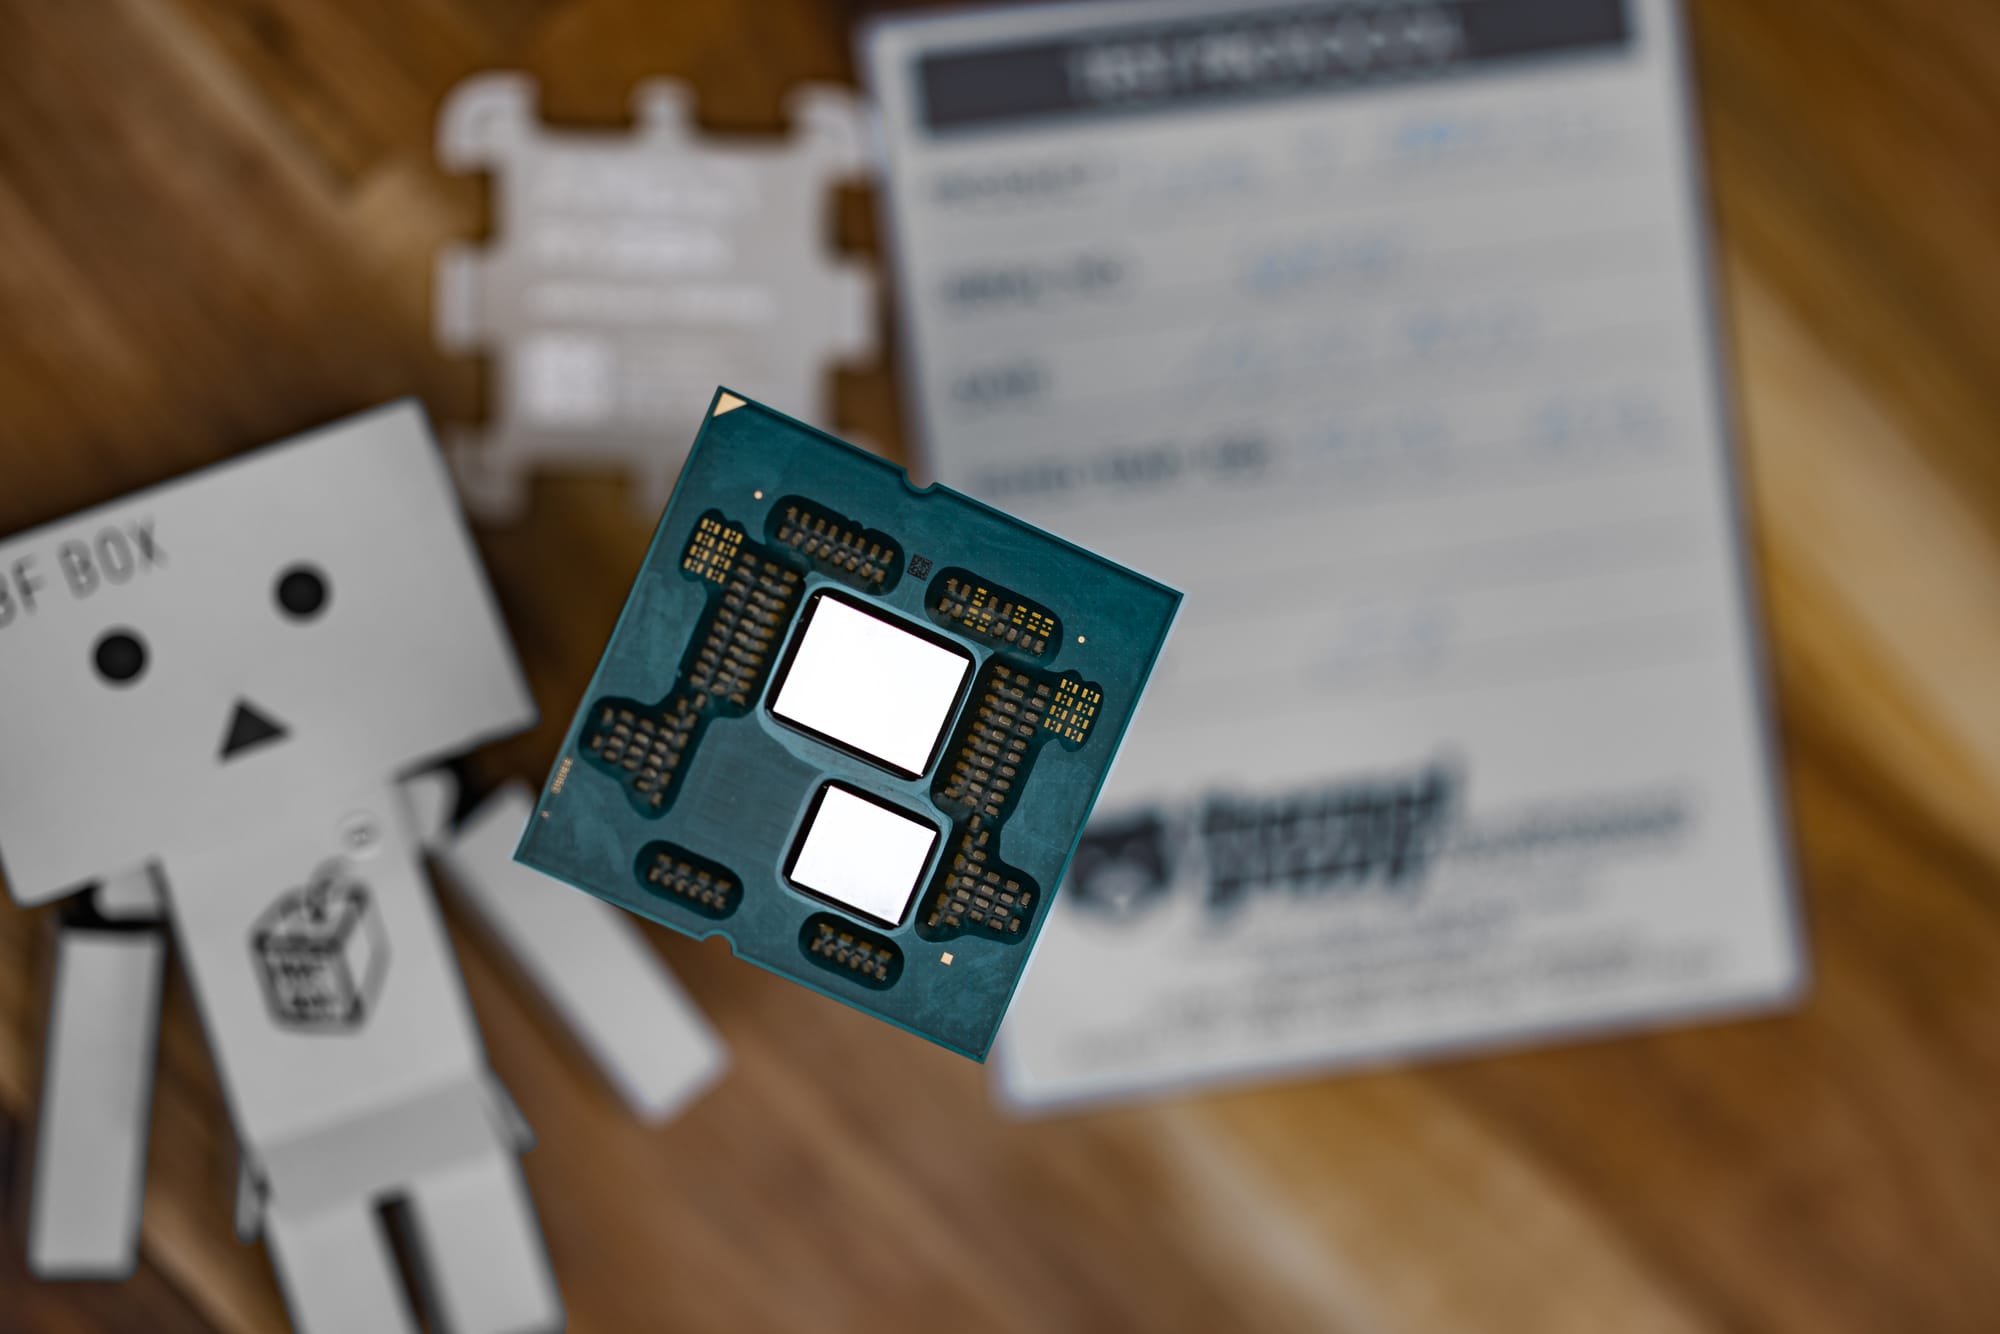
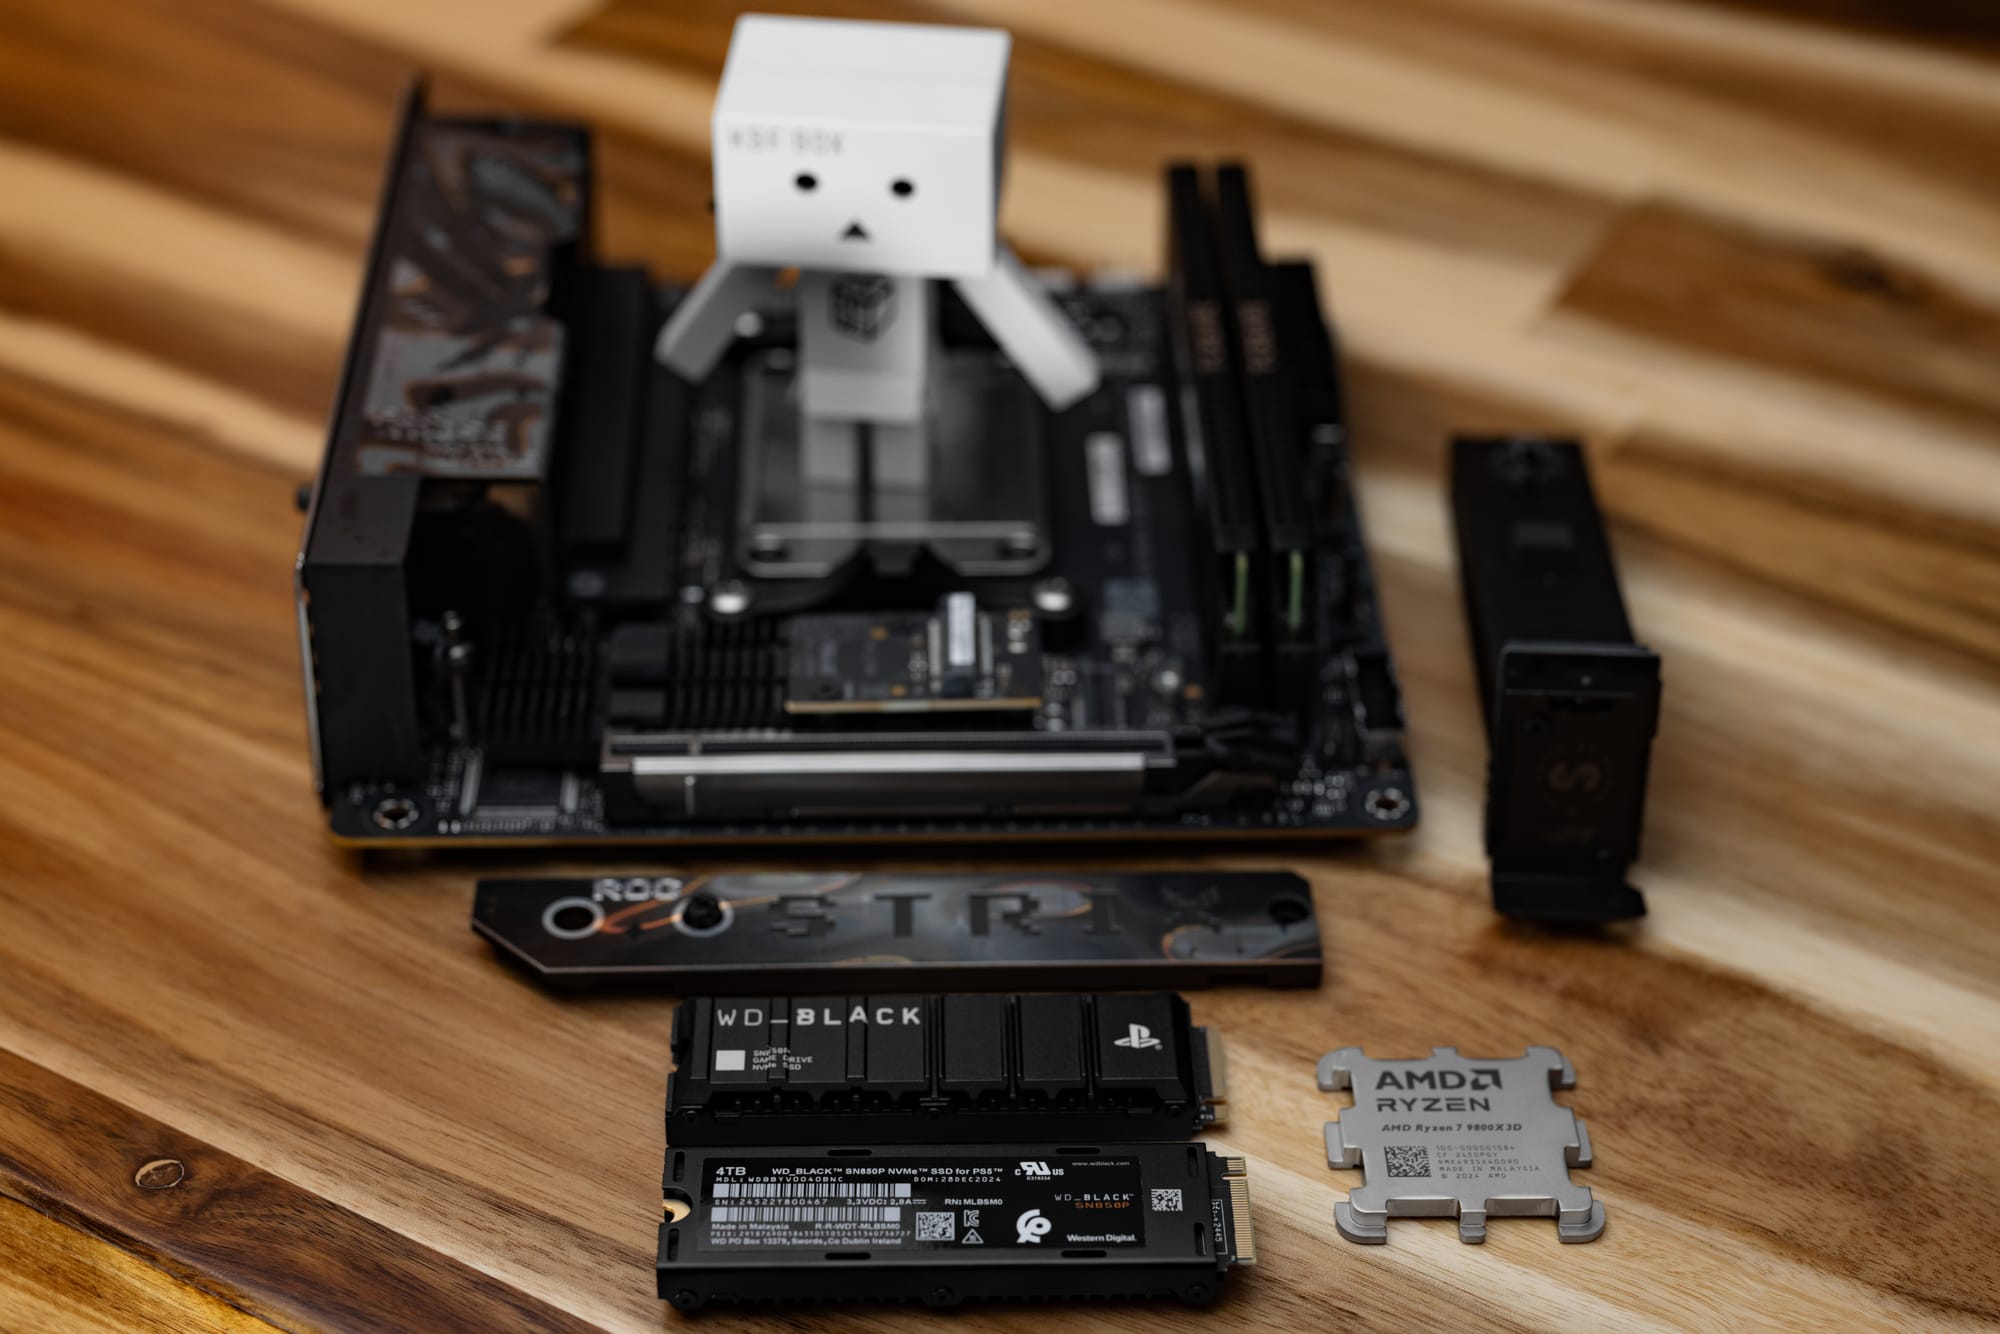
CPU/Mobo - AMD Ryzen 7 9800X3D (Thermal Grizzly Delidded)
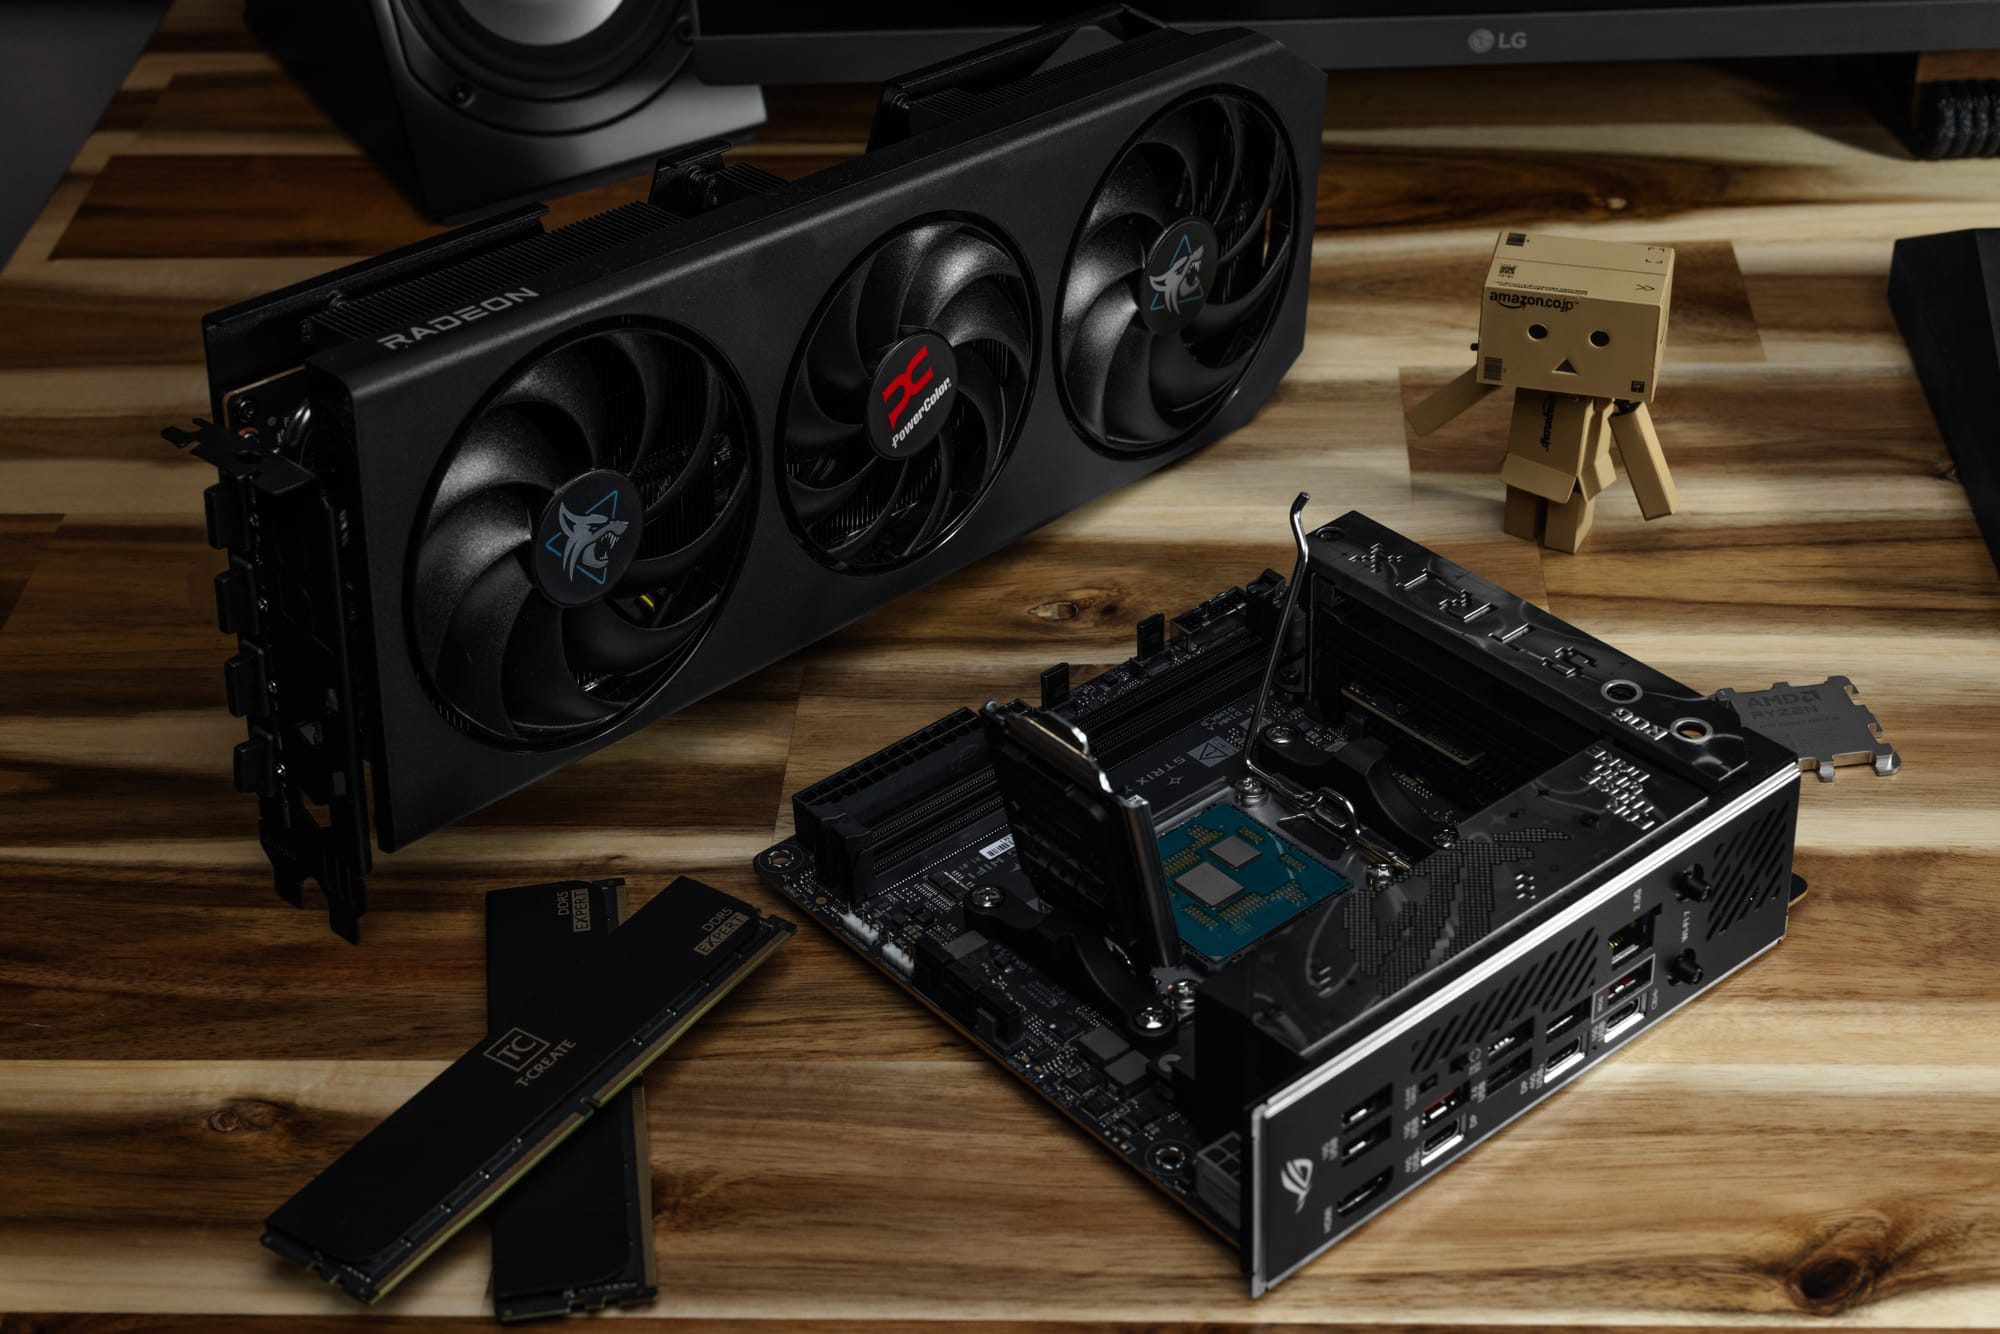
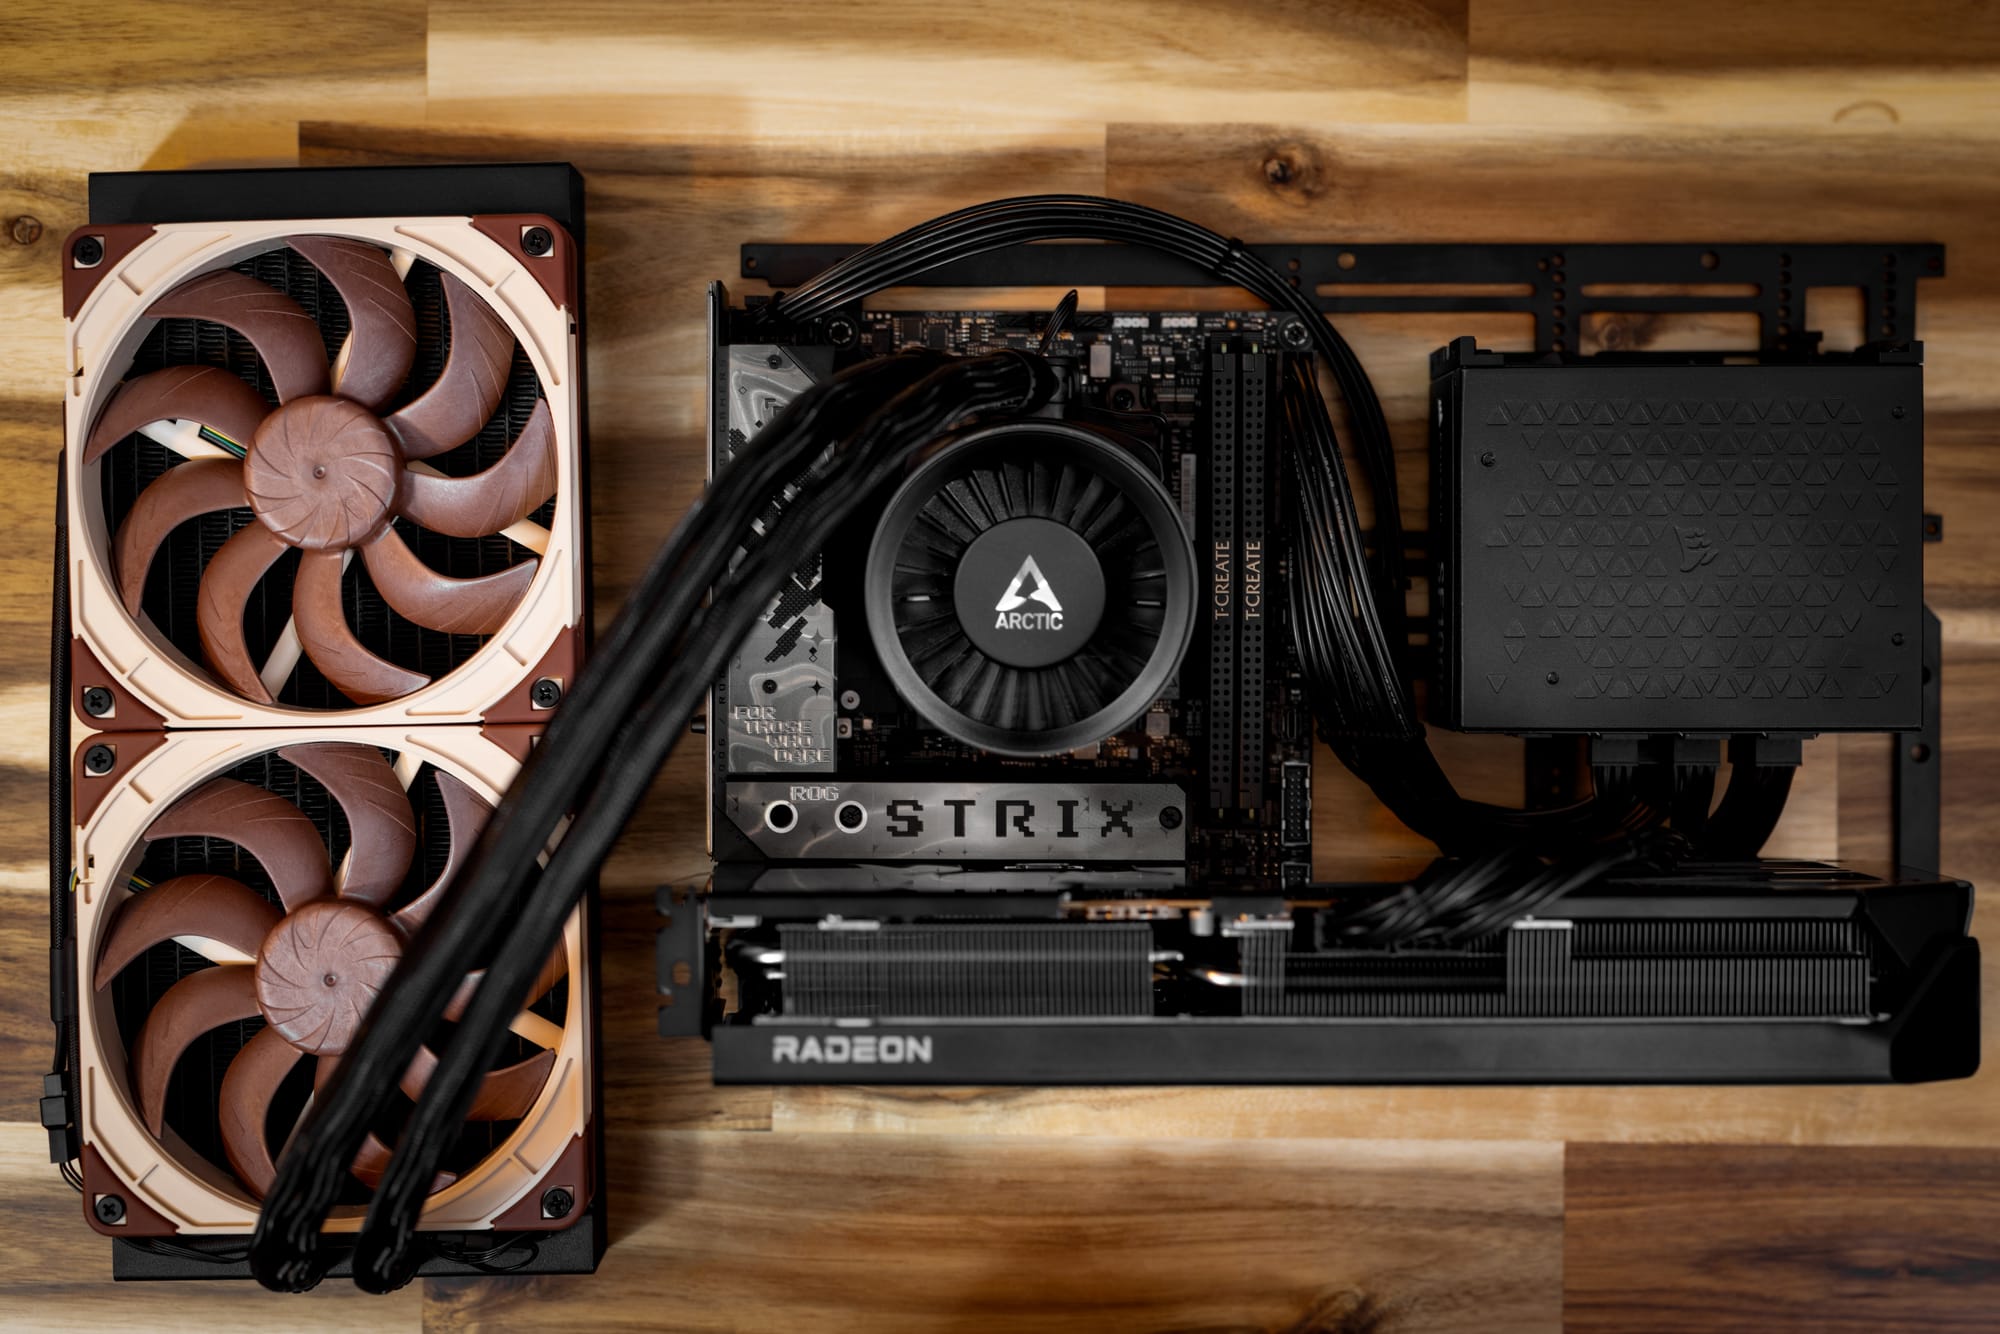
Mobo - ASUS ROG STRIX X870-I Gaming Wi-Fi
RAM - TEAMGROUP T-Create 96GB (2x48GB) DDR5 6400 CL32
Storage - 2x 4TB WD SN850P NVMe SSDs
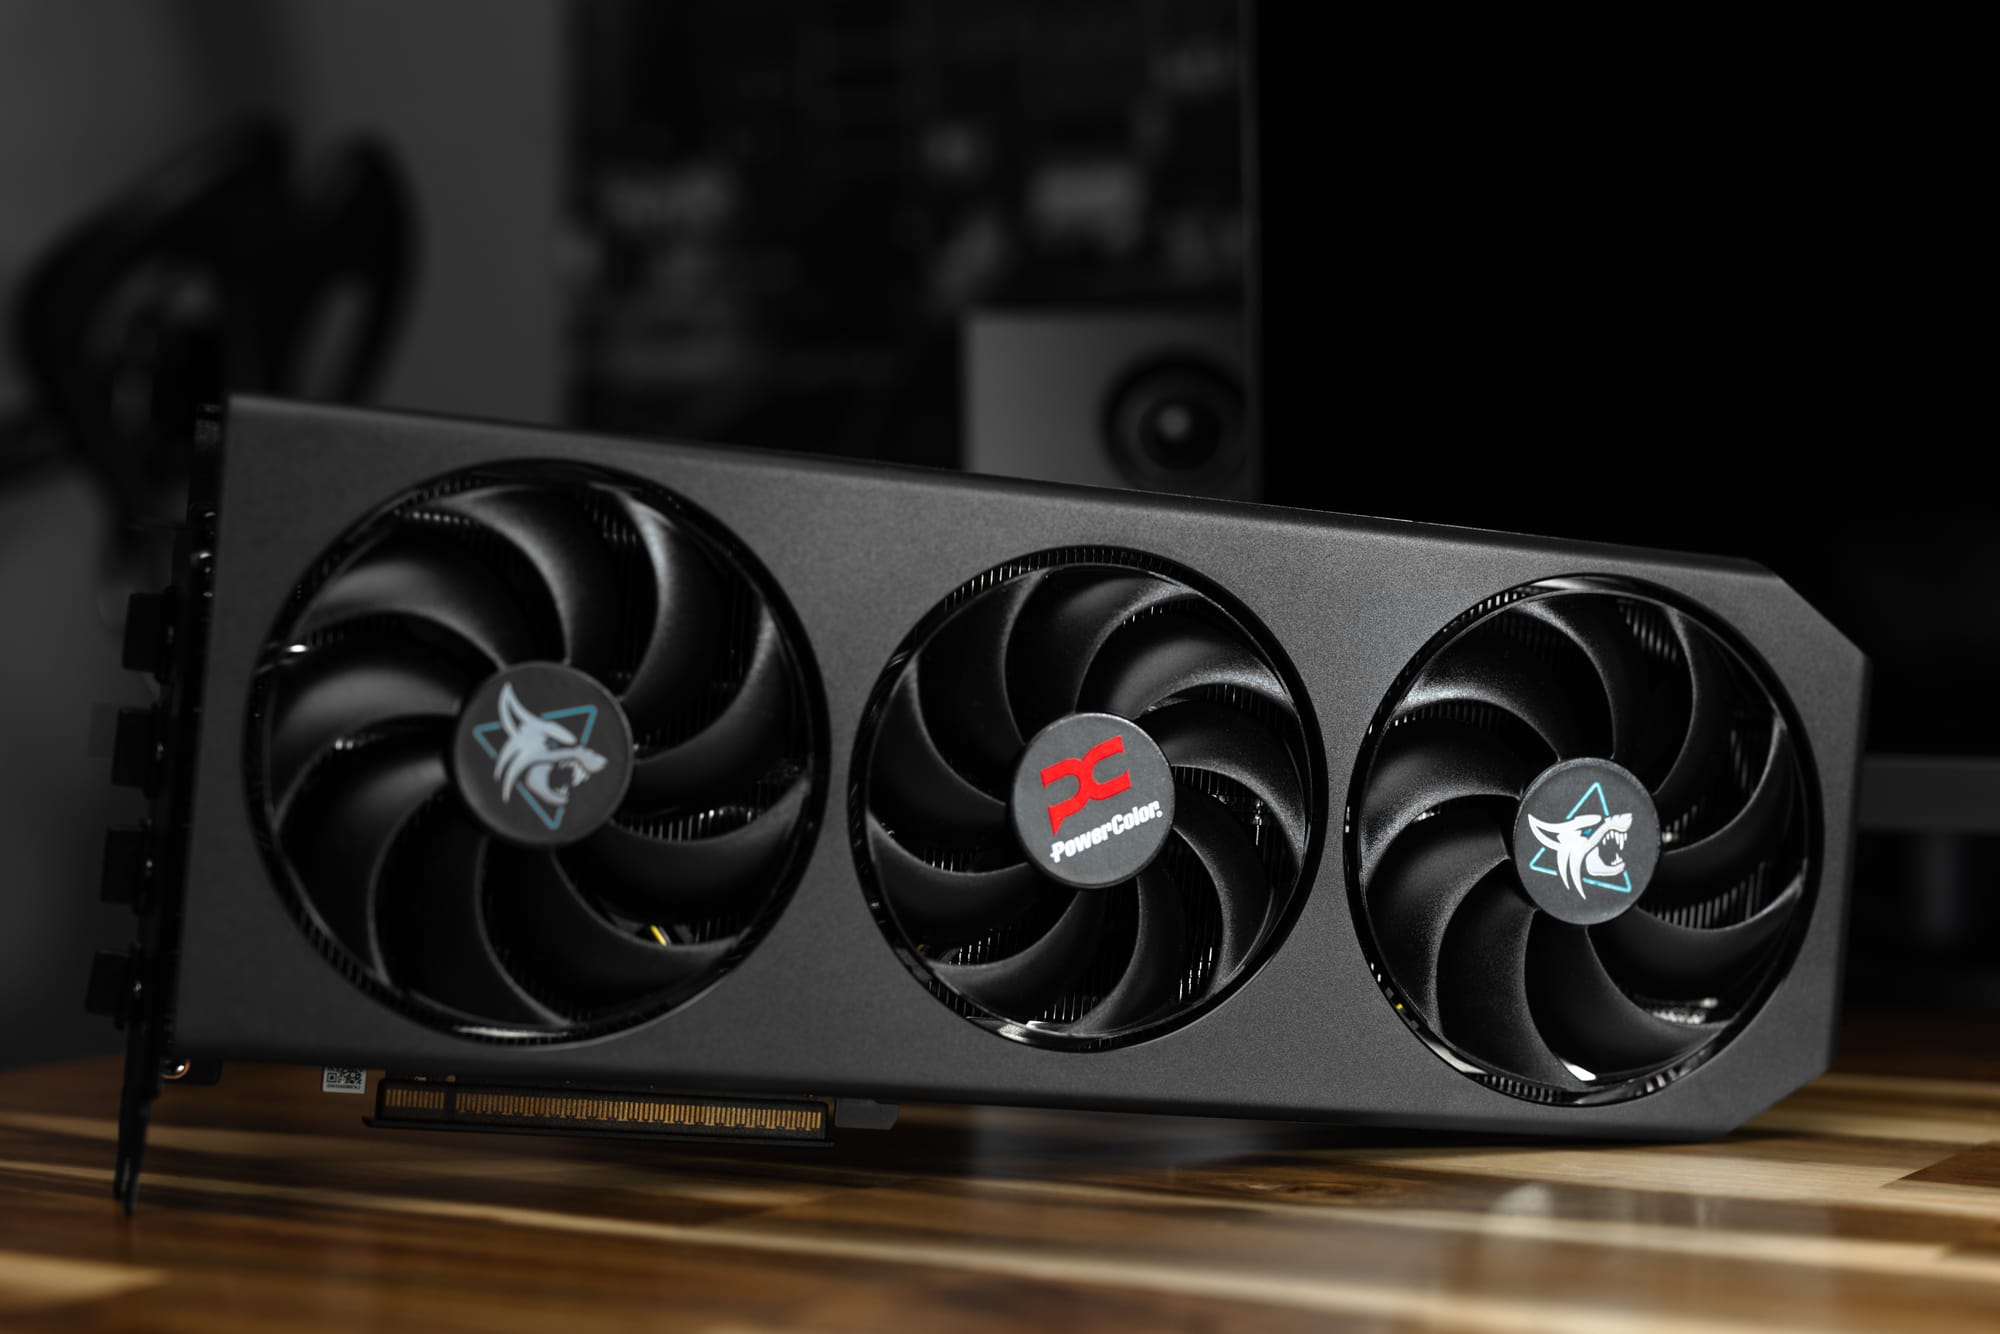
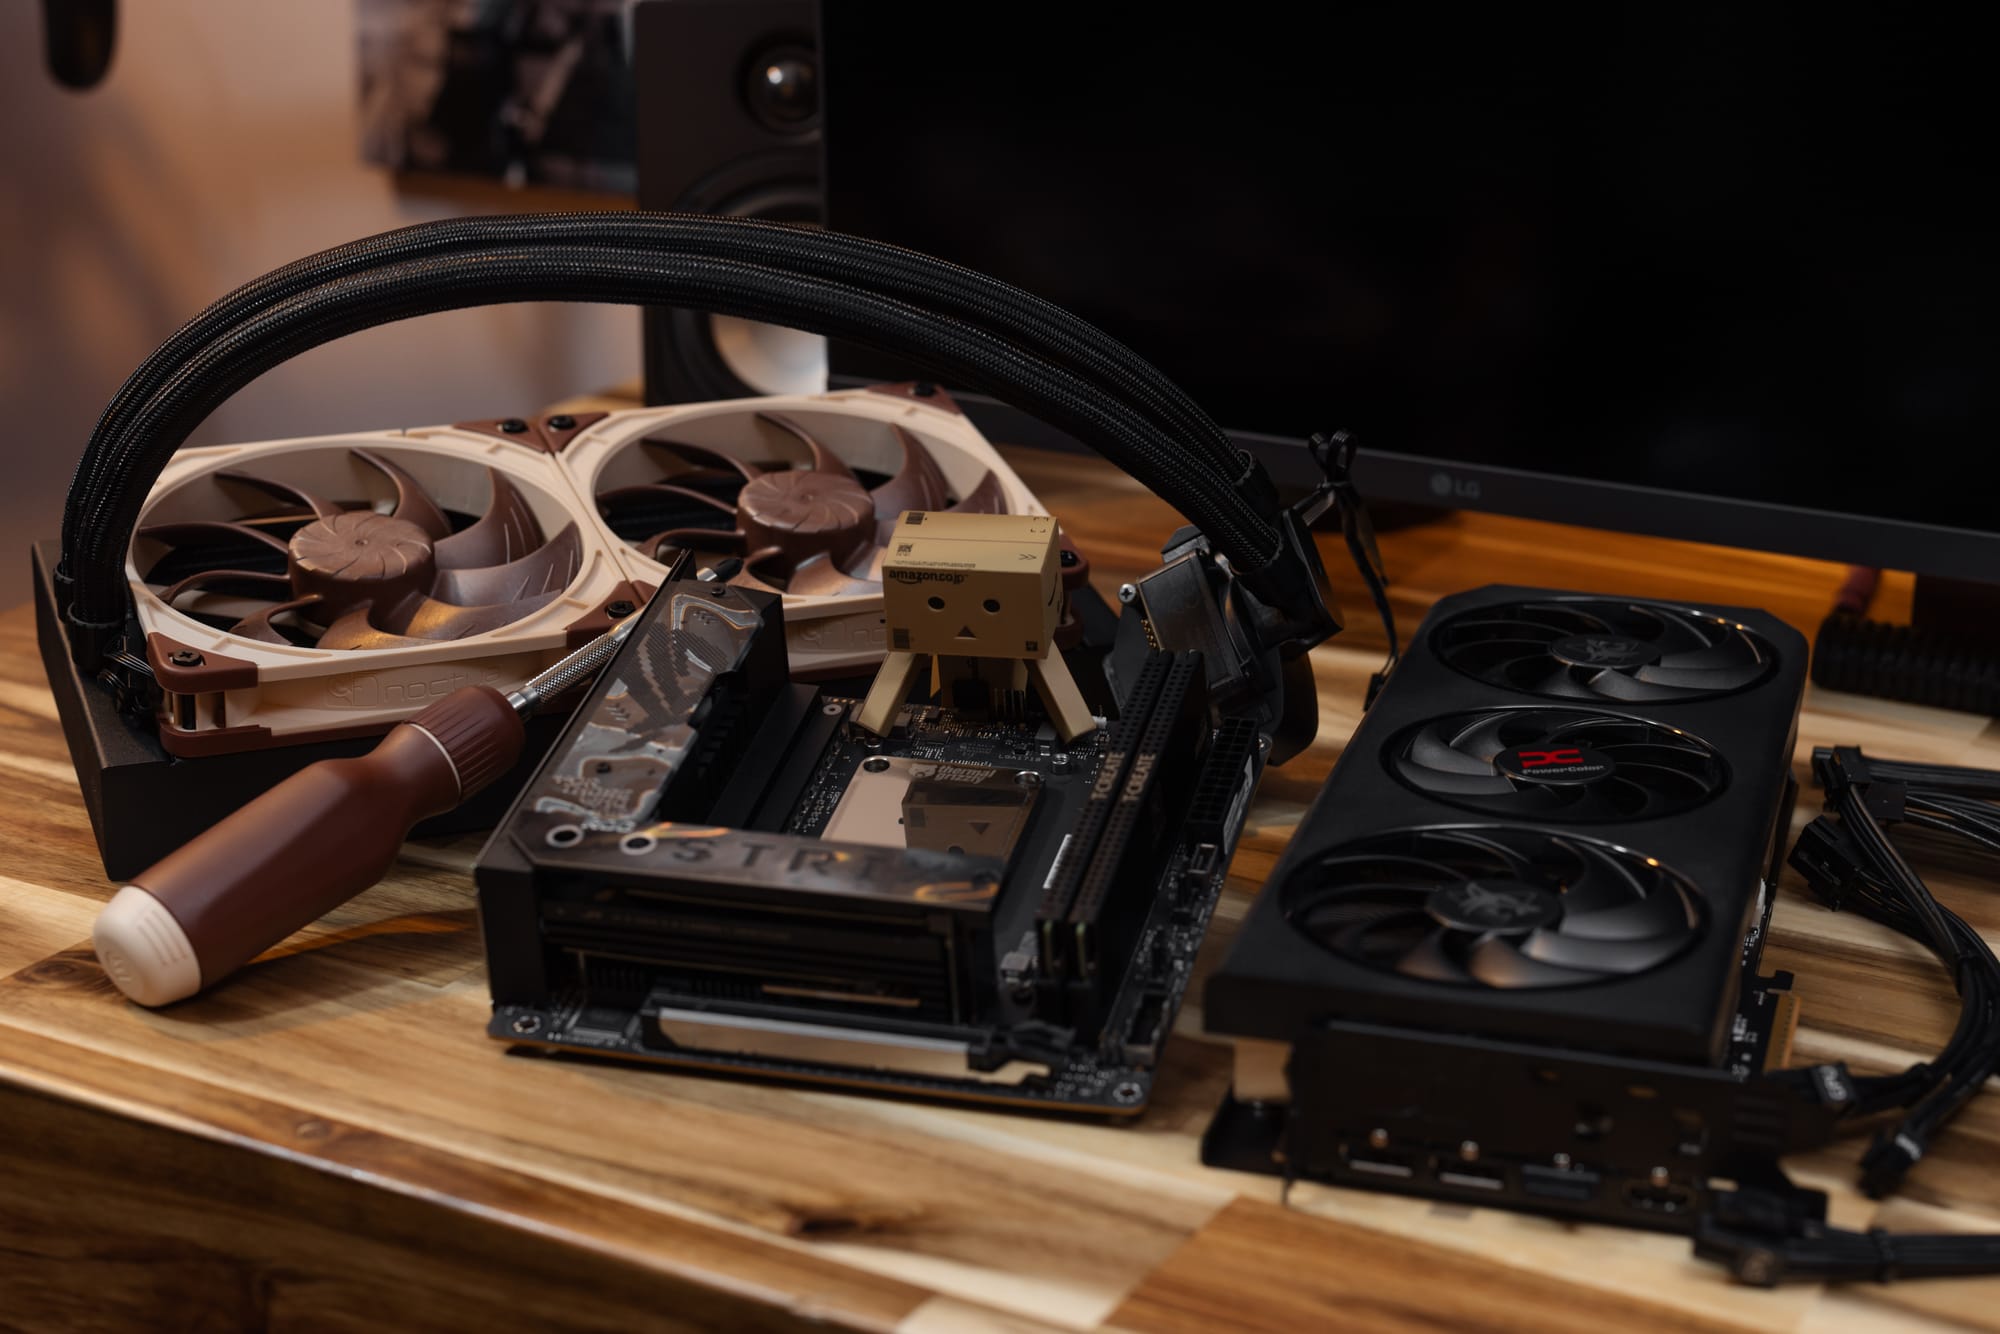
GPU - PowerColor Hellhound Radeon RX 9070 XT
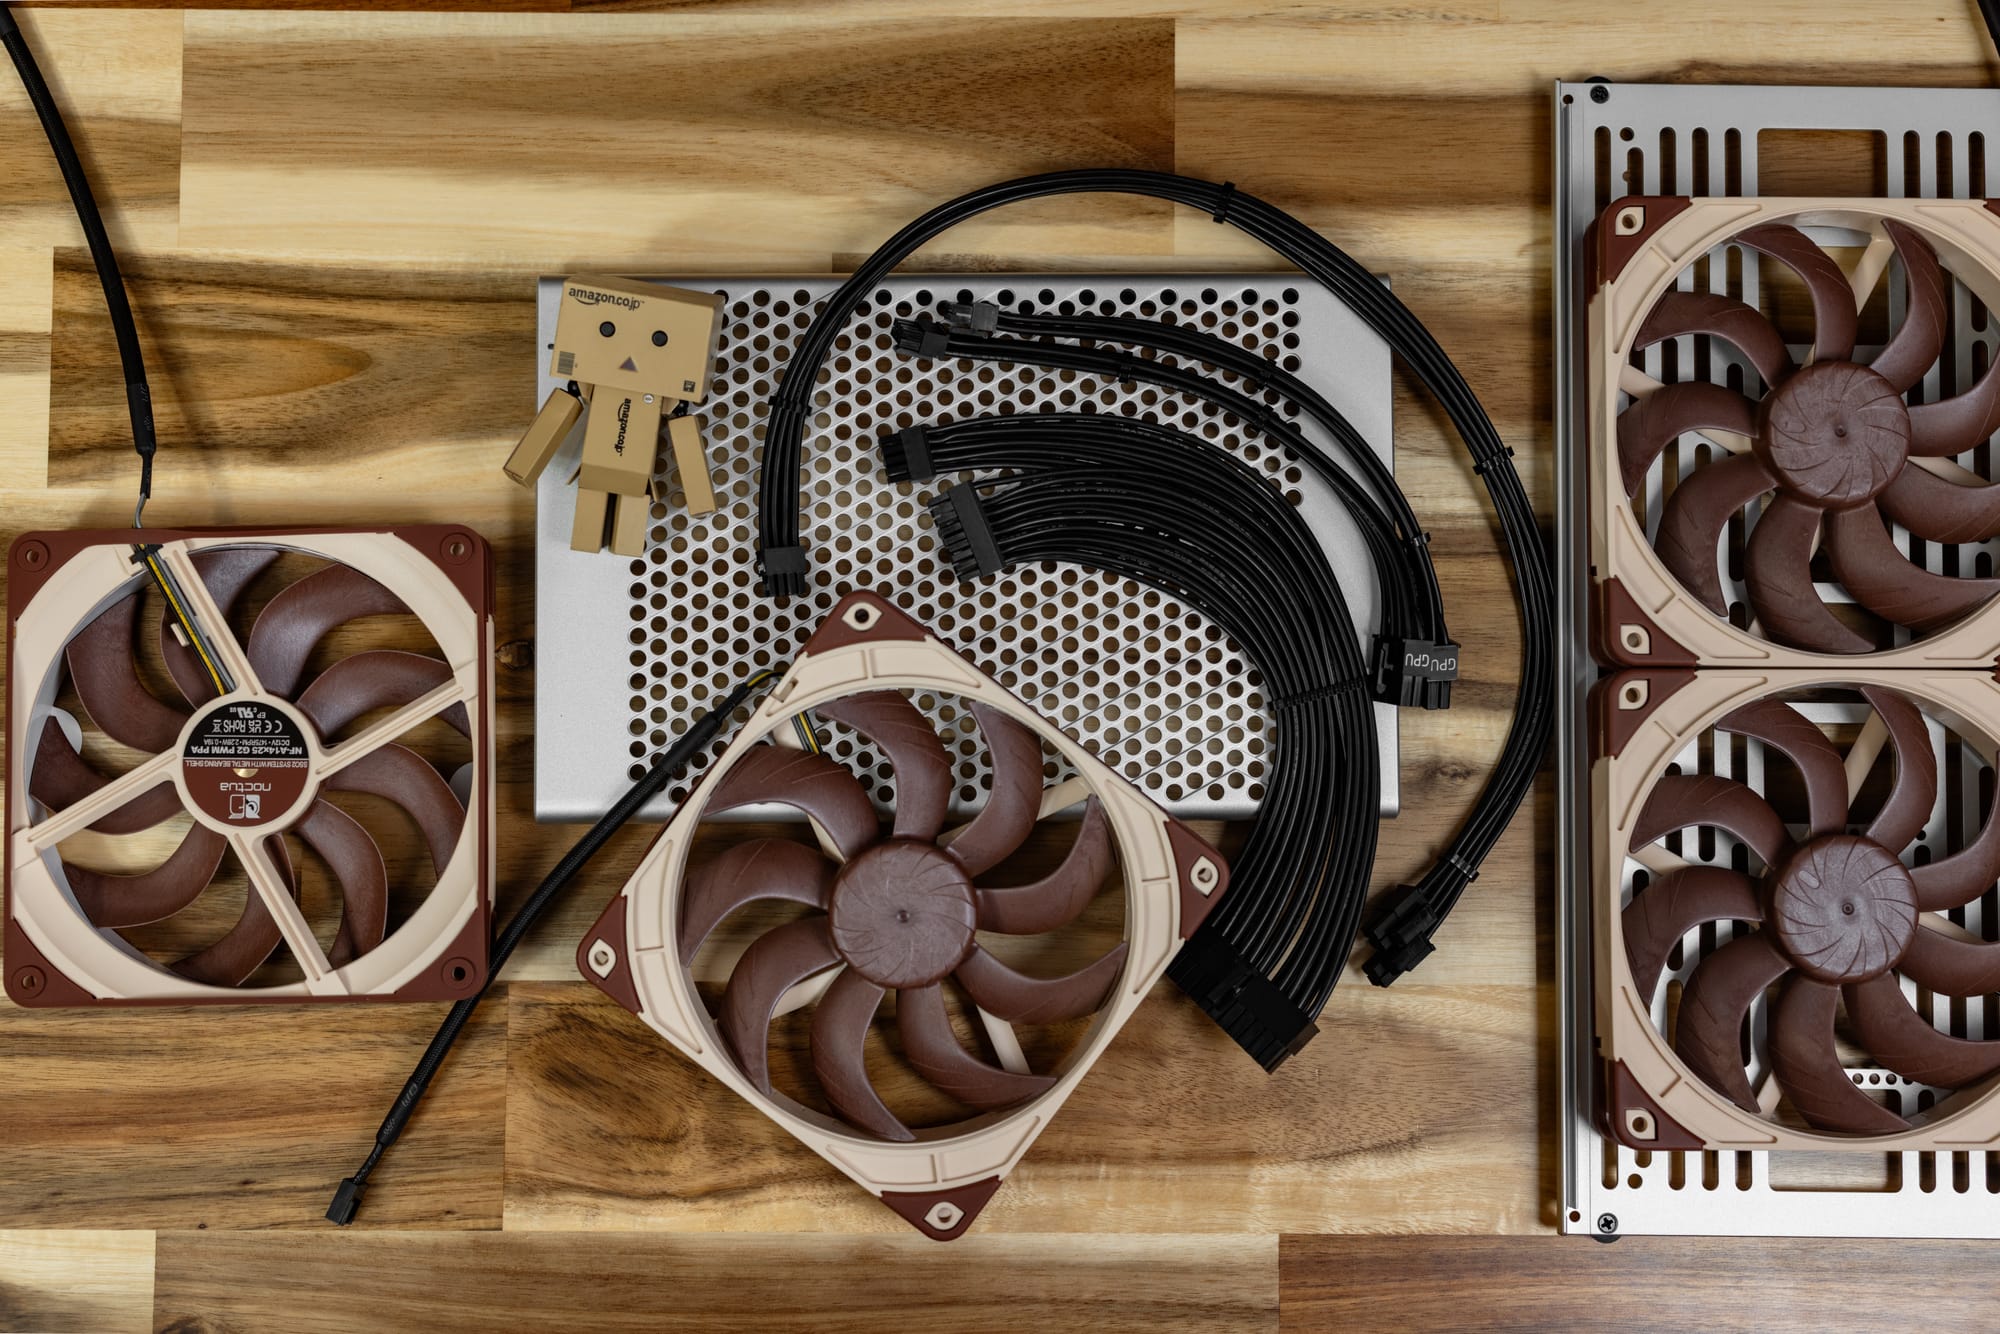
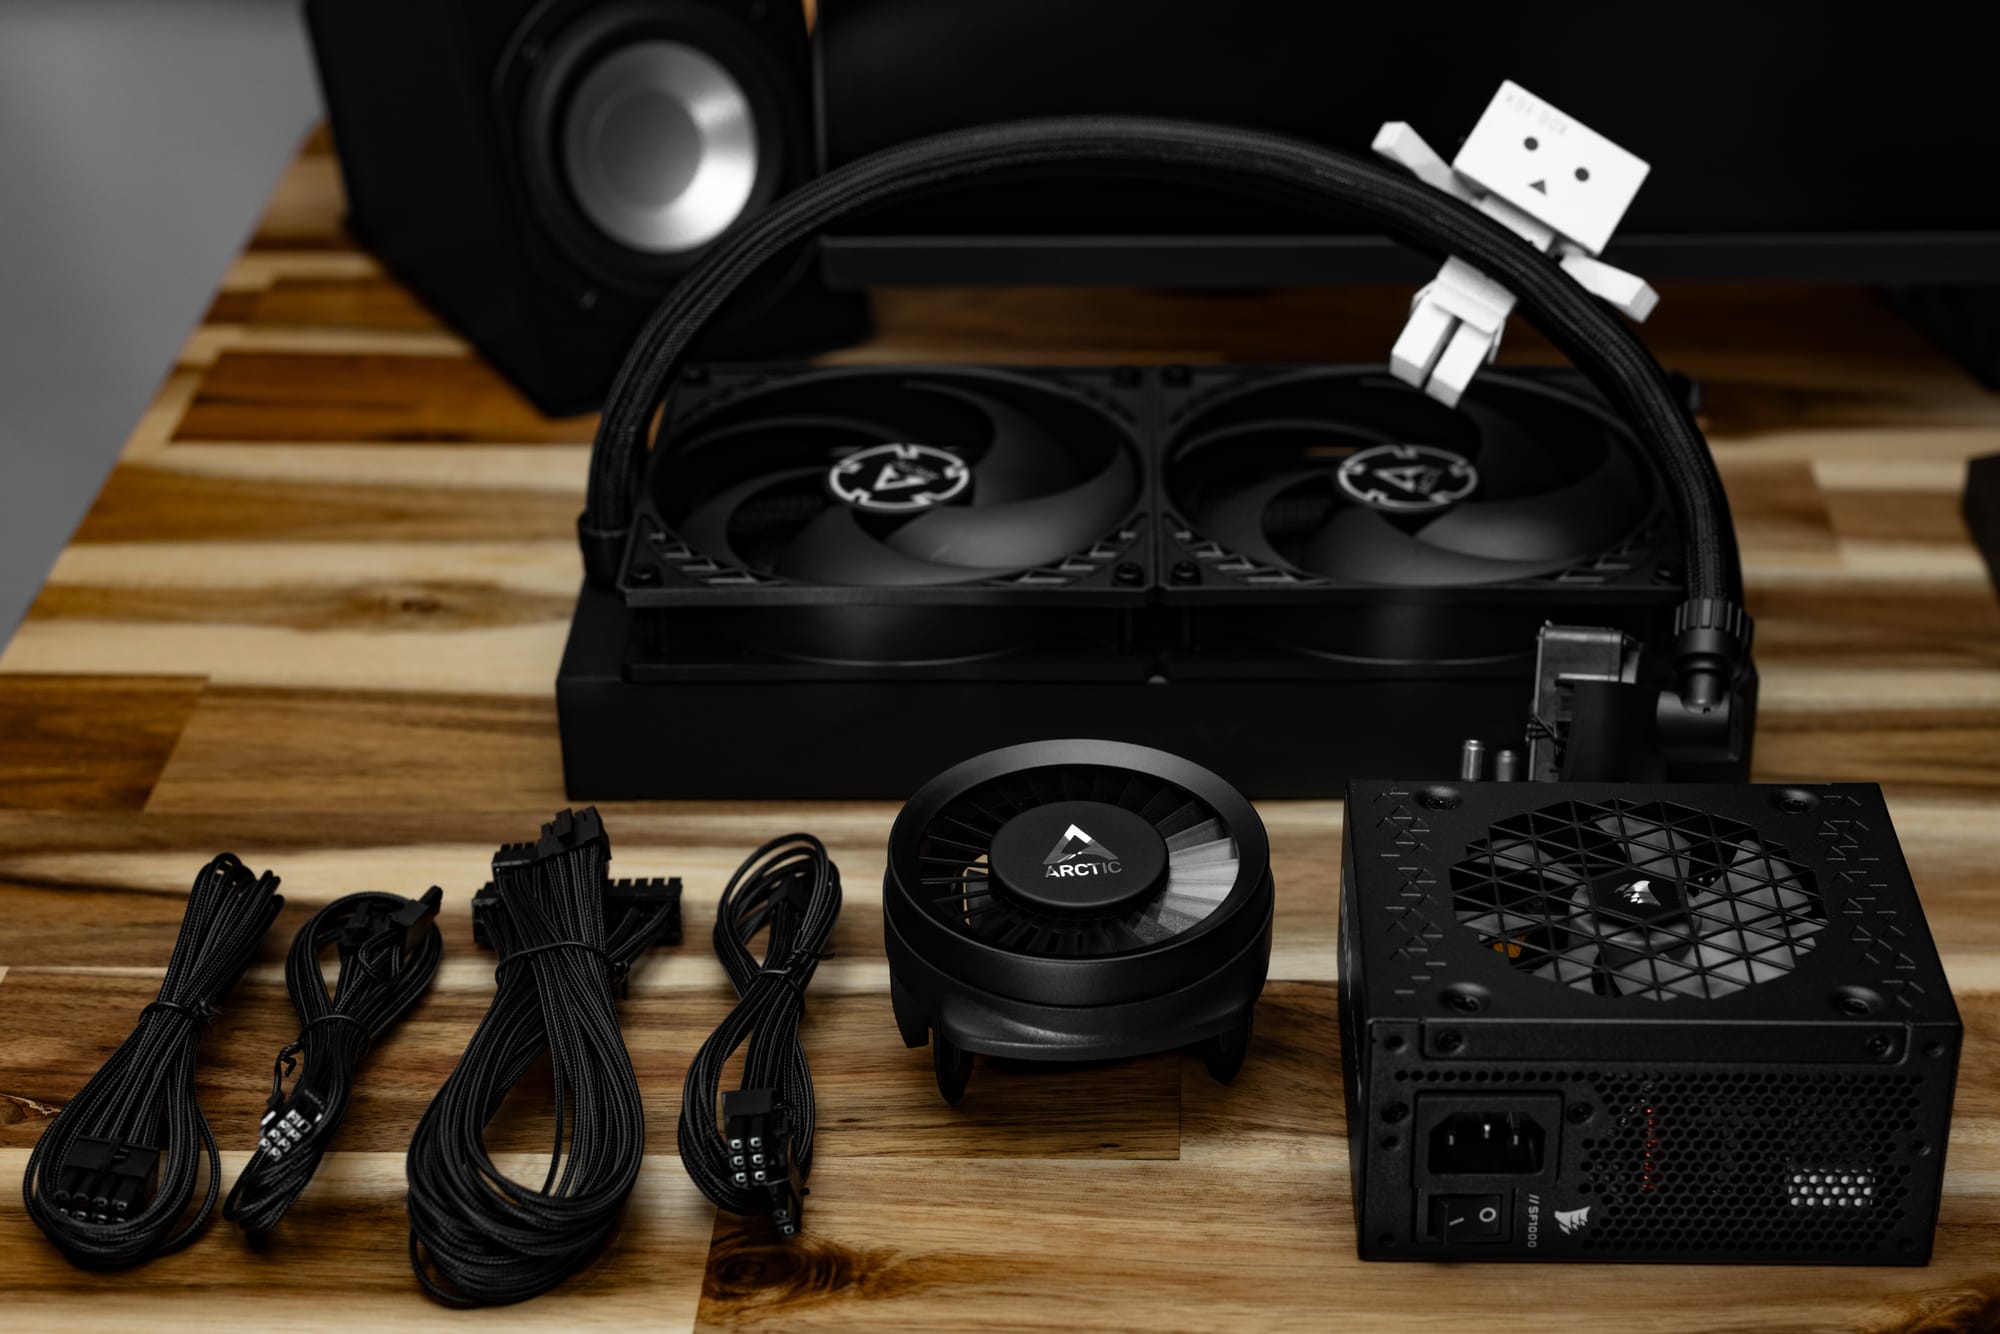
Cooler - Arctic Liquid Freezer III
PSU - Corsair SF1000 (2024)
Custom Cables - Cablester on Etsy
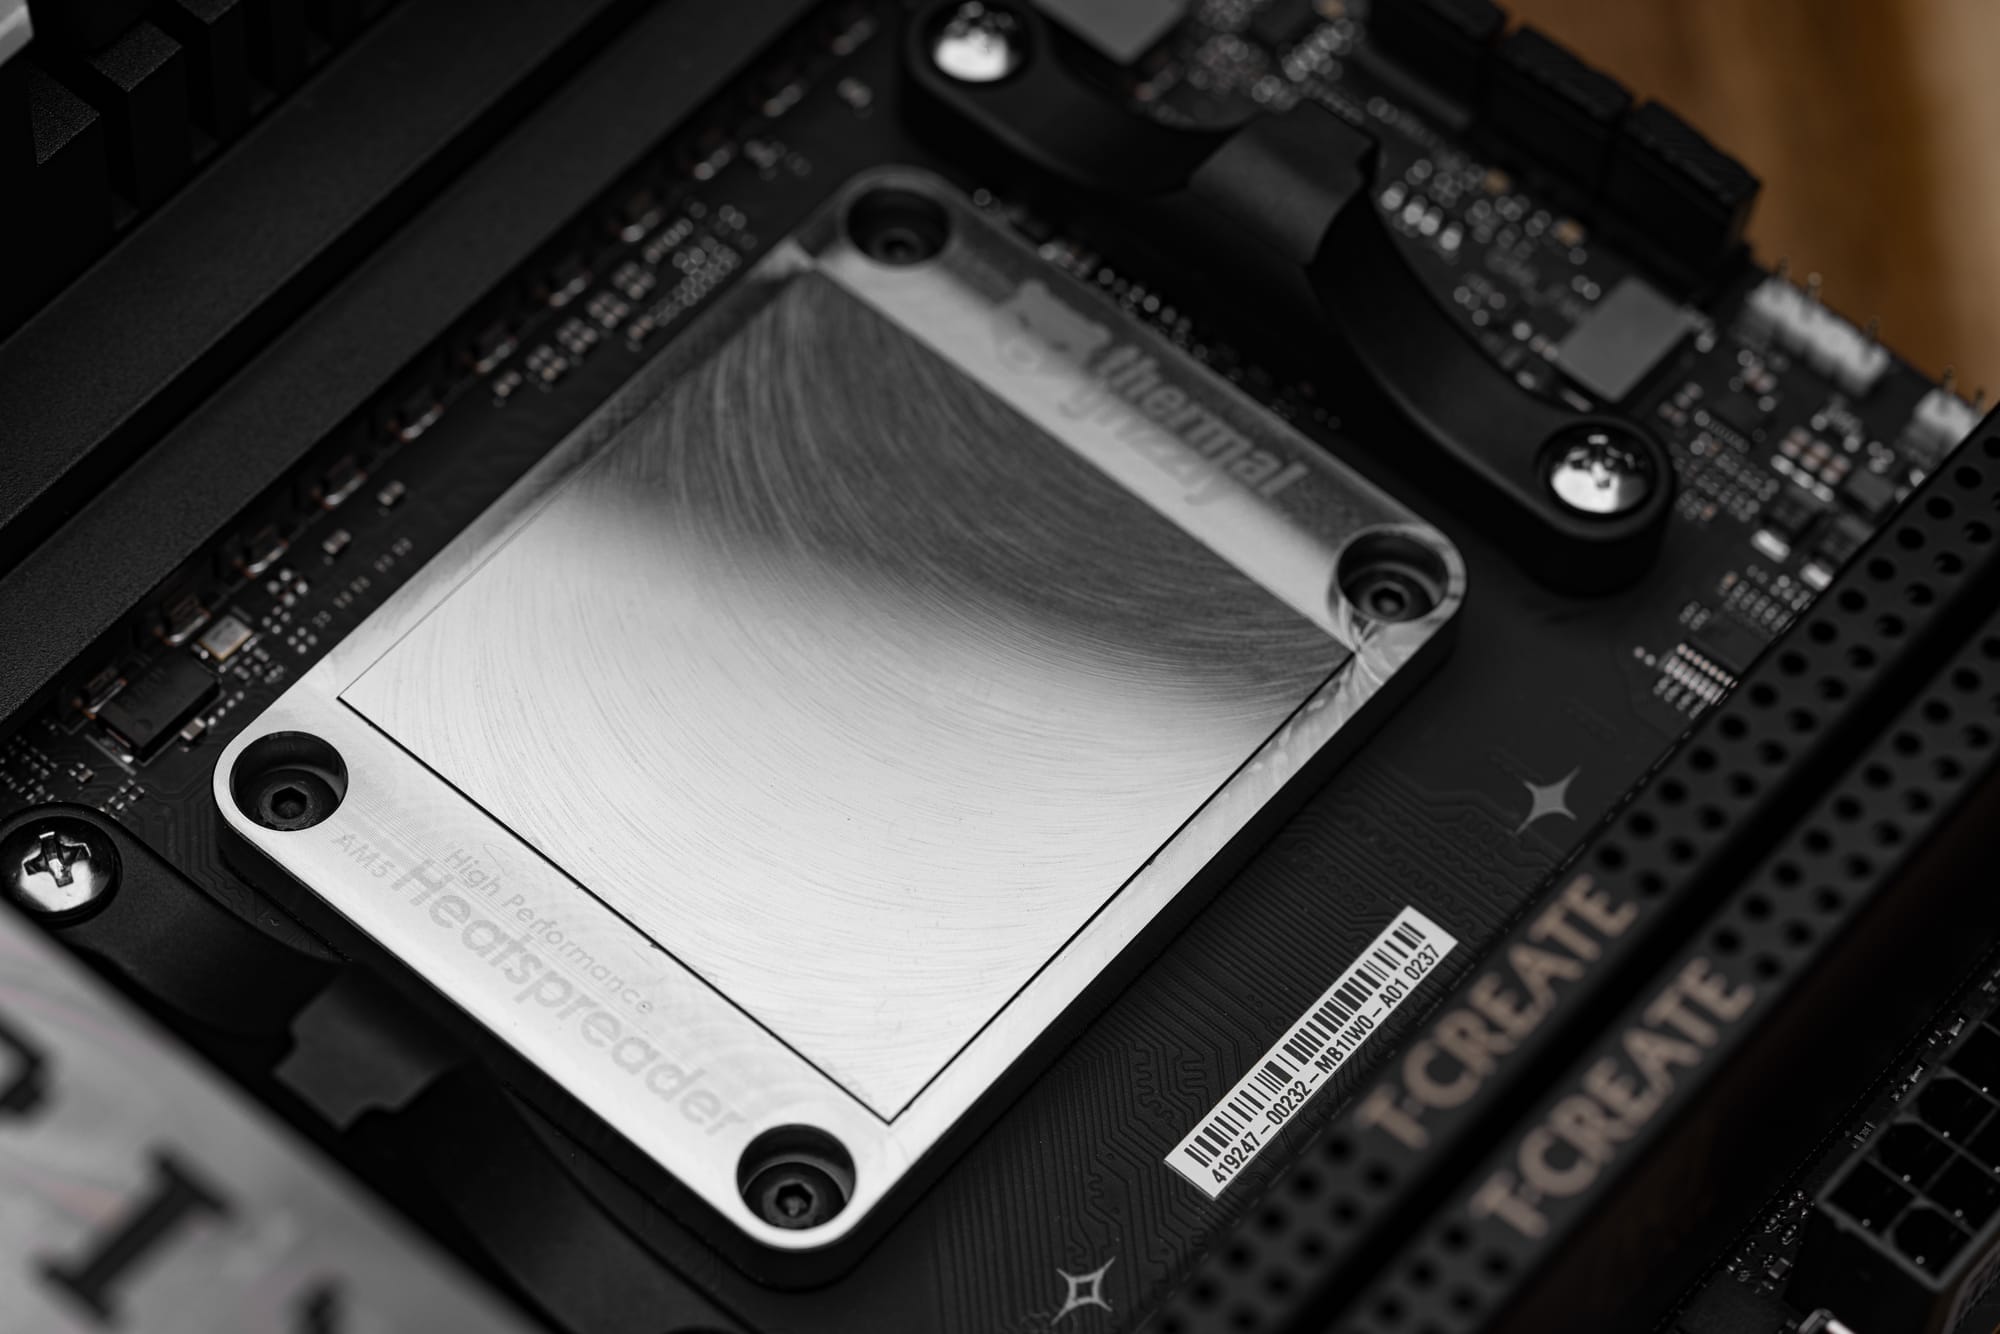
With my last build, Blackhaus, I delidded the 13900K from day 1 so that it had the best possible chance at staying cool in an SFF chassis. It wasn’t necessarily for overclocking. This worked out well because I was never impacted by degradation issues with all that extra headroom. I went this route again with the 9800X3D, knowing that 3D vCache likes lower temps. The 9800X3D is more thermally forgiving than its predecessors, so there’s even room for a bit of fun here. I picked up the Thermal Grizzly delidded version as I happened to catch de8auer’s video when it went live. The 2-year warranty is great, and I wouldn’t tempt fate by doing this myself. Together with Thermal Grizzly Conductonaut Extreme, the AM5 High Performance Heatspreader, and PhaseSheet PTM, this CPU runs amazingly cool no matter the workload.


Blackhaus went from an Intel A770 to an RTX 4070 after I was done with the work projects that required me to daily drive that card. It was a welcome change because the A770 never agreed with my Level1Techs KVM and later 144Hz monitor, often causing flickering and loss of video on one screen when waking from sleep. The 4070 would have continued to serve me well, but I really did not want to deal with Nvidia woes on Wayland with Togami. Luckily for me, there are 3 Micro Center locations in a decent radius, so I was able to score a PowerColor Hellhound RX 9070 XT on launch day. If not for this, I would have likely ended up with the RX 7900 XTX.
A lot of this build has its "full circle" moments with my past PCs, but I was glad to get the PowerColor Hellhound in particular because of how they brought me into water cooling. Around the launch of the 5700 XT, PowerColor found me on the LTT forum and complimented me on the photos I took of the Red Devil. Shortly after, they asked if I did any water cooling. I hadn't ever done it and was frankly hesitant to try. A few back and forths and a confidence boost later, Liquid Visions was born, and I've done MANY custom loops since then.
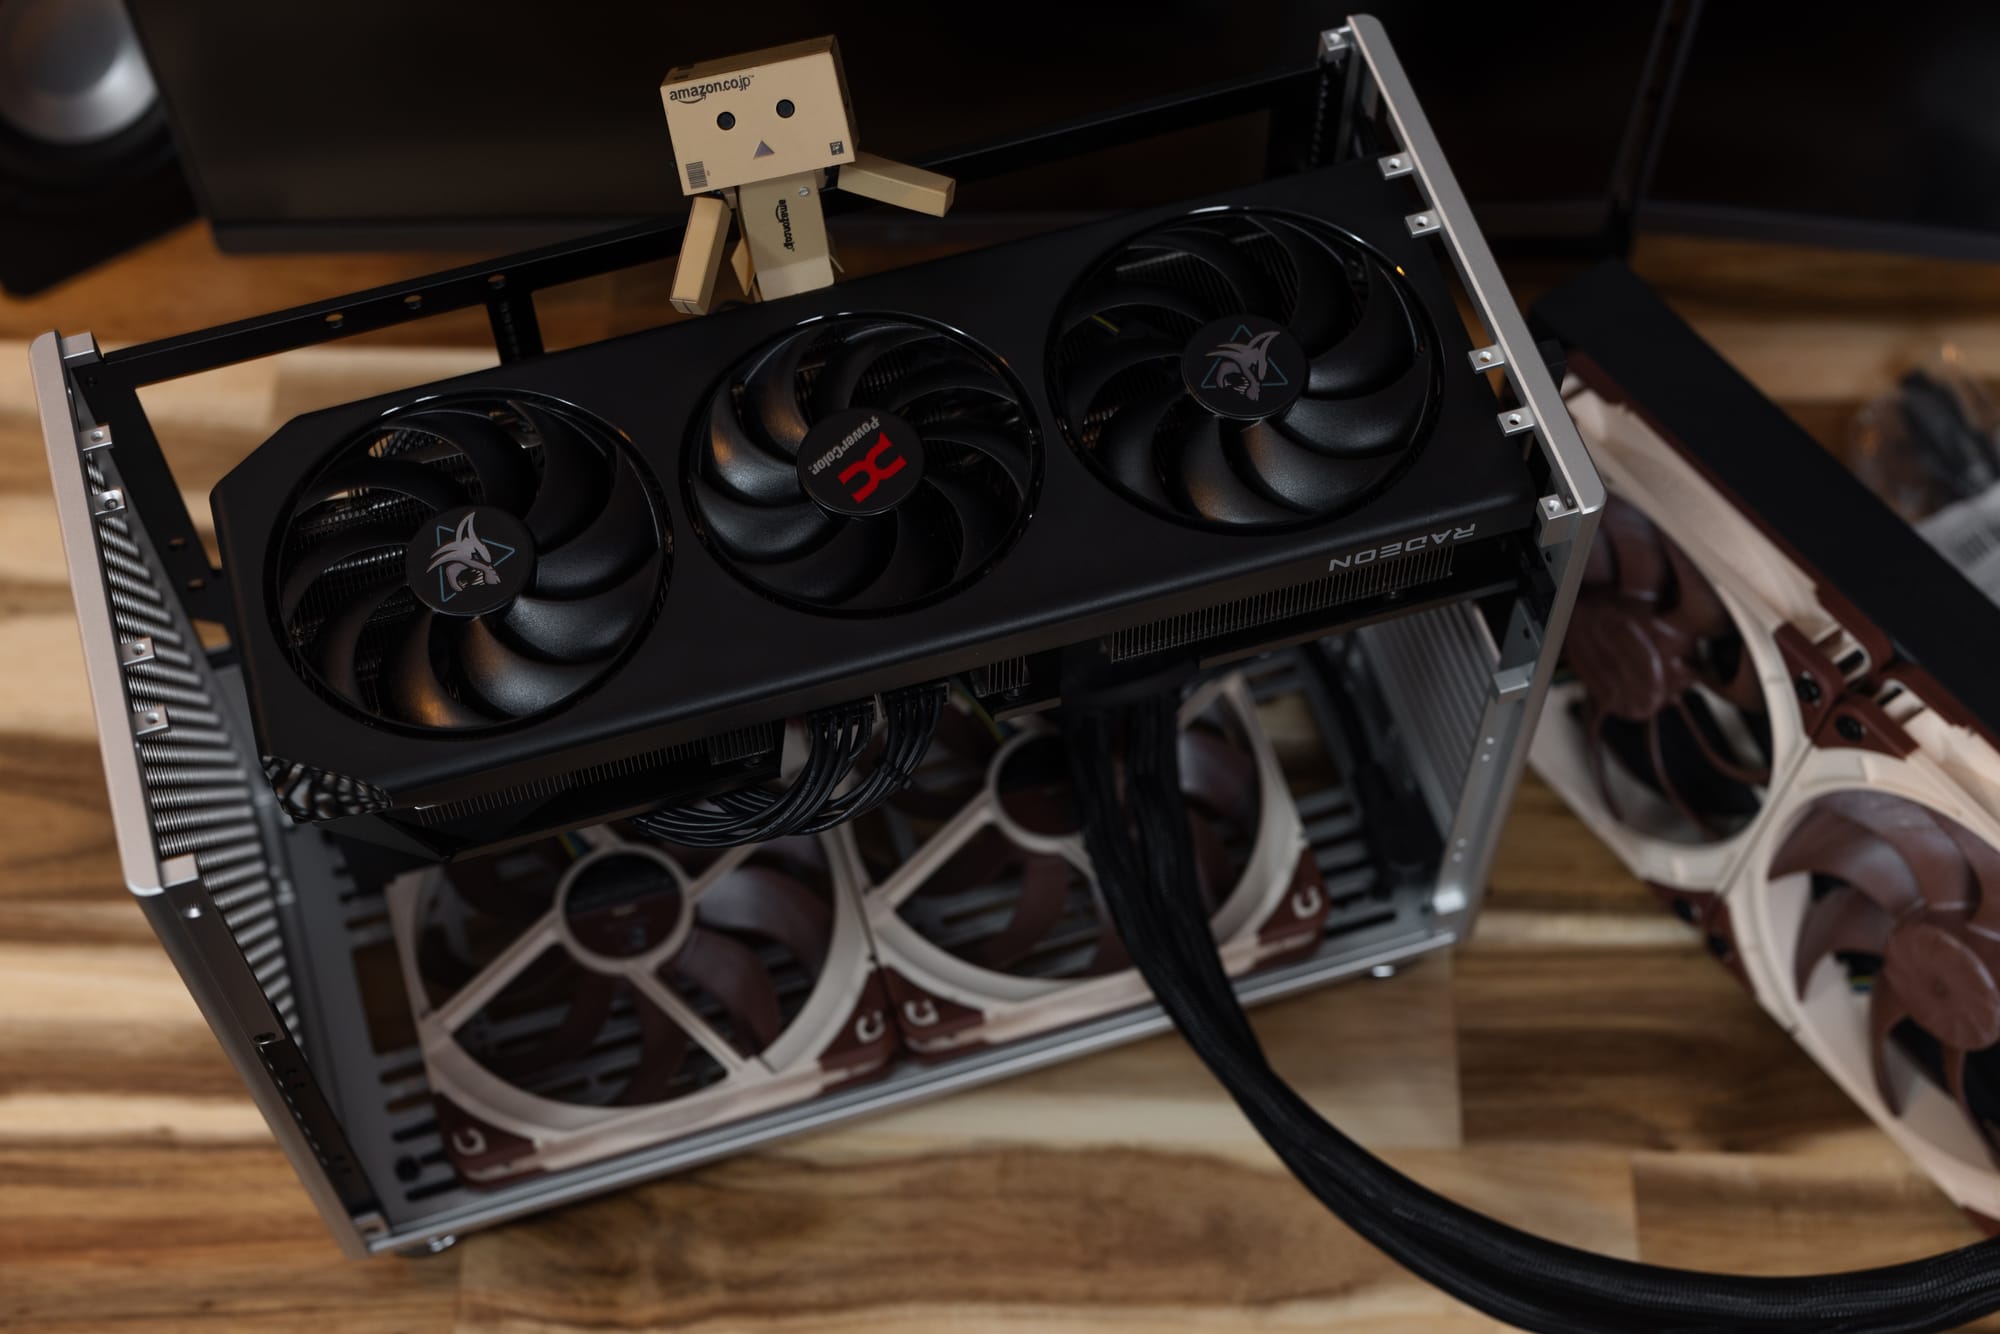
The PowerColor Hellhound RX 9070 XT is an excellent card. I prefer classically designed fan shrouds, and this card gets the look just right. Something overly gaudy wouldn't fit my idea for this build. The card ships with the OC BIOS enabled by default. It isn't noticeably audible over room noise unless the both CPU and GPU are under a fully synthetic workload. Gaming and day to day use are quiet. The magic of this GPU is in undervolting. It was good stock, but the second I undervolted, I saw quite a boost to both clocks and frame rate.
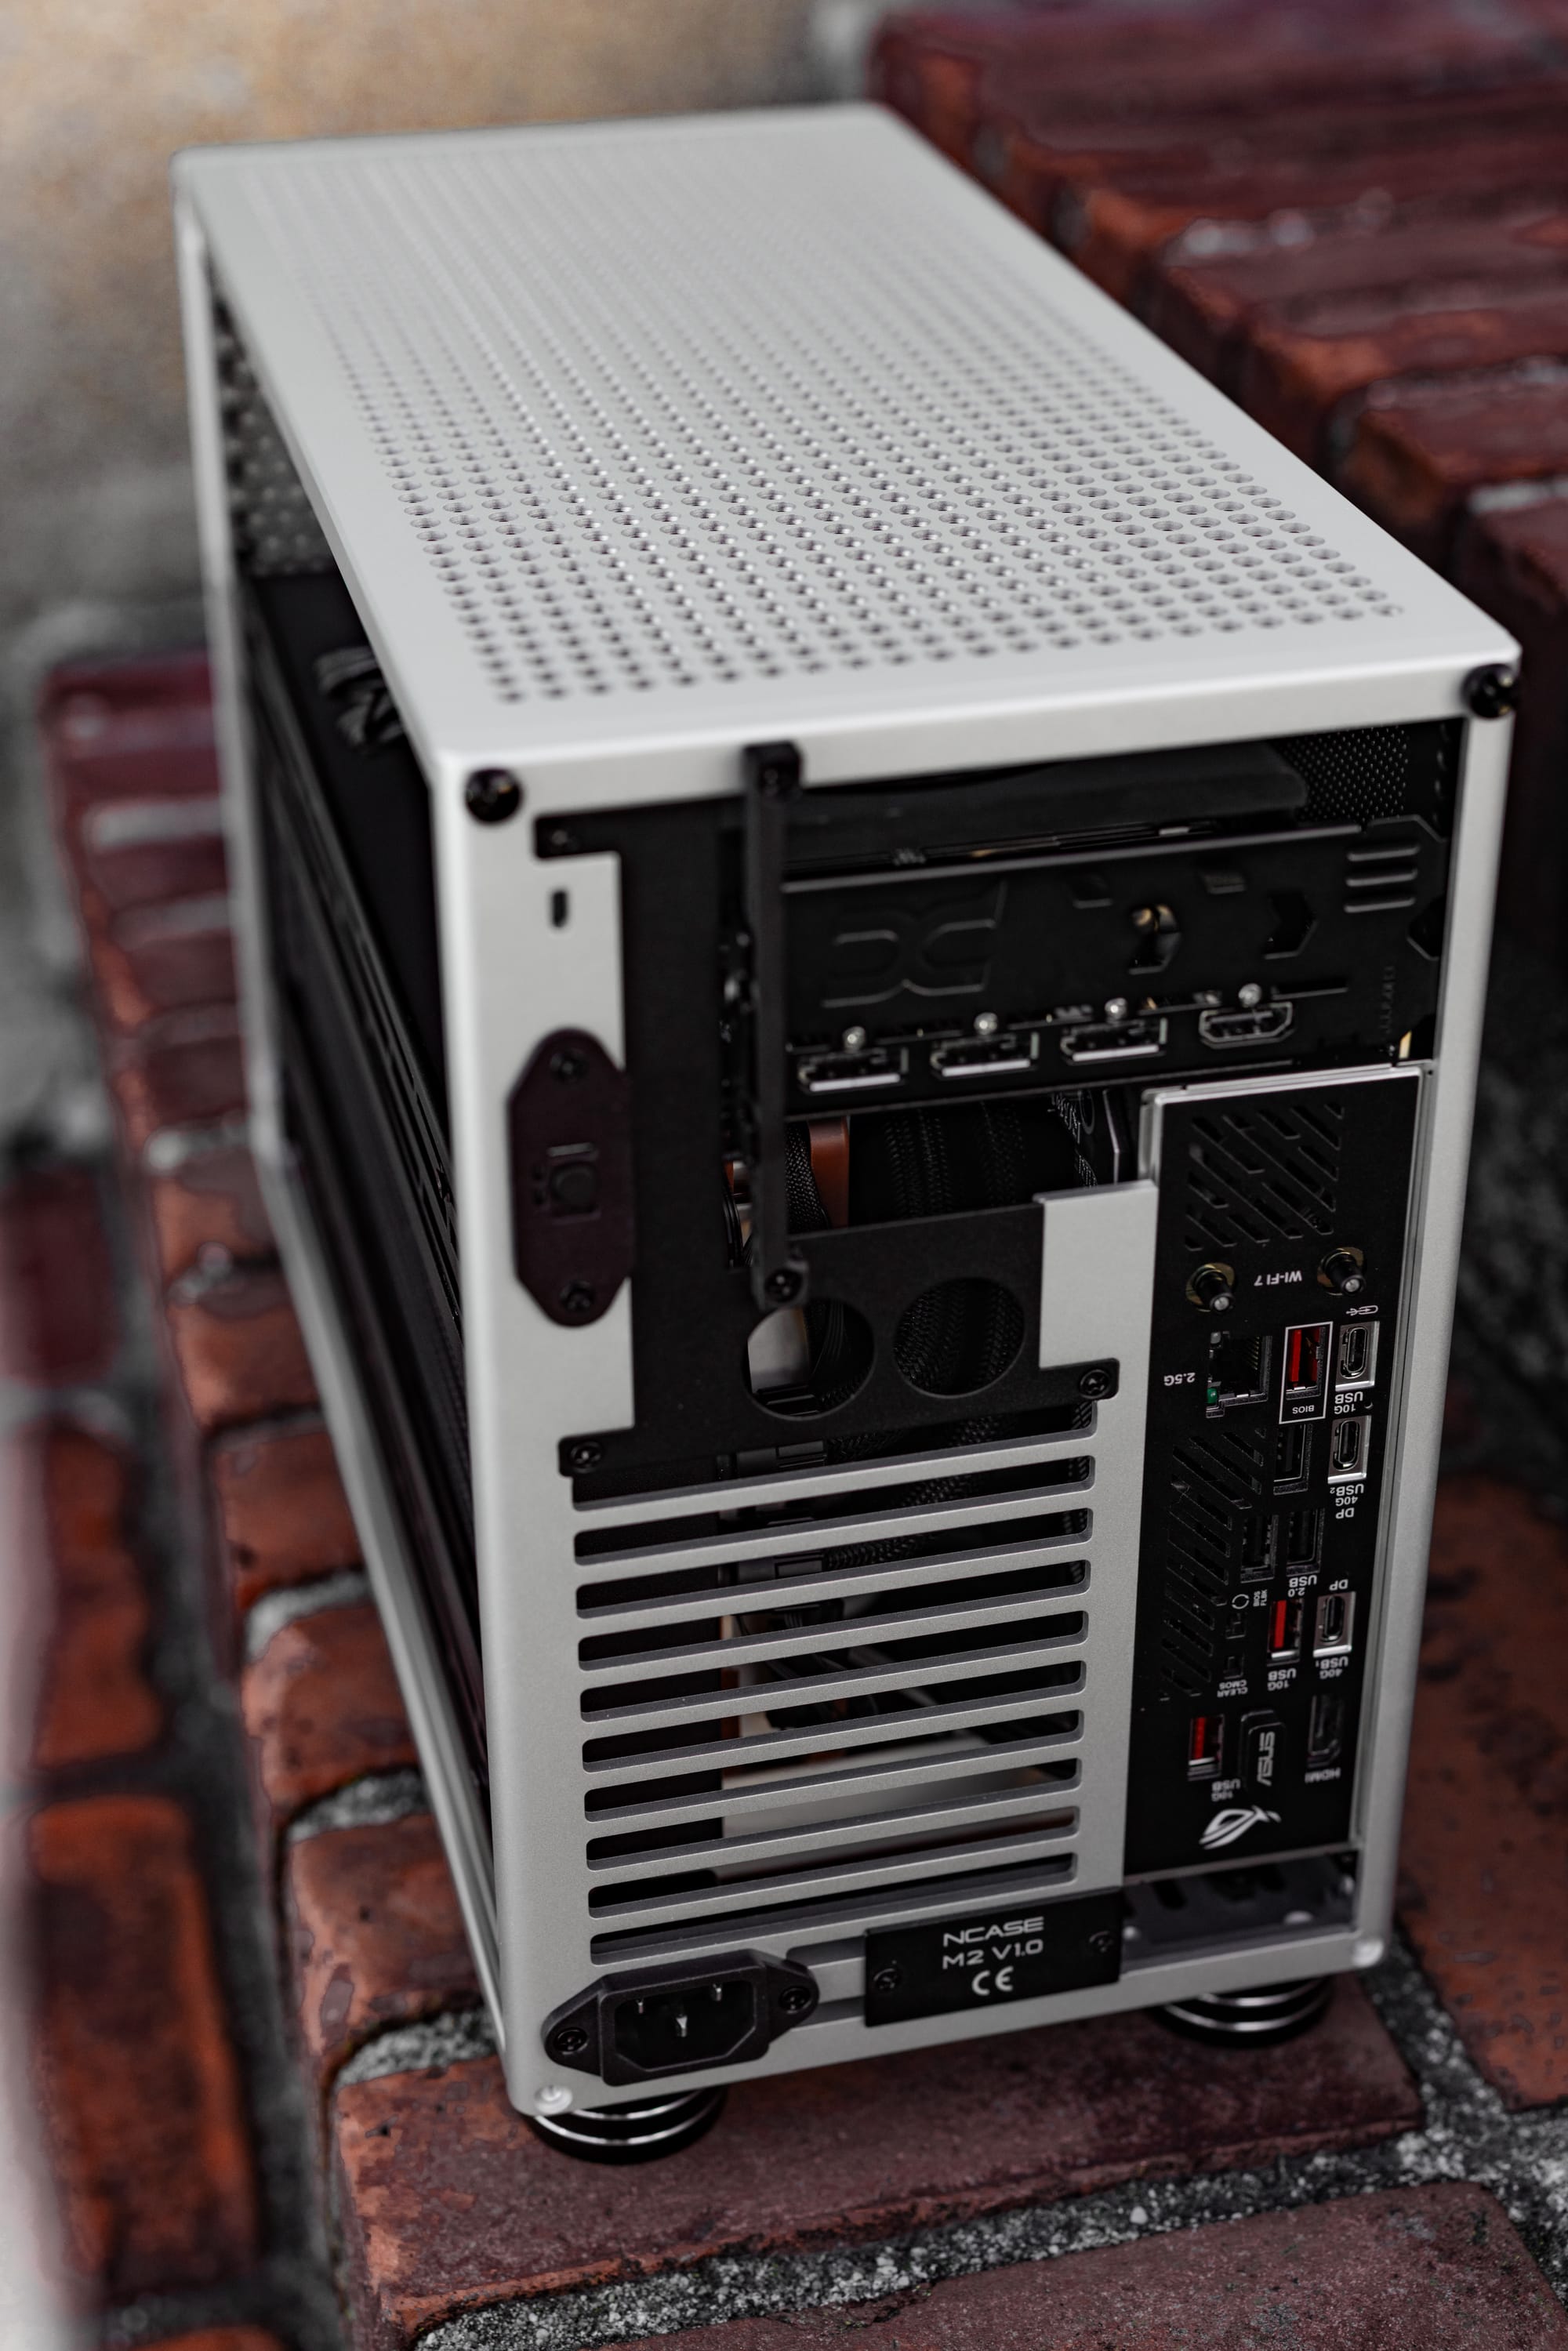
Case choice for this build was a bit of a nostalgia trip. My first true SSF build was inside the NCASE M1 V5 in 2018, JustNCASE. It featured an 8700K, which was the first delidded CPU I owned. The evolution from M1 to M2 truly encompasses all NCASE has learned from itself and the community over the years. The concept of building around the motherboard plate made it a breeze, and the build quality and finishing are top-notch. The only strike against this case comes from the case feet. You have the small nubs that come with it and some nicer, more elevated ones that need some awkward mounting. Instead, I purchased some sound isolation pads intended for Hi-Fi equipment. Shout out to u/ComputAni for that idea. After comparing the silver and black/silver options, I went with the latter for contrast. These are mounted with nylon nuts and bolts to reduce any chance of scratching the aluminum. I may 3D print new ones, or commission some made from wood, but these isolation pads are doing the job for now.

For the motherboard, I really wanted to push boundaries and shove an mATX board in here, but mATX didn’t get any love from motherboard manufacturers. Instead, I chose the ASUS ROG STRIX X870-I Gaming Wi-Fi. It has the most Type-C ports, two of them being USB4. This means I can run an IOCrest USB4 10 gig ethernet adapter and still have a free port for other things like a thunderbolt CFExpress reader. I changed out the incompatible and craptastic Mediatek Wi-Fi card for the Qualcomm NCM865, harvested from the MSI Herald-BE Max. ASUS made this a lot harder than it needed to be.

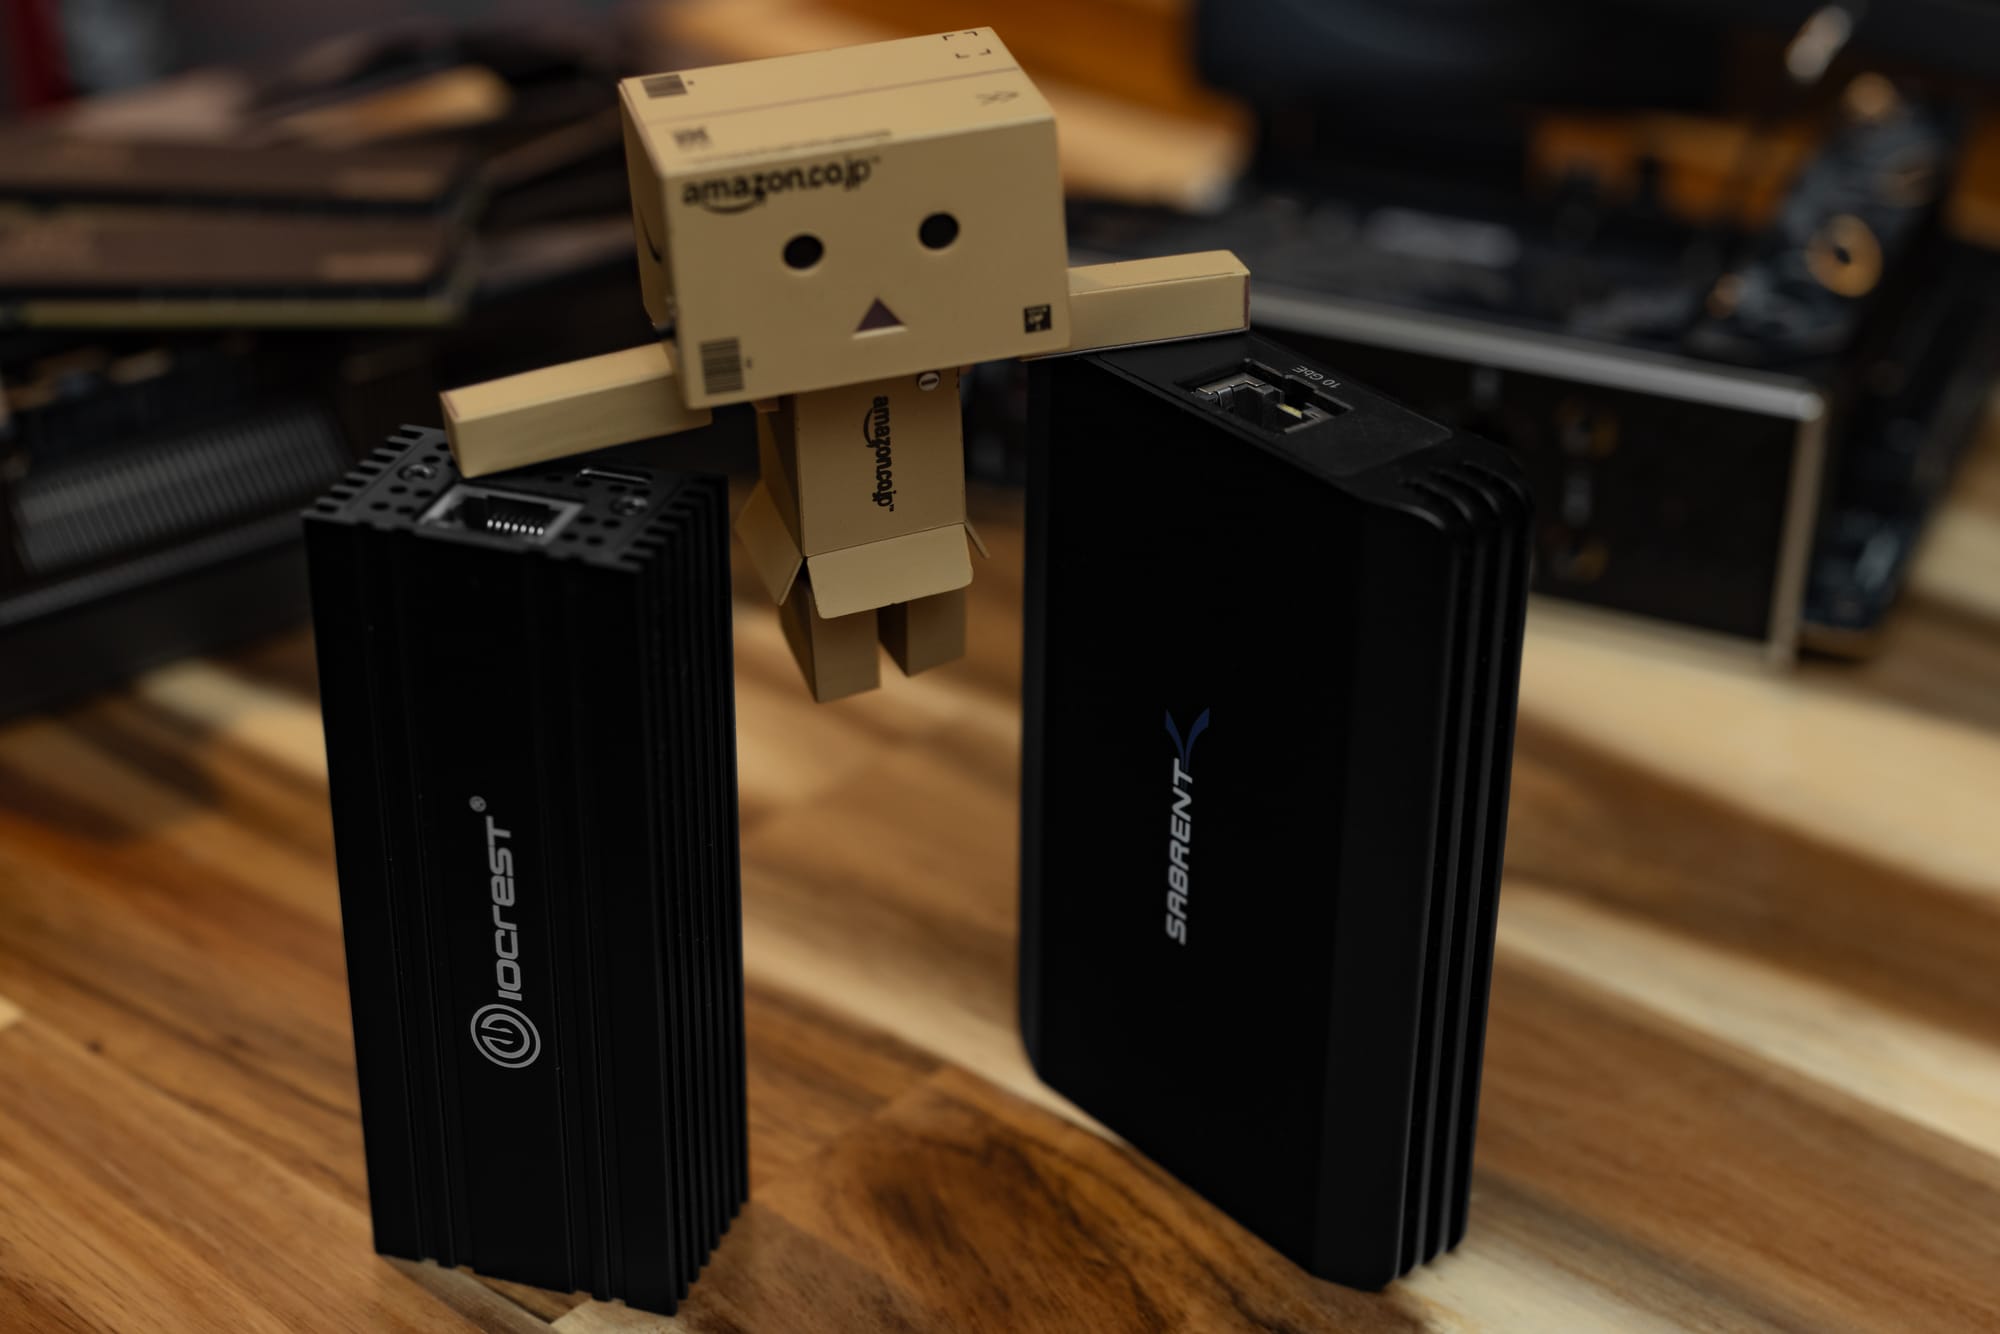
This is my first time straying away from G.Skill Trident-Z in a personal build since 2018. I will not miss the unnecessarily sharp razor blade heatsinks. I went with the TEAMGROUP T-Create Expert 96GB DDR5-6400 CL32 kit. I’m a ways away from needing 256GB like I had in Sanjuni, but did find myself running up against the 64GB I had in Blackhaus. I have plenty of NAS storage, but it never hurts to have fast local storage. For this I went with 2x WD_BLACK SN850Ps. They are usually pricier SN850Xes with low-profile heatsinks, but Amazon had a lightning deal that made them cheaper. For the PSU, I grabbed the Corsair SF1000 (2024). I went into Micro Center for the 850, but it was sold out. I don’t mind the extra headroom, and it runs passively most of the time, while inaudible over ambient room noise under heavy load. Knowing the AIO would be a tight fit, I opted for custom-length cables to keep them out of the way. I went with Cablester on Etsy since I wouldn’t have to do any measuring. Something I couldn’t do because the case was a pre-order. The cables came out great, and I highly recommend Cablester.
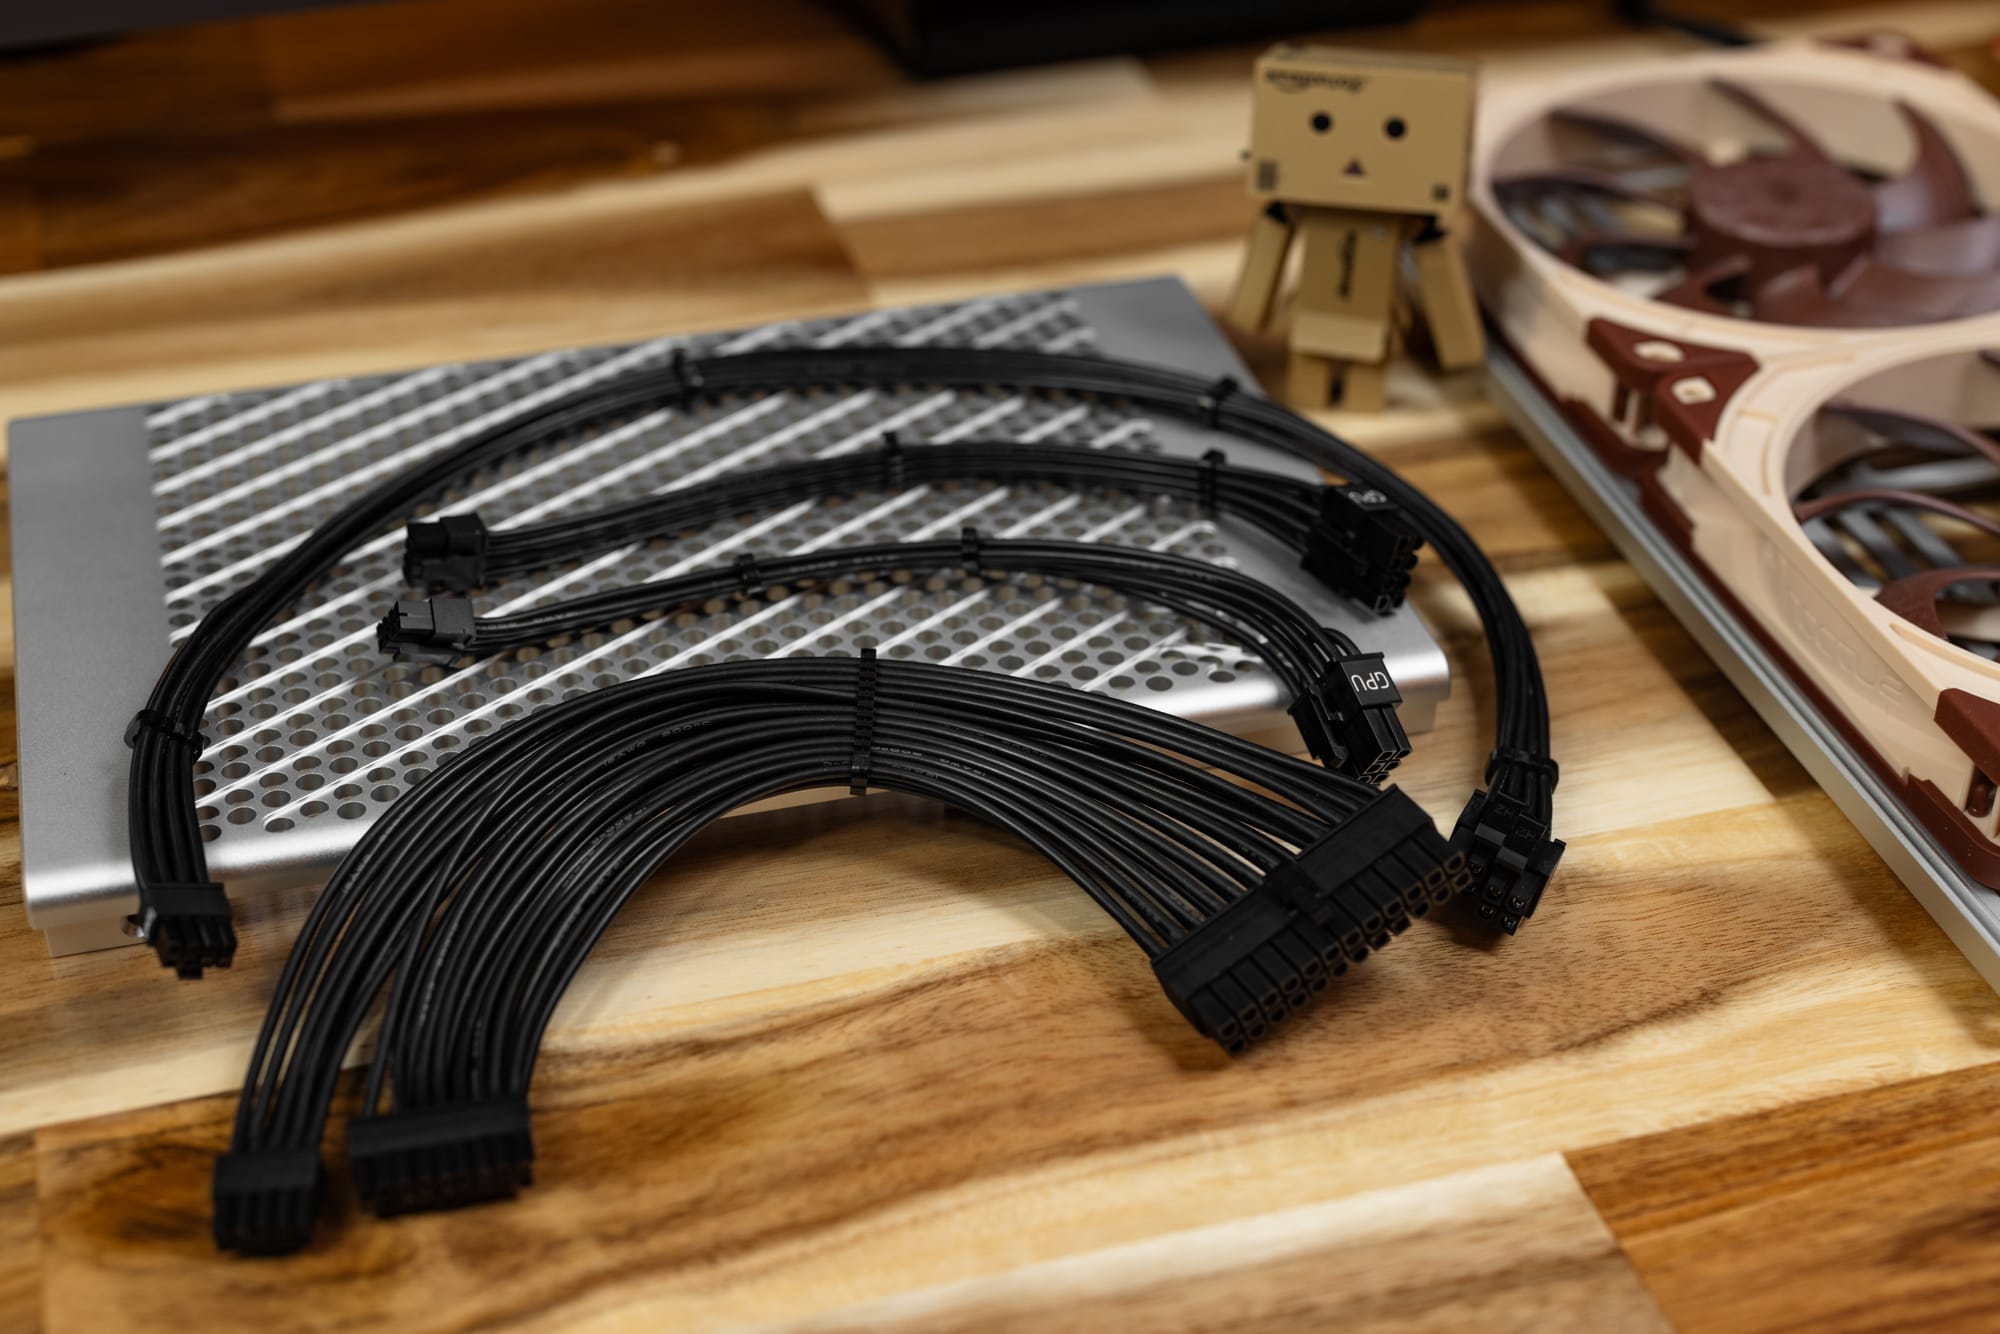
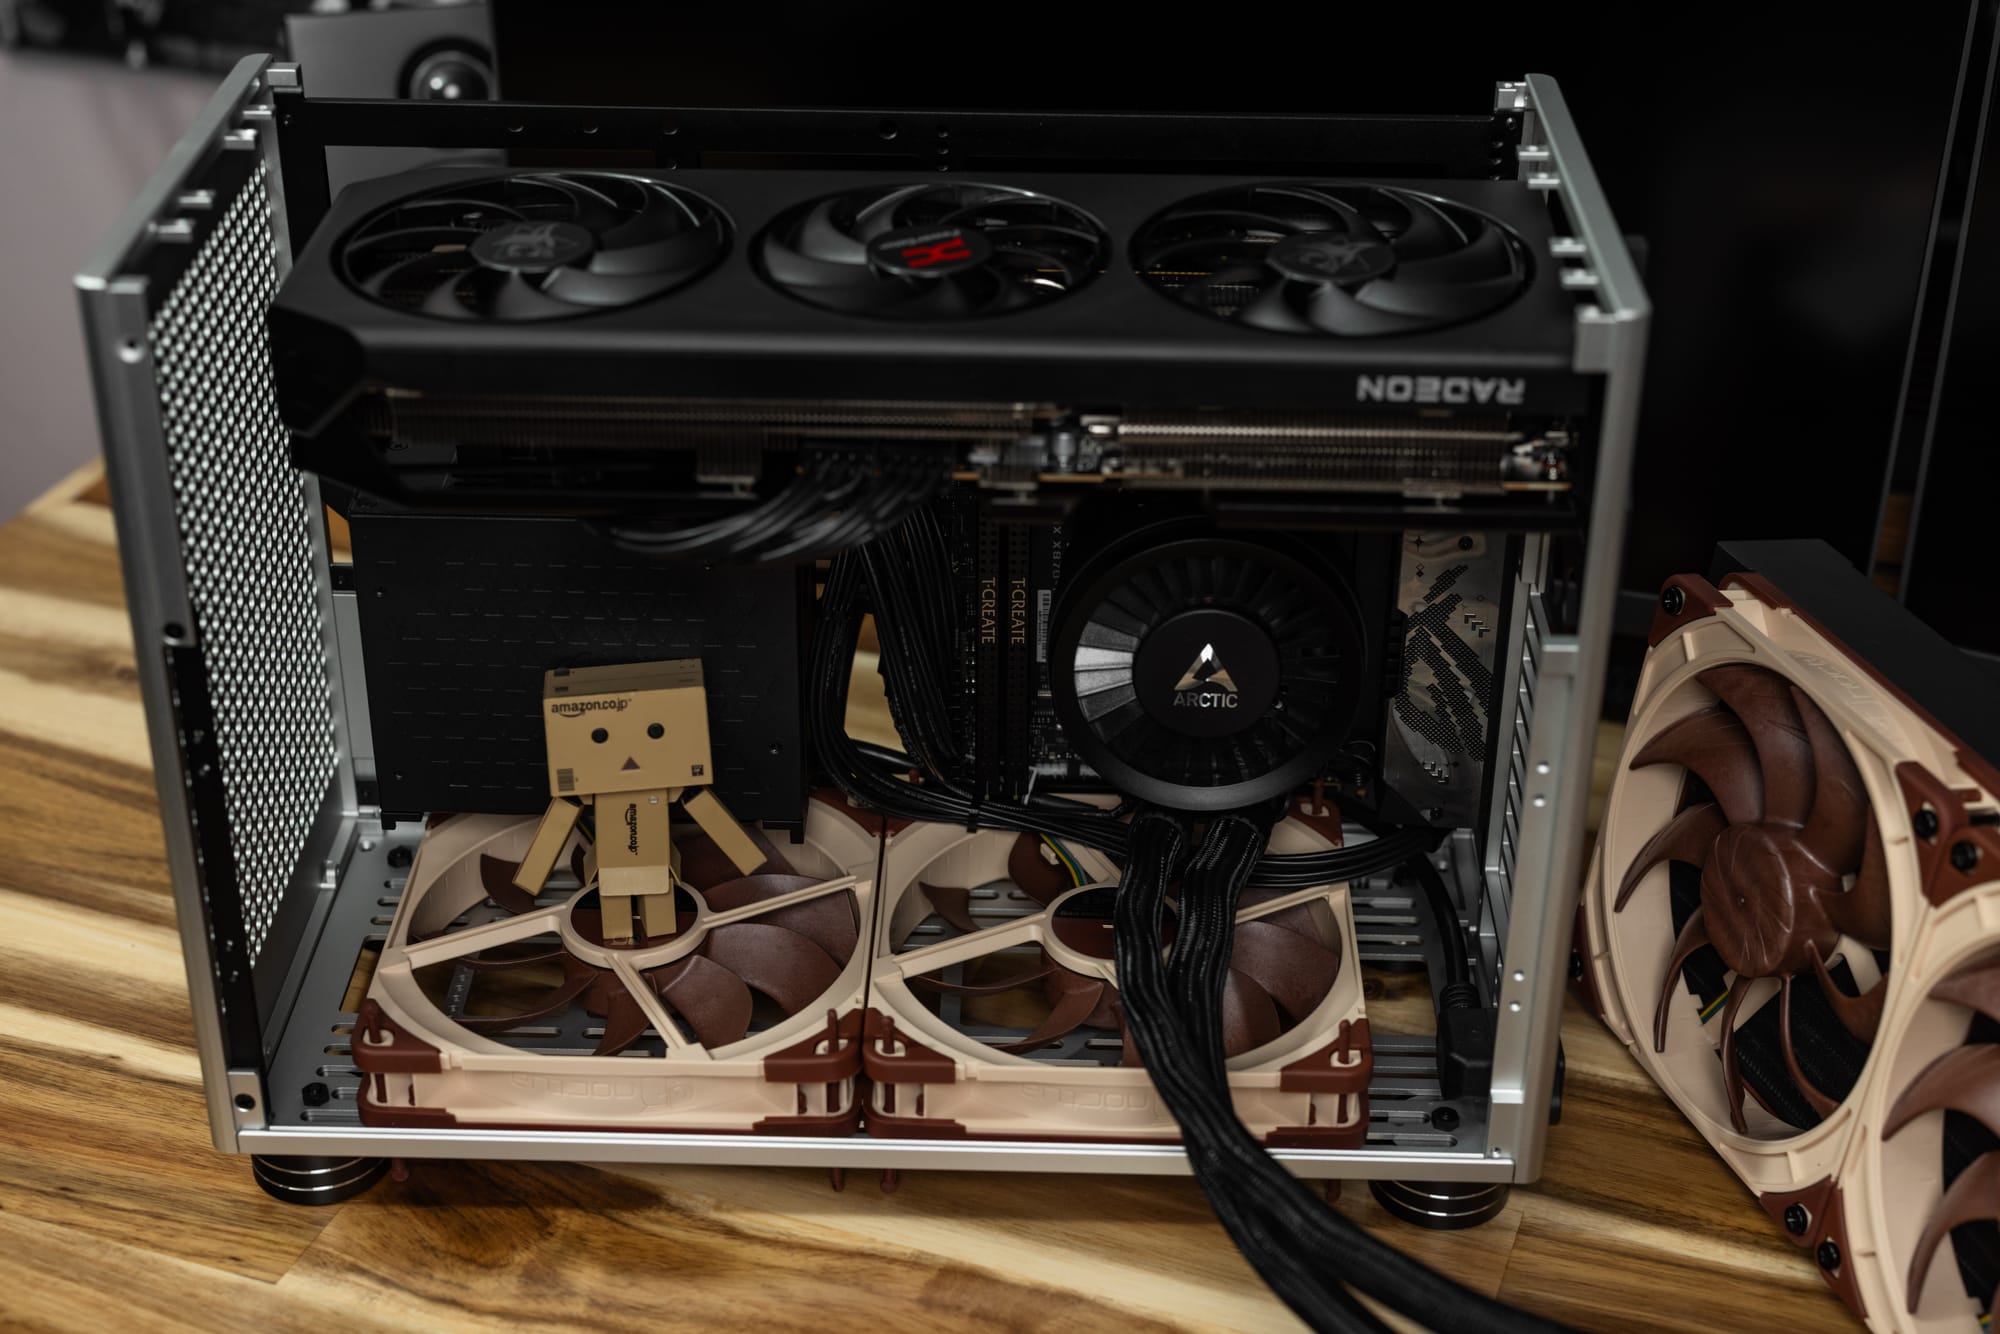
Cooling here isn’t permanent. Eventually I plan to custom loop this build if water blocks ever come out for the 9070 XT. Does it need it? Nope. Do I want it? Yes. For now, I went with the Arctic Liquid Freezer III 280mm since I already had it. It’s important to note that it is ordinarily not compatible with this motherboard. This doesn’t matter for me because the Thermal Grizzly IHS is extremely effective at spreading/dissipating heat. When testing the CPU locked at 5.1GHz all-core in both orientations, there wasn’t a difference. I measured heat, voltage, temps, and benchmark scores to make sure the consistency wasn’t due to any other factor. For fans, the Noctua NF-A14x25 G2s were selected with longevity in mind. There are plenty of cheaper fans, but I’m still scarred from how loud and obnoxious other fans motors were in as little as a year in past builds. I don’t mind the expense here for long-term silence.
The Build Process
I watched a few videos on the NCASE M2 before I ordered it. This informed the decision to go flat-packed, since I would have to mostly disassemble the case anyway. The modularity of this case is remarkable. Everything starts with the motherboard tray. Going for the “Level 7” inverted build, I started figuring out exactly where to mount the motherboard to allow for bottom intake. After that came side-mounting the power supply, running PSU cables, and then the GPU. Once those are mounted to the plate, you build the rest of the case around it a panel at a time. The only deviation was installing custom case feet with nylon M4 screws and bolts. Since the case only has a rear-mounted power button for I/O, I did not use the I/O card for the ASUS motherboard. The Level1Techs KVM ends up being front I/O since the computer is to my right on its own desk. I use (and always have used) a smart plug in the event I need to power the system on or off.
As I normally do with PTM7950, I refrigerated the TG PhaseSheet before attempting to use it. I did end up tearing it due to a stubborn protective cling. This isn’t an issue, given it’ll go back together once it liquifies, but I still felt a tinge of defeat.
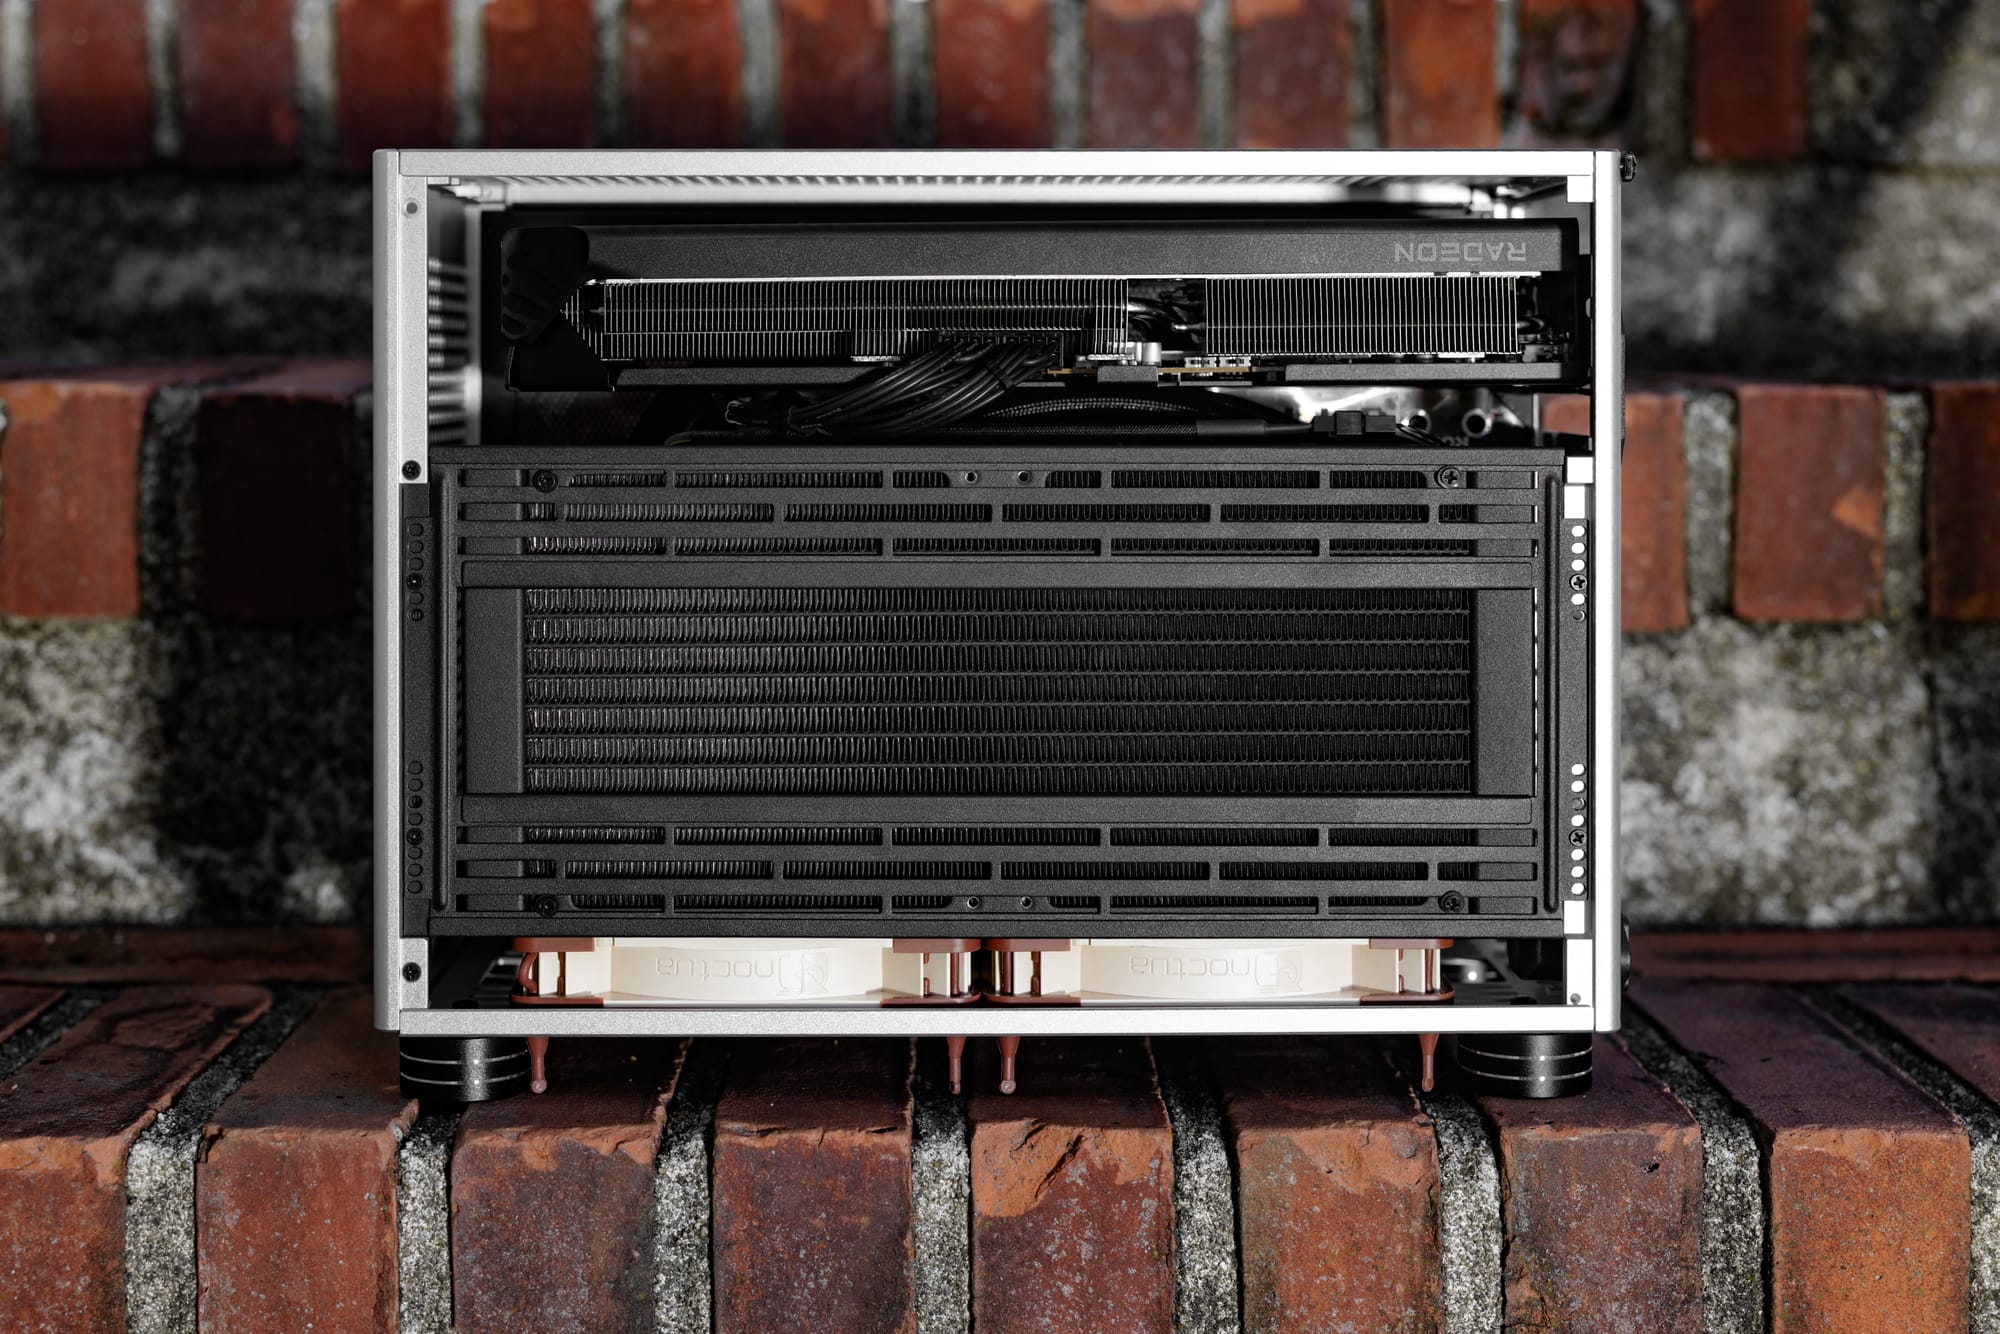
Getting the radiator installed with the tubes was probably the most challenging part, though not very. The key here was very loosely mounting the radiator to the fan bracket. This allowed its final position to be determined by the best fit. I used more nylon washers here to prevent scratching the finish on the bracket. NCASE helpfully provides washers to create space between the case and the fan bracket. Every millimeter counted here. I bought fan grills in case the tubes rubbed against the side-mounted fans. They were absolutely required. The bottom intake fans did not have any interference.
Final assembly involves slotting the side panel in at a steep angle, then holding both in place to then slide the top cover in place.
Performance and Acoustics
During normal use, it’s rare to see the CPU go above 58C. Idle is around 41C. I used the ASUS silent profile as a base, then tweaked it for the slowest possible ramp from 60C to 75C. Elevated fan speeds only occur when gaming (GPU) or rendering video (CPU) for long periods. I disabled 0-fan mode on the GPU and instead have it spin at minimum RPM to keep heat from hanging around.
Overall, I am extremely pleased with how little the CPU temps budge under most workloads/circumstances. 8 cores is a step down from the 24 cores I had in Blackhaus, but I shifted all Adobe work to my M2 Ultra Mac Studio. I tried switching to macOS for a good while, but window management was awful. I could not use it and stay sane, despite the ecosystem advantages. I either switch to it via KVM to work in Adobe, or access it remotely with Parsec. This performs well with the much-needed GPU acceleration that was recently reintroduced to Parsec.
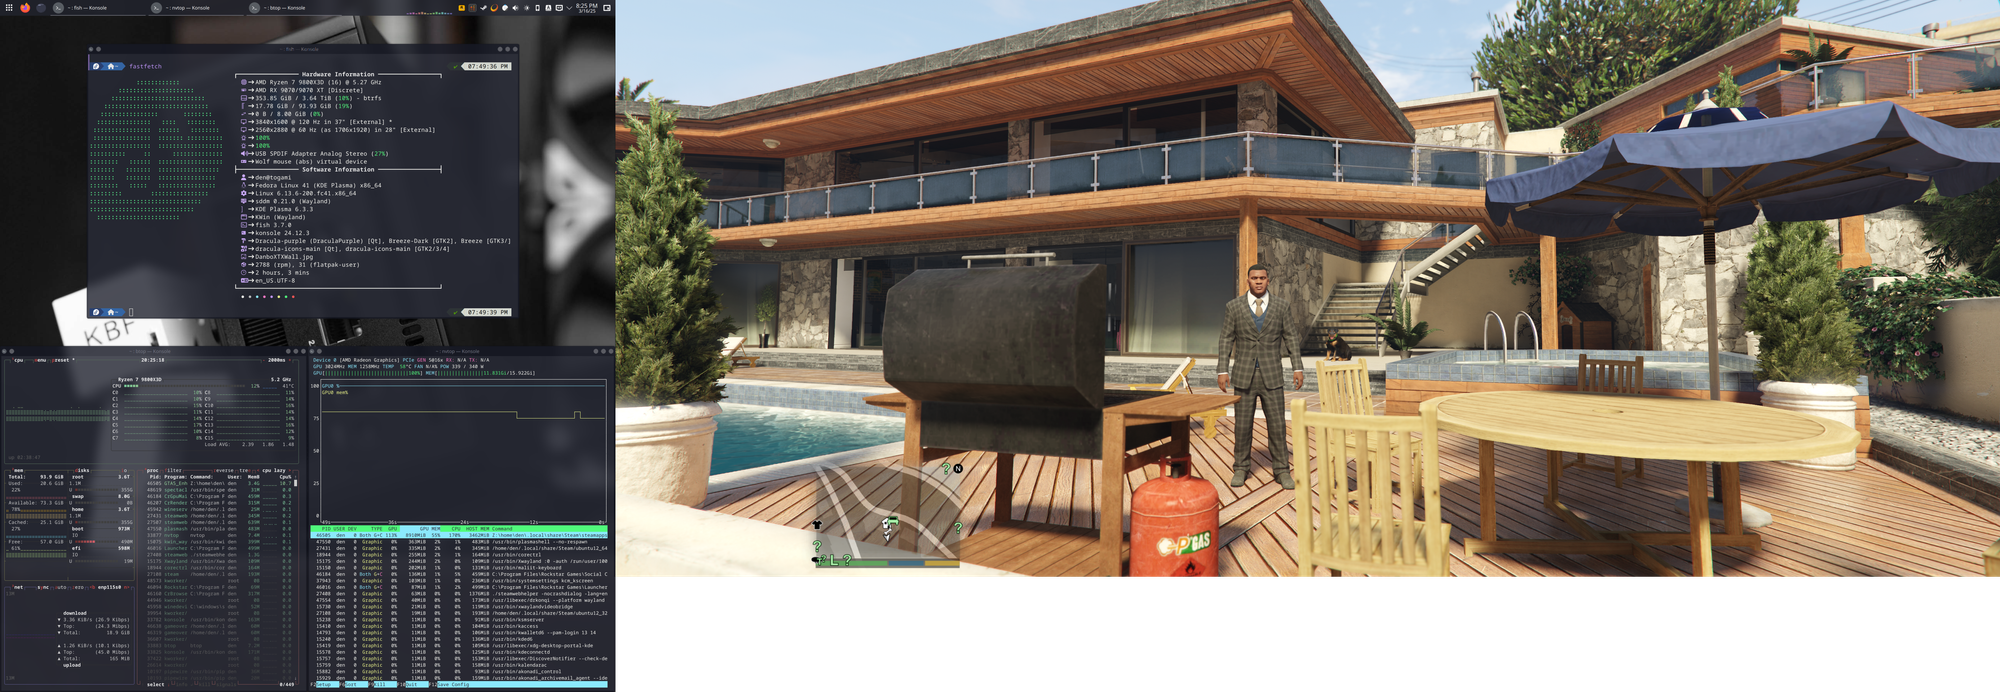
Gaming (All 3840x1600)
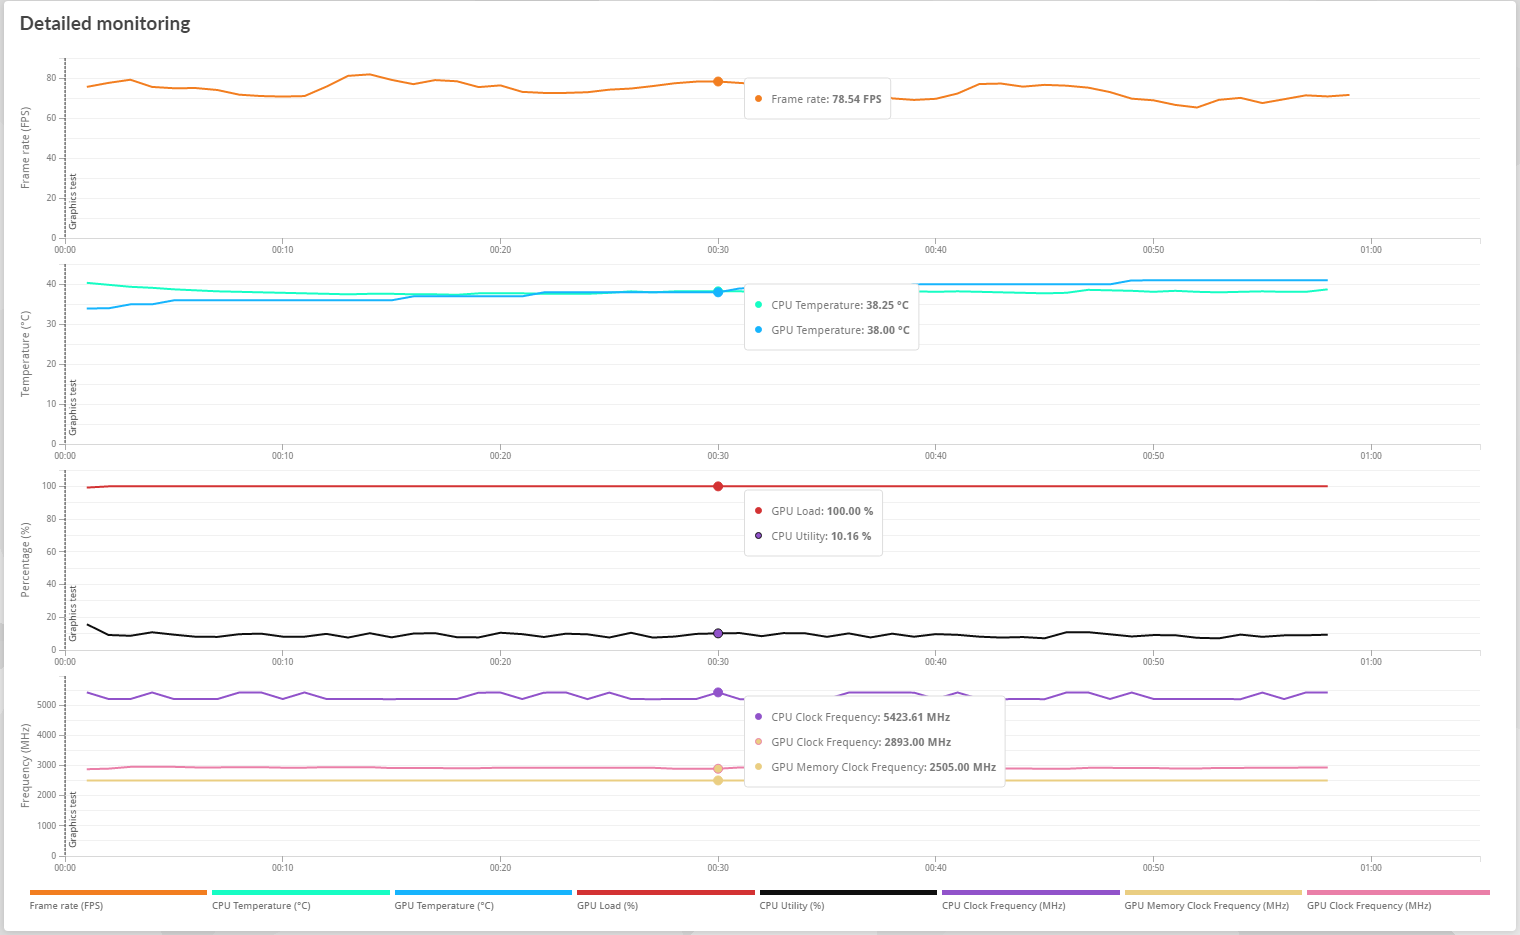
I don’t do a lot of gaming, but when I do, it’s mainly GTA V Enhanced or Cyberpunk 2077. I waited about an hour before recording temps to make sure the AIO and air inside the case were saturated.
Grand Theft Auto Enhanced (Linux), Max RT CPU 60-63C, 106FPSCyberpunk 2077 (Linux, RT Unavailable) FSR3 , no frame gen, 69-71C CPU, 62-65C GPU, 95 FPSCyberpunk 2077 (Windows, Ultra RT) FSR3 , no frame gen, 77FPS
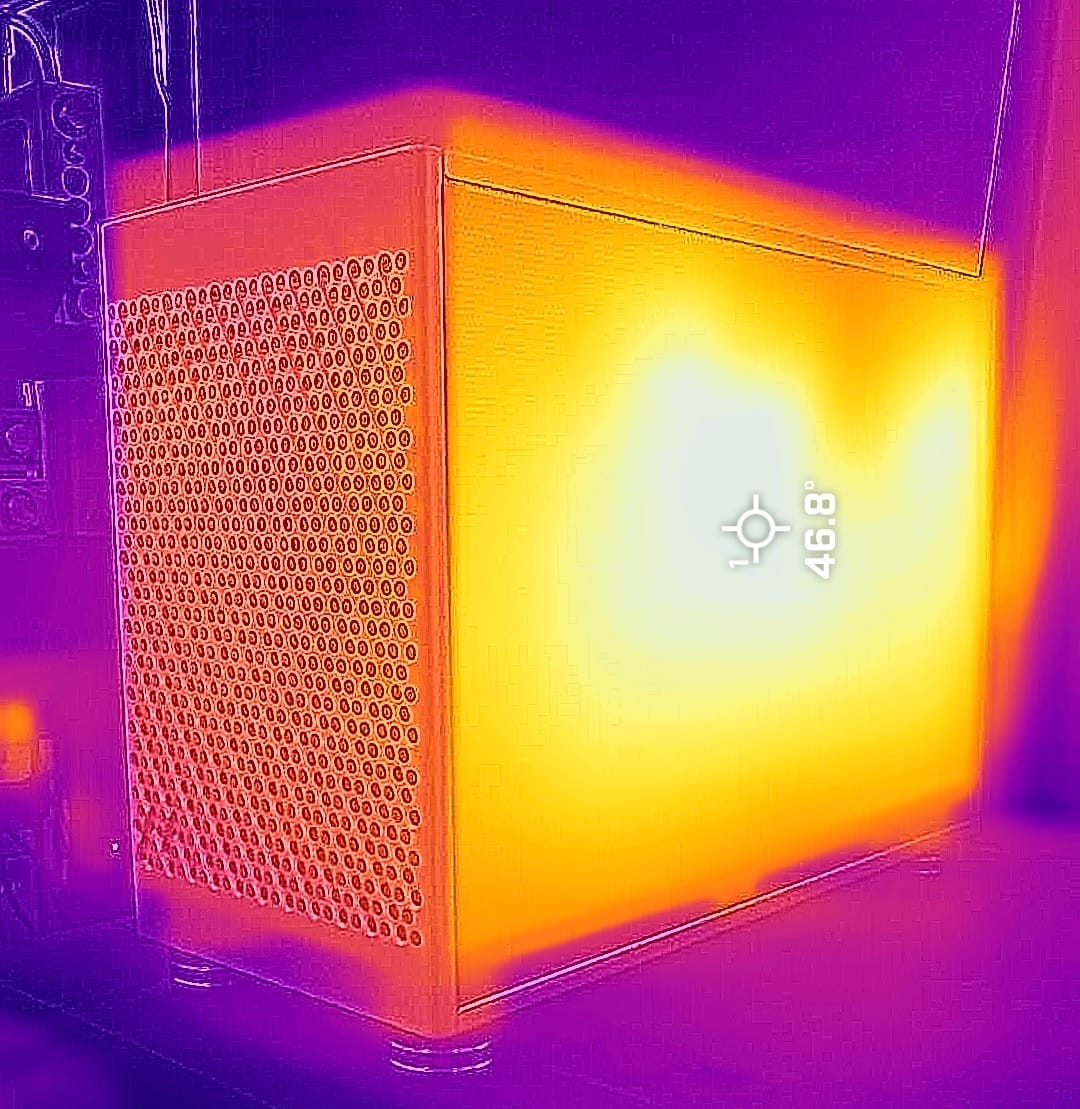
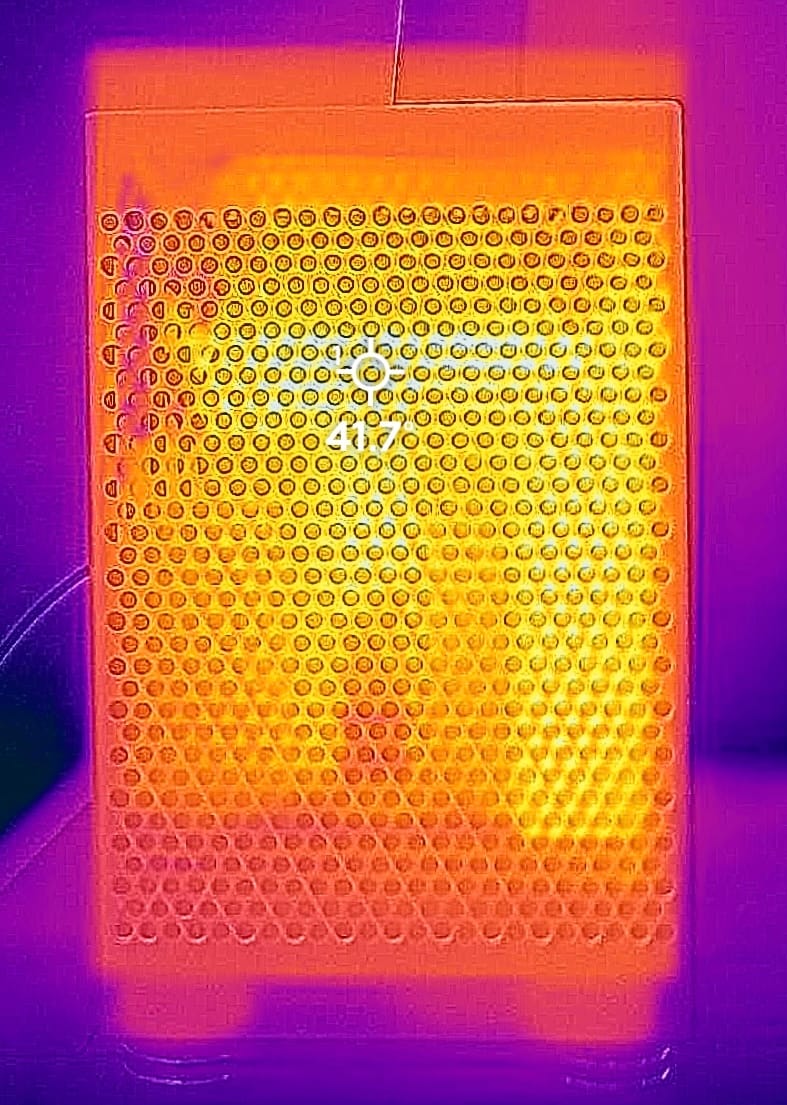

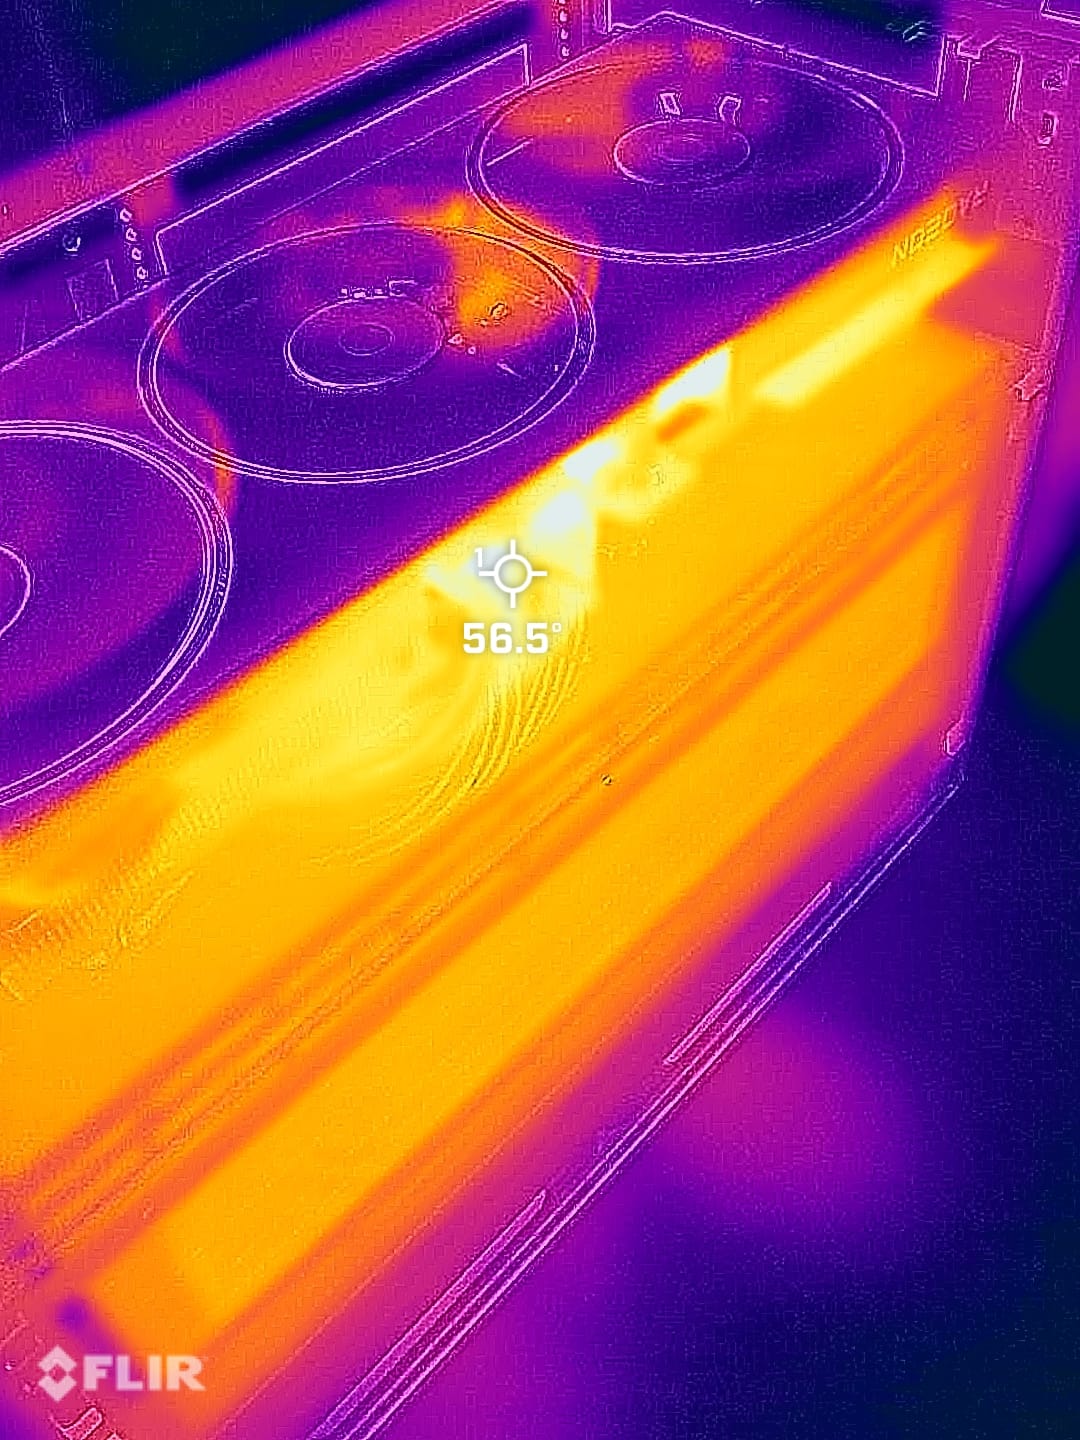
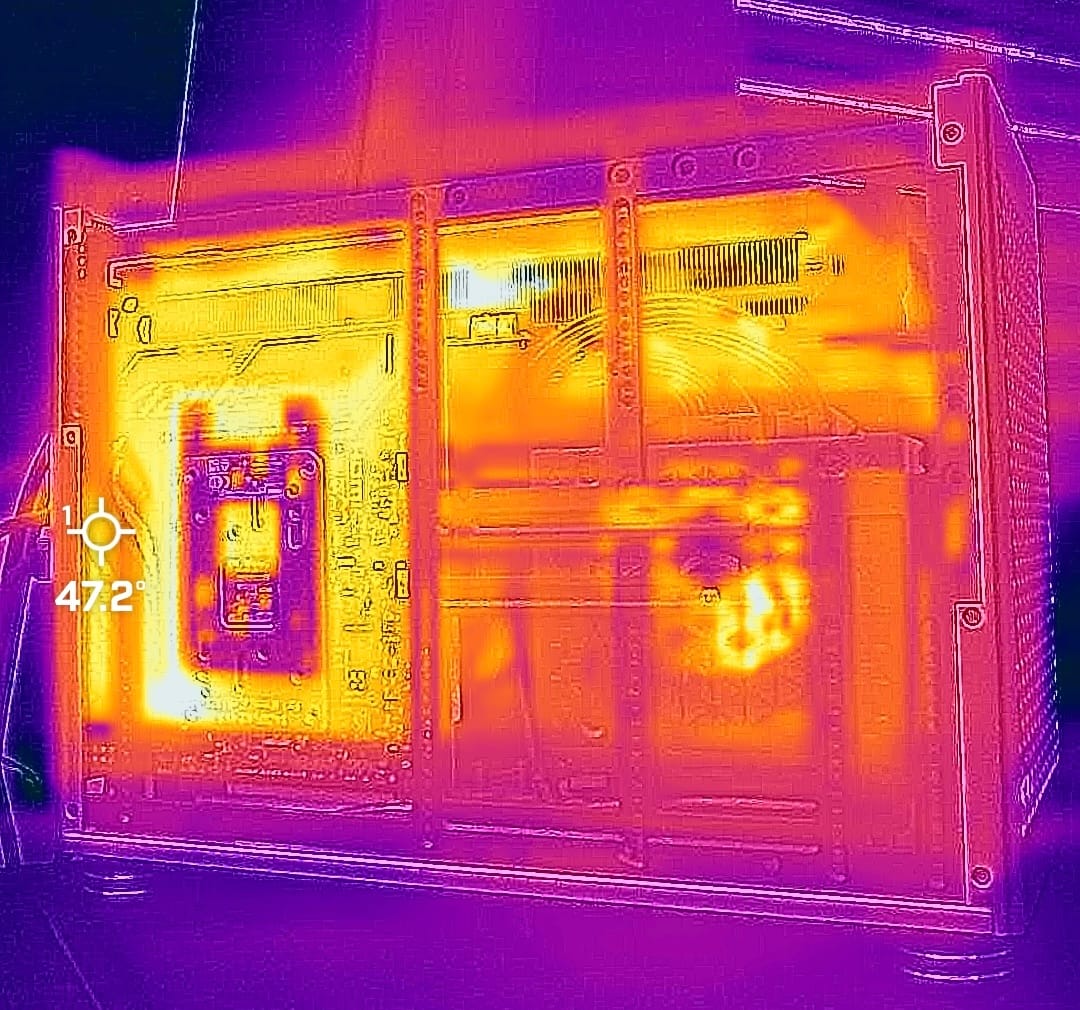
FLIR thermal imaging - 1 hour into Cyberpunk 2077
Benchmarks
Cinebench R23.2:
OC: PBO 2, FMAX +200MHz, Scalar 10x, Curve Optimizer All-Core Magnitude -40
Multi: 23,948 (67C after 10 mins)
Single: 2,197 (59C after 10 mins)
3DMark:
CPU OC: Simple PBO BIOS toggle (hadn’t tinkered with CPU much yet)
GPU OC: No clock tweaking, -80mV, 340W Power Target
Port Royal: 19,584 (GPU 3,147MHz, Mem 2,674MHz, CPU 5,358MHz)
Time Spy: 27,724 (GPU 3,141MHz, Mem 2,674MHz, CPU 5,327MHz)
Speedway: 6,716 (GPU 3,055MHz, Mem 2,674MHz, CPU 5,326MHz)
Steel Nomad: 7,605 (GPU 2,968MHz, Mem 2,746MHz, CPU 5,425MHz)
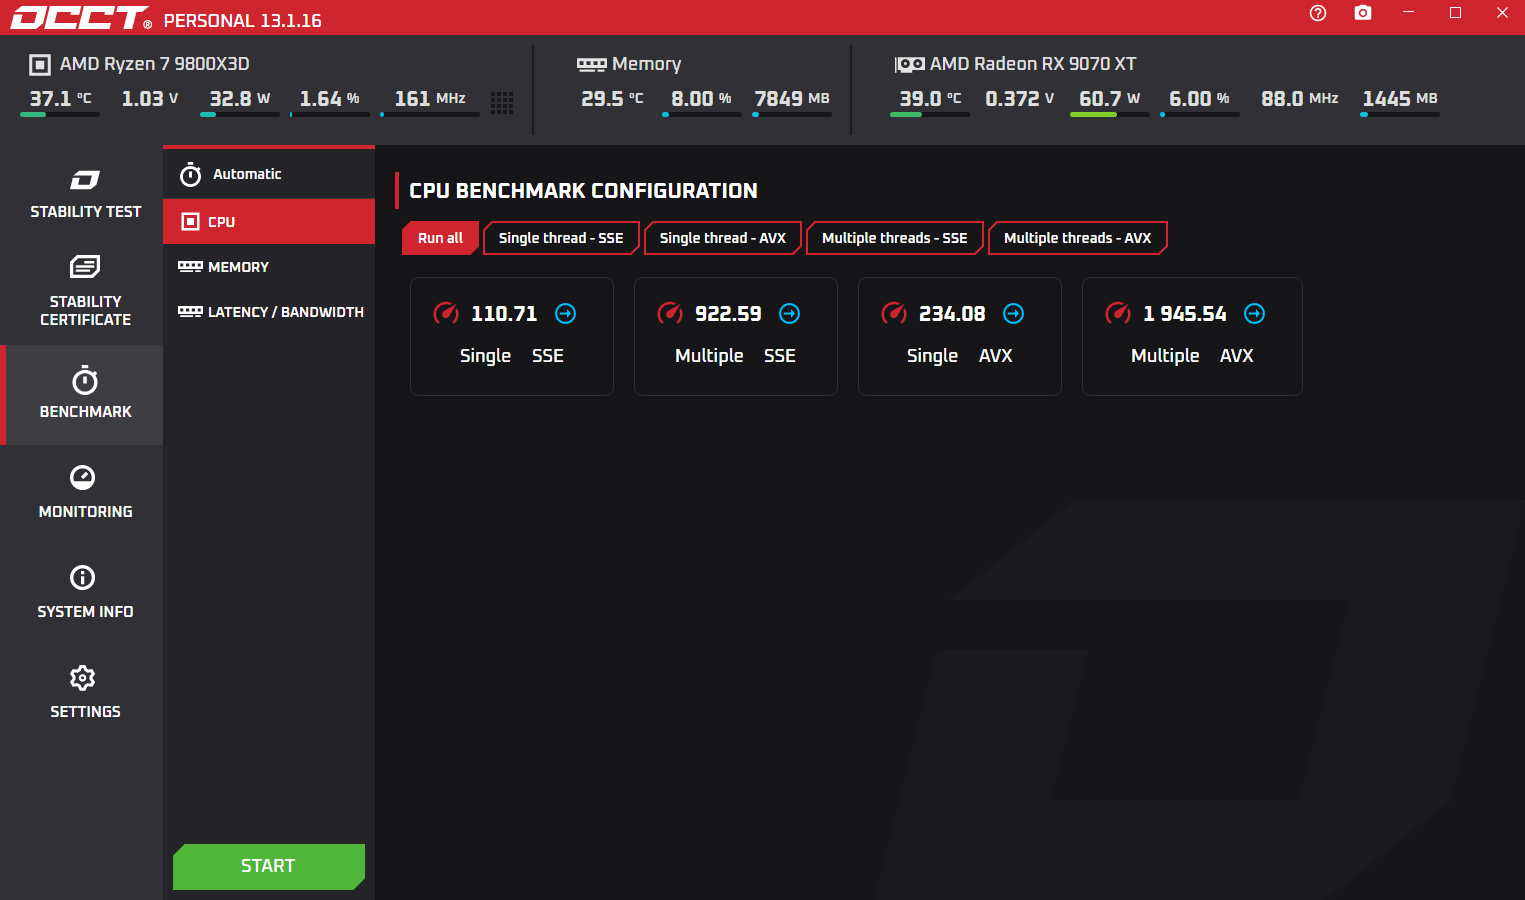
OCCT:
OC: PBO 2, FMAX +200MHz, Scalar 10x, Curve Optimizer All-Core Magnitude -40
Single SSE: 110.71
Multiple SSE: 922.59
Single AVX: 234.08
Multiple AVX: 1,945.54
Future Plans
I still have things to get used to in terms of replicating the good parts of my Windows experience. Shortcuts, window management tweaks, adding functionality, etc… I plan to write a piece on switching to Linux that documents this, both for anyone thinking of doing the same, and to help me remember going forward.
As I said earlier, I hope to turn this into a custom loop, keeping alive the tradition of my last few builds. I am wholly impressed with the RX 9070 XT and would give it a water block “just because.” For the 9800X3D. I may get a normal block, or go all in on Thermal Grizzly with the direct-die block.
It’s been great tinkering with getting games running. Valve putting its weight behind Linux is nothing but good.
Comments?
Leave us your opinion.