Blackhaus - Intel 13900K + Arc A770 Custom Loop in the SSUPD Meshlicious
I will say nice and early that this is not a gaming focused build. Blackhaus was always going to have an Intel A770 16GB Limited for work purposes. Beyond that, things fell into place as the build progressed. I knew I wanted Intel and SFF, so I initially went with the 13700K and the ASUS Z790-I Gaming. Keep in mind my last 15 builds were Ryzen based. I needed a break. A month went by as it sat on my test bench chugging away at compiling and testing various ARC centered projects sent over from my office. I can’t code my way out of a paper bag, but I can assist with validation and bug squashing as long as minimal guidance is provided. (Unfortunately, I cannot speak about these projects or their performance relative to ARC and other platforms due to red tape).
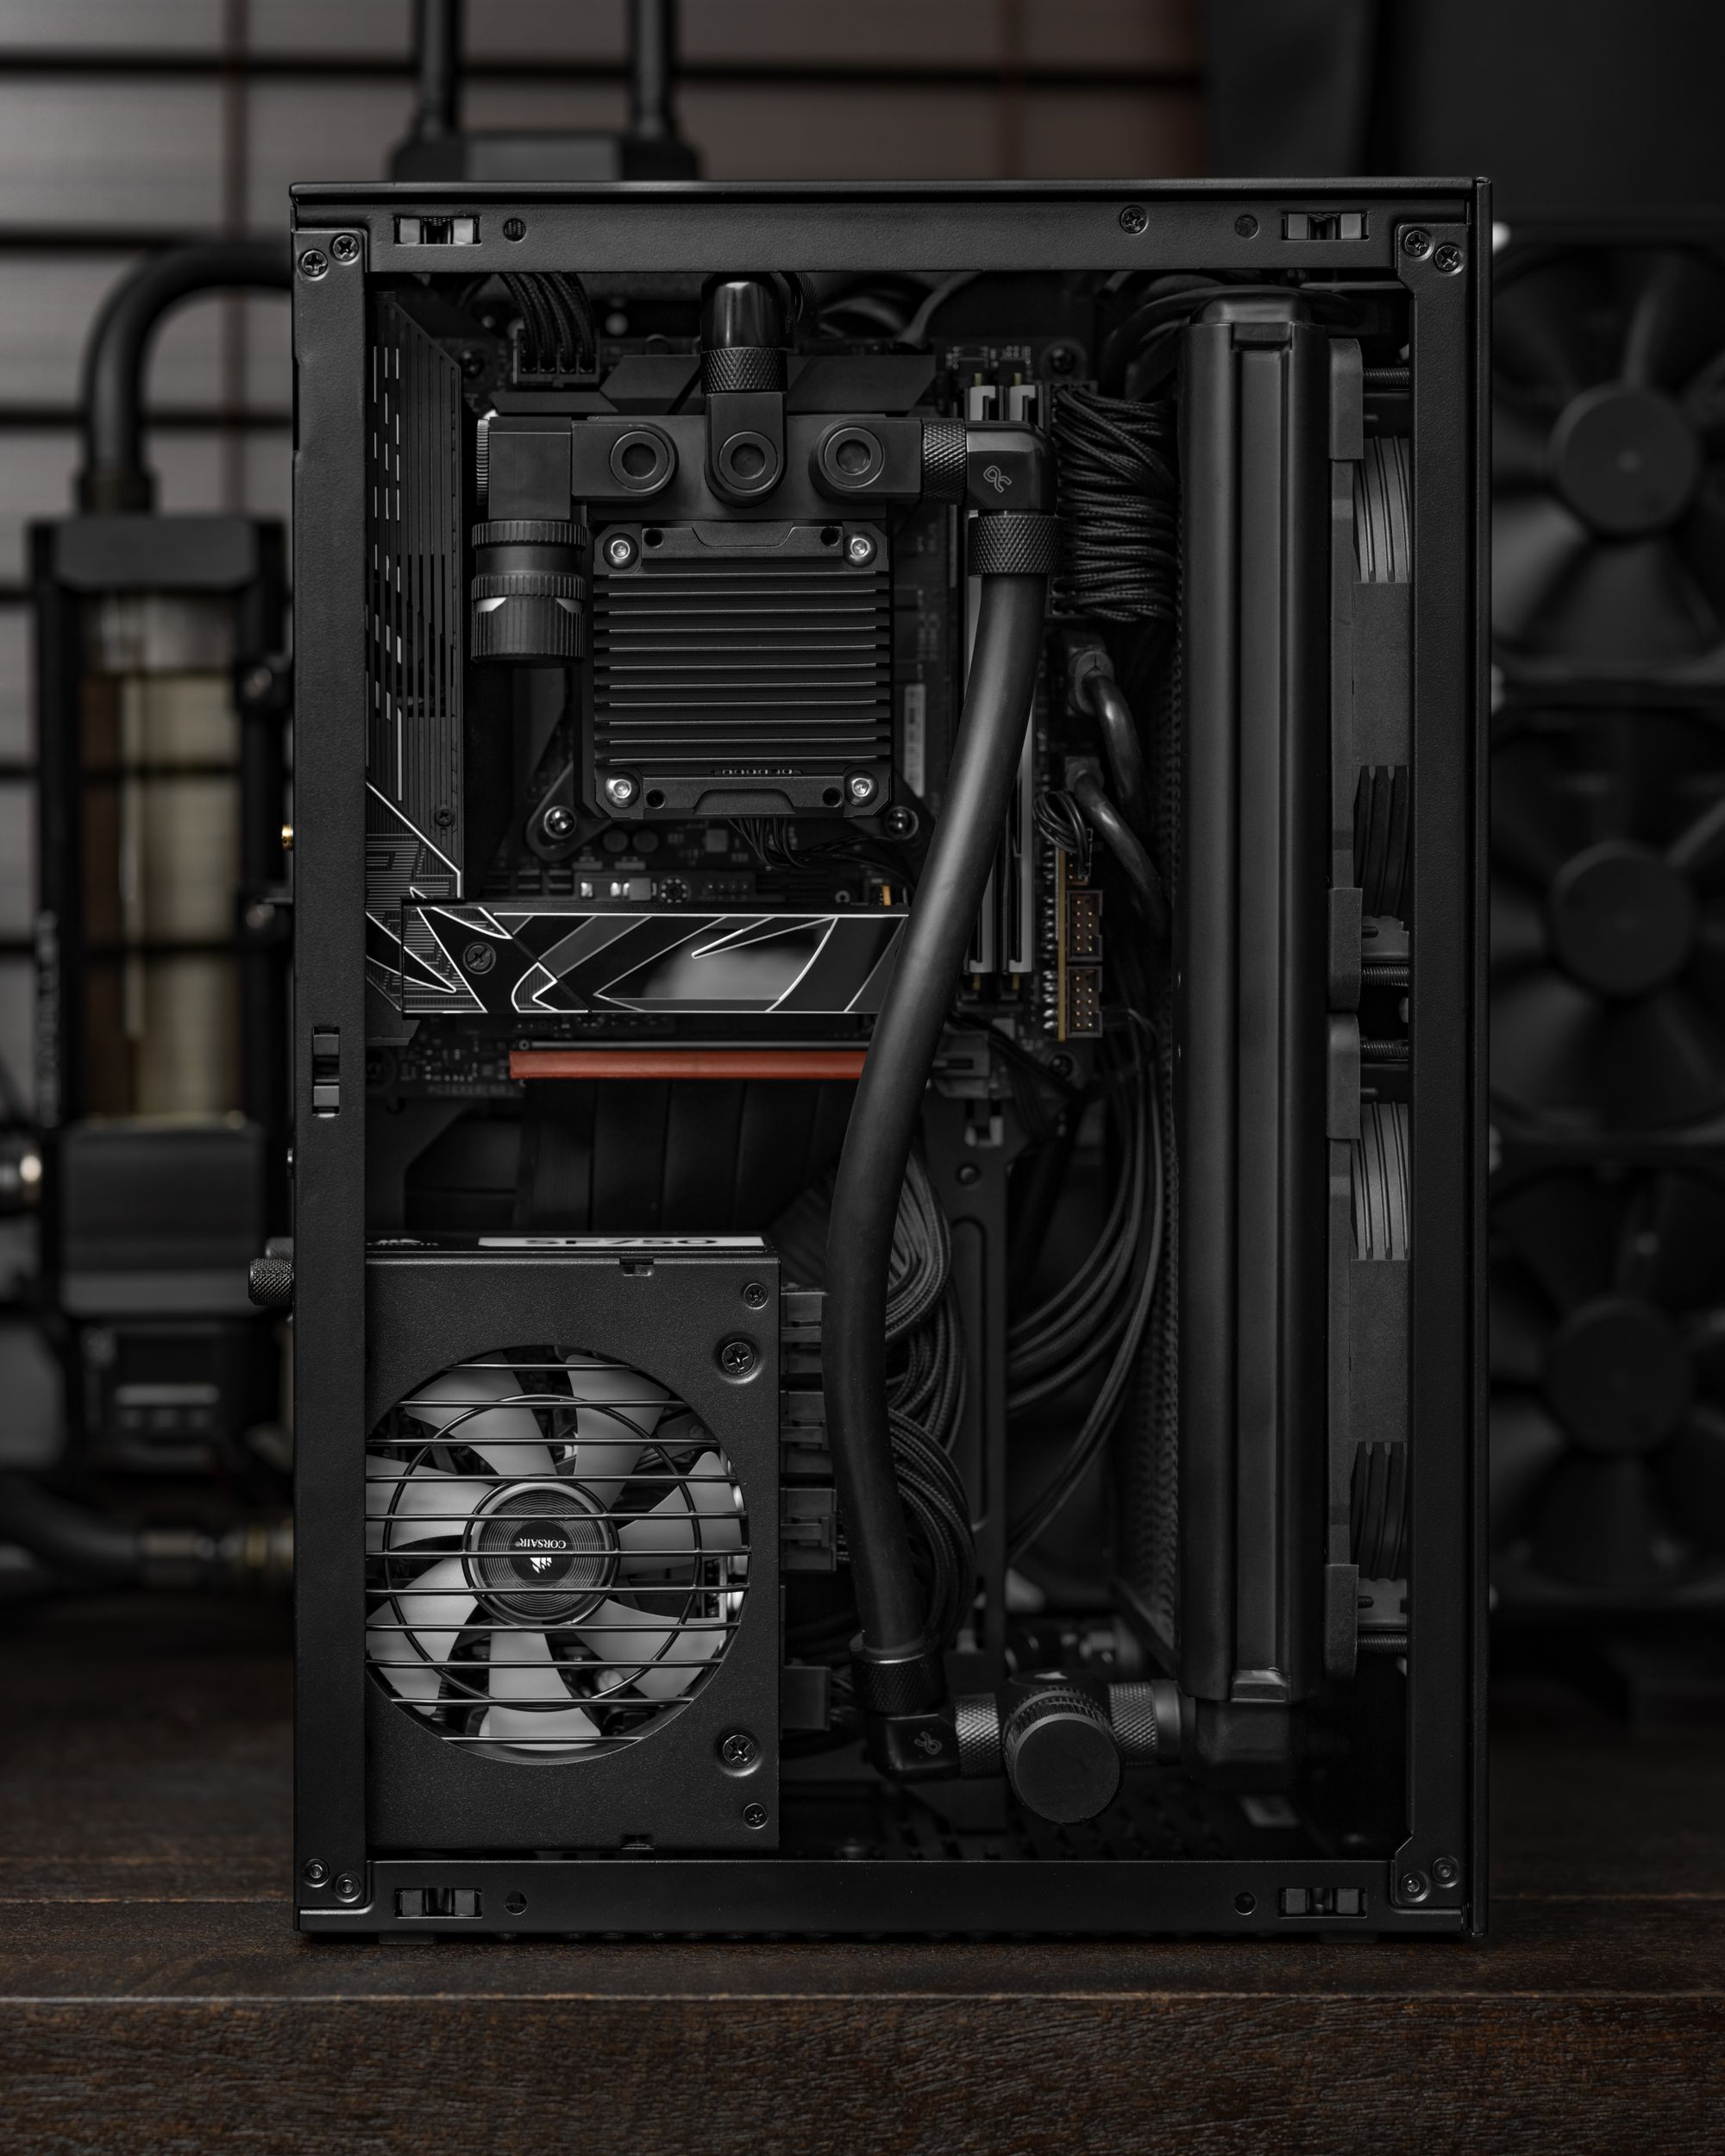
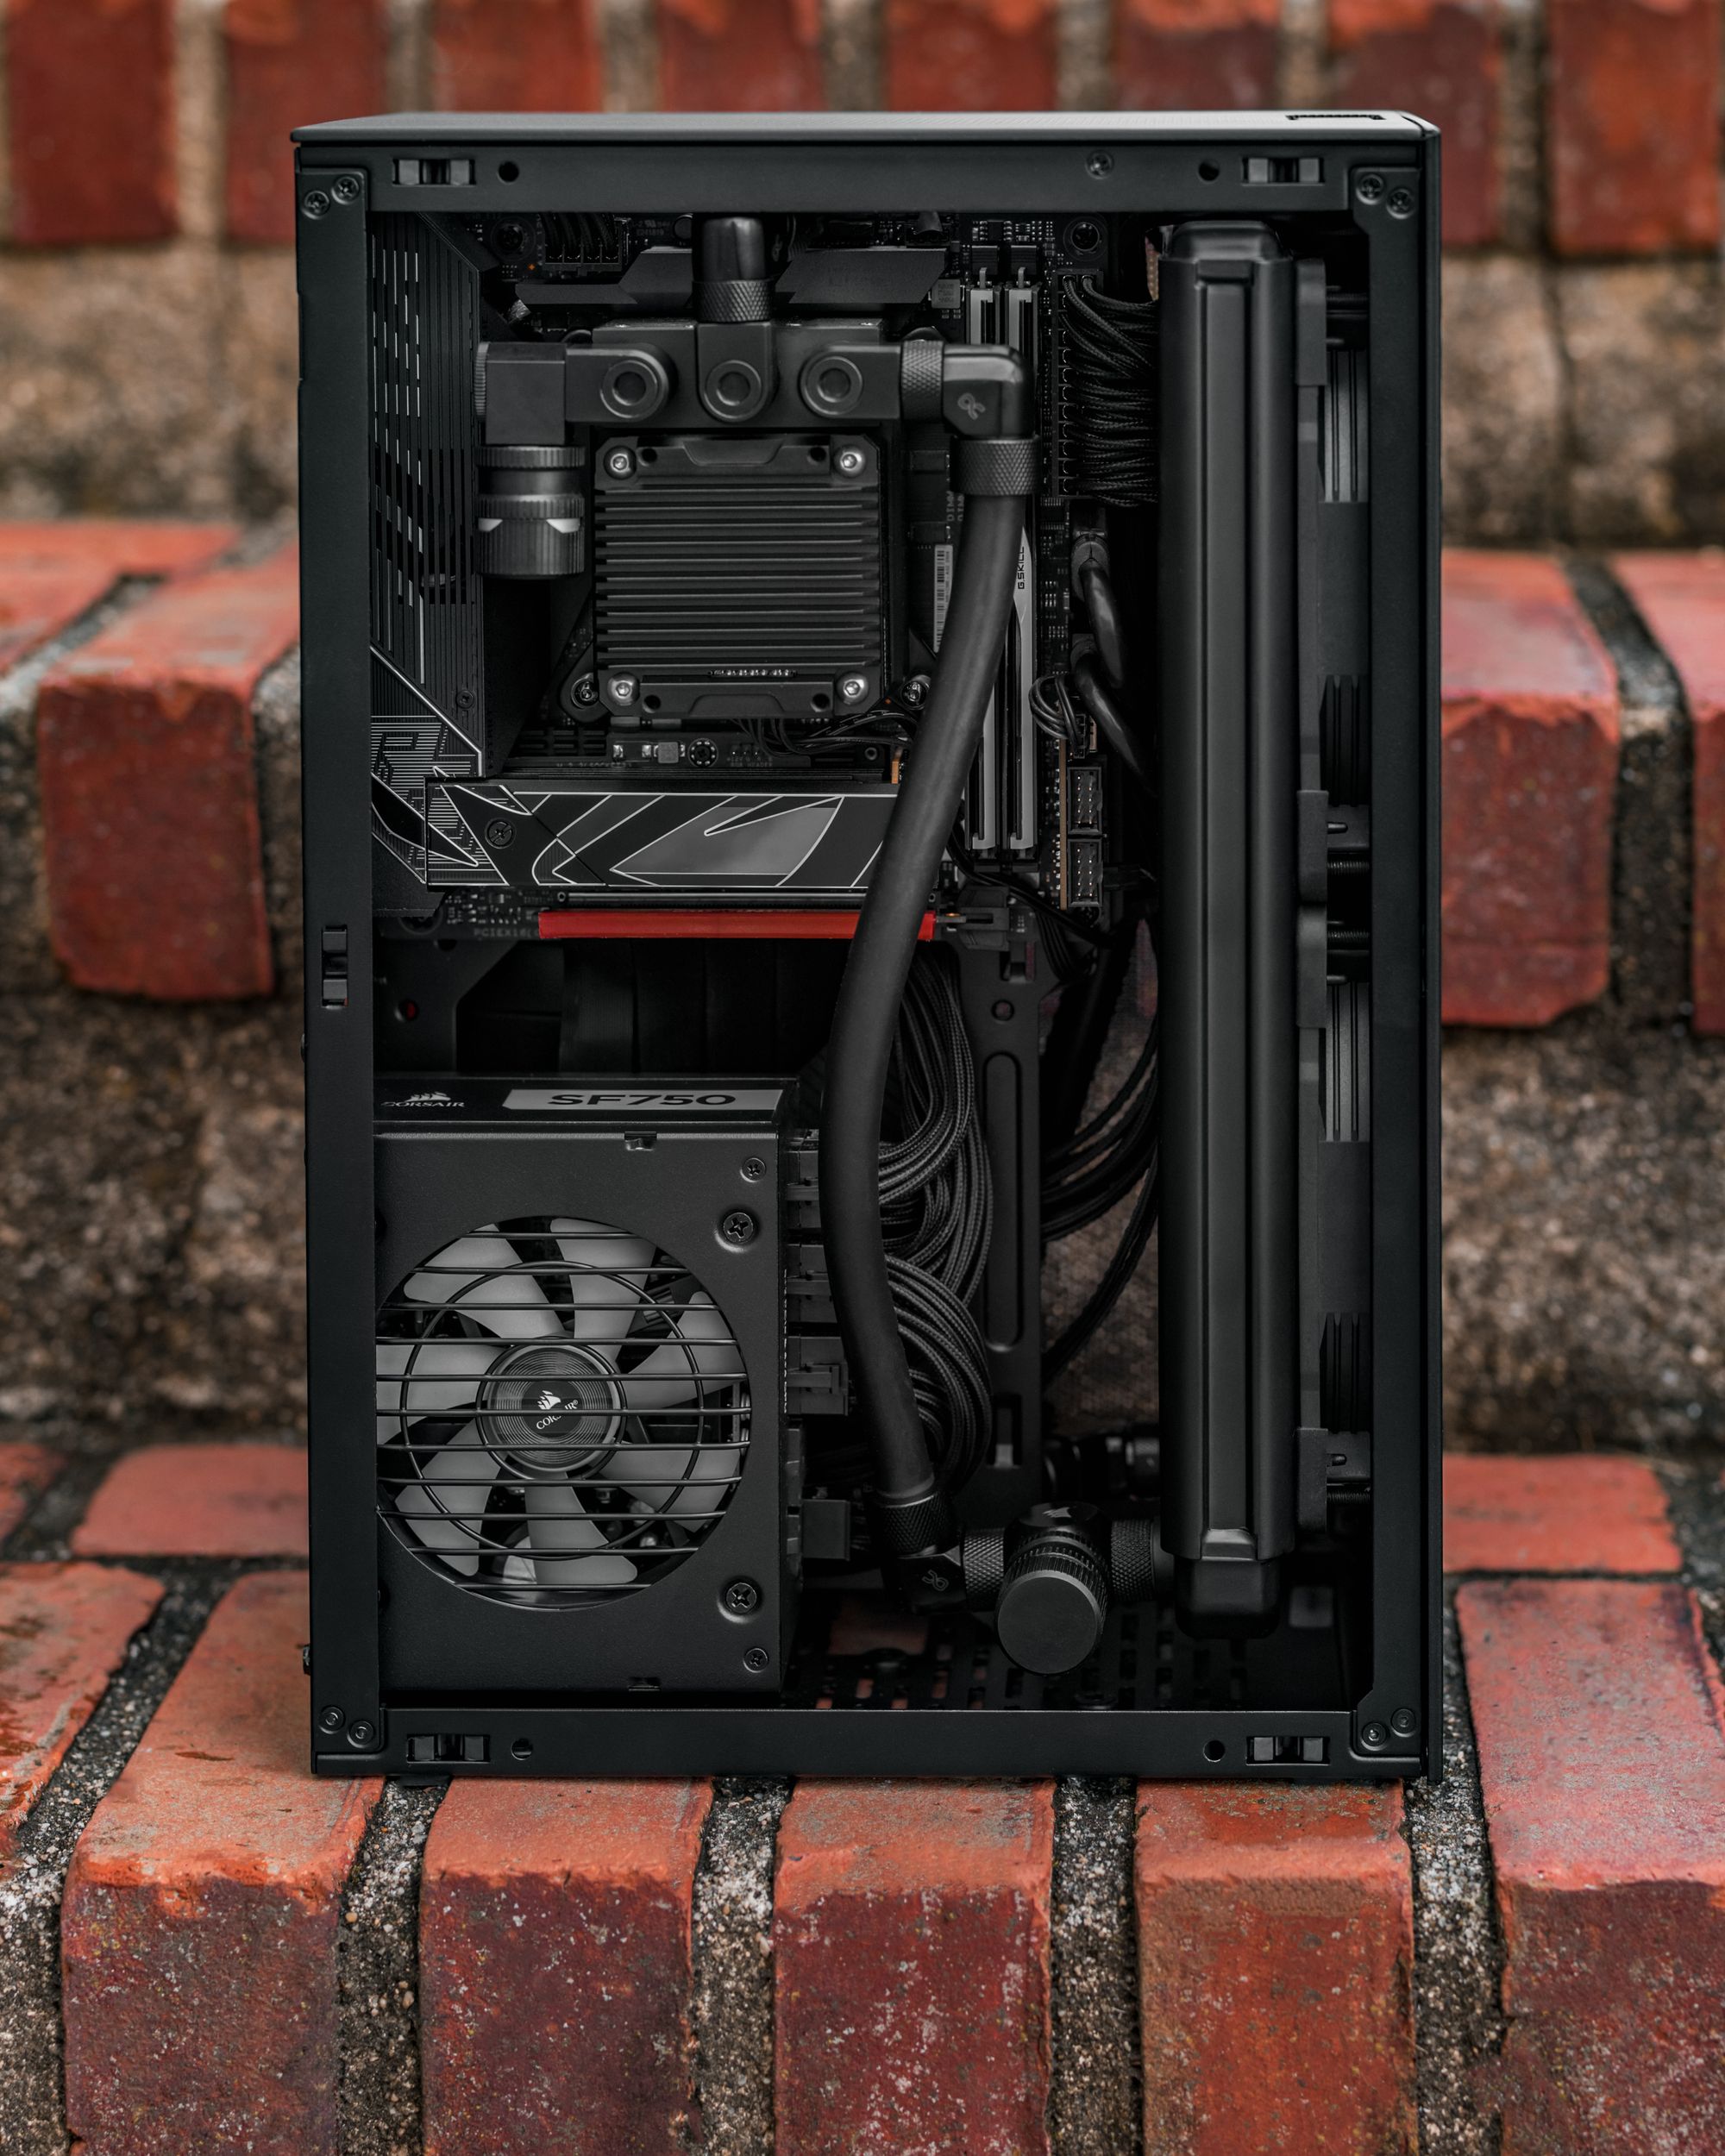
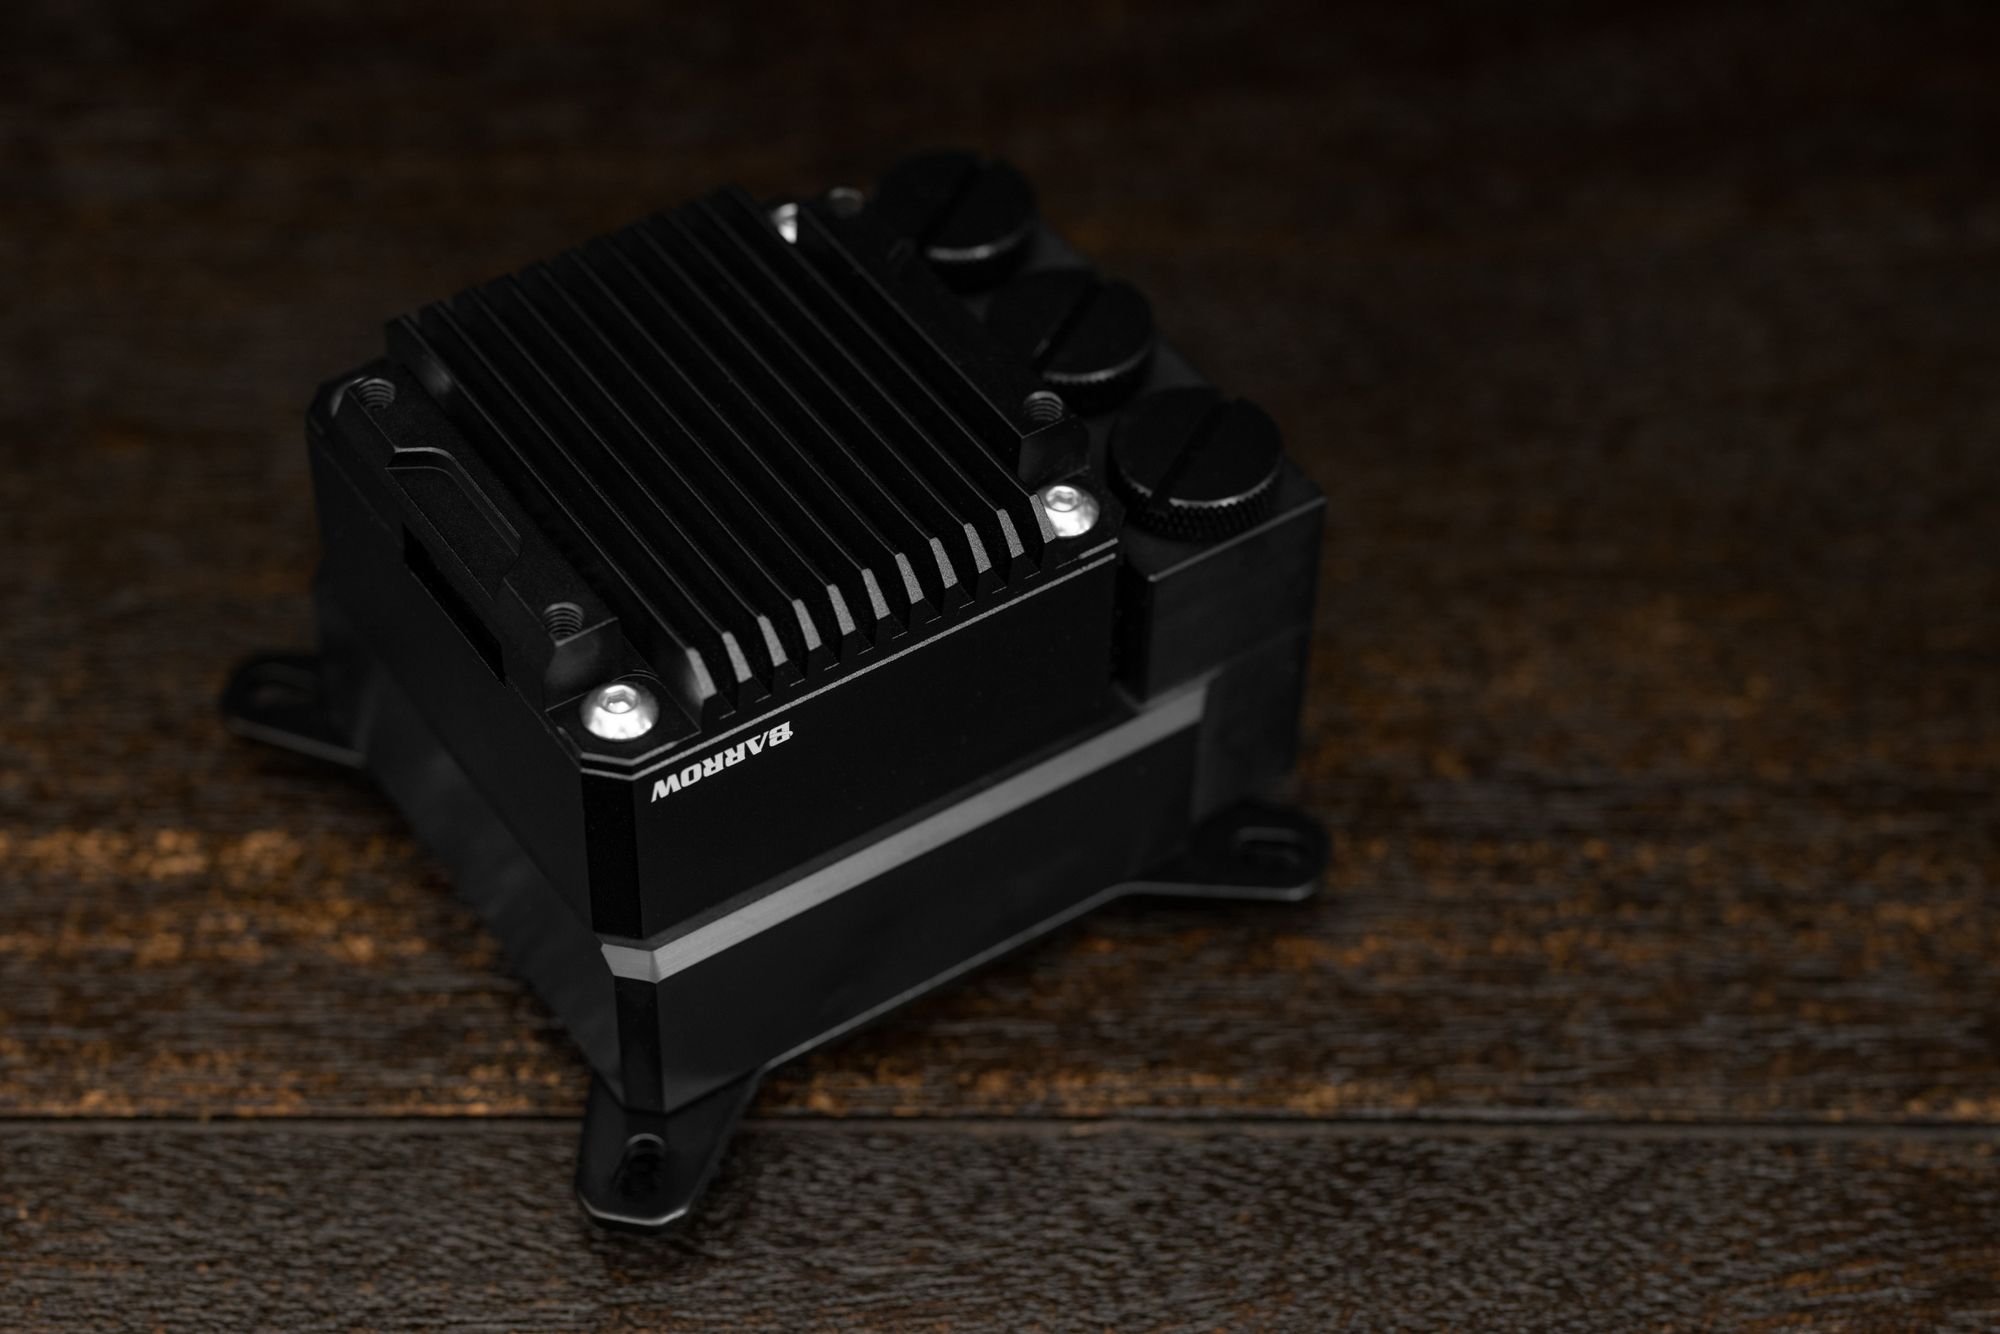
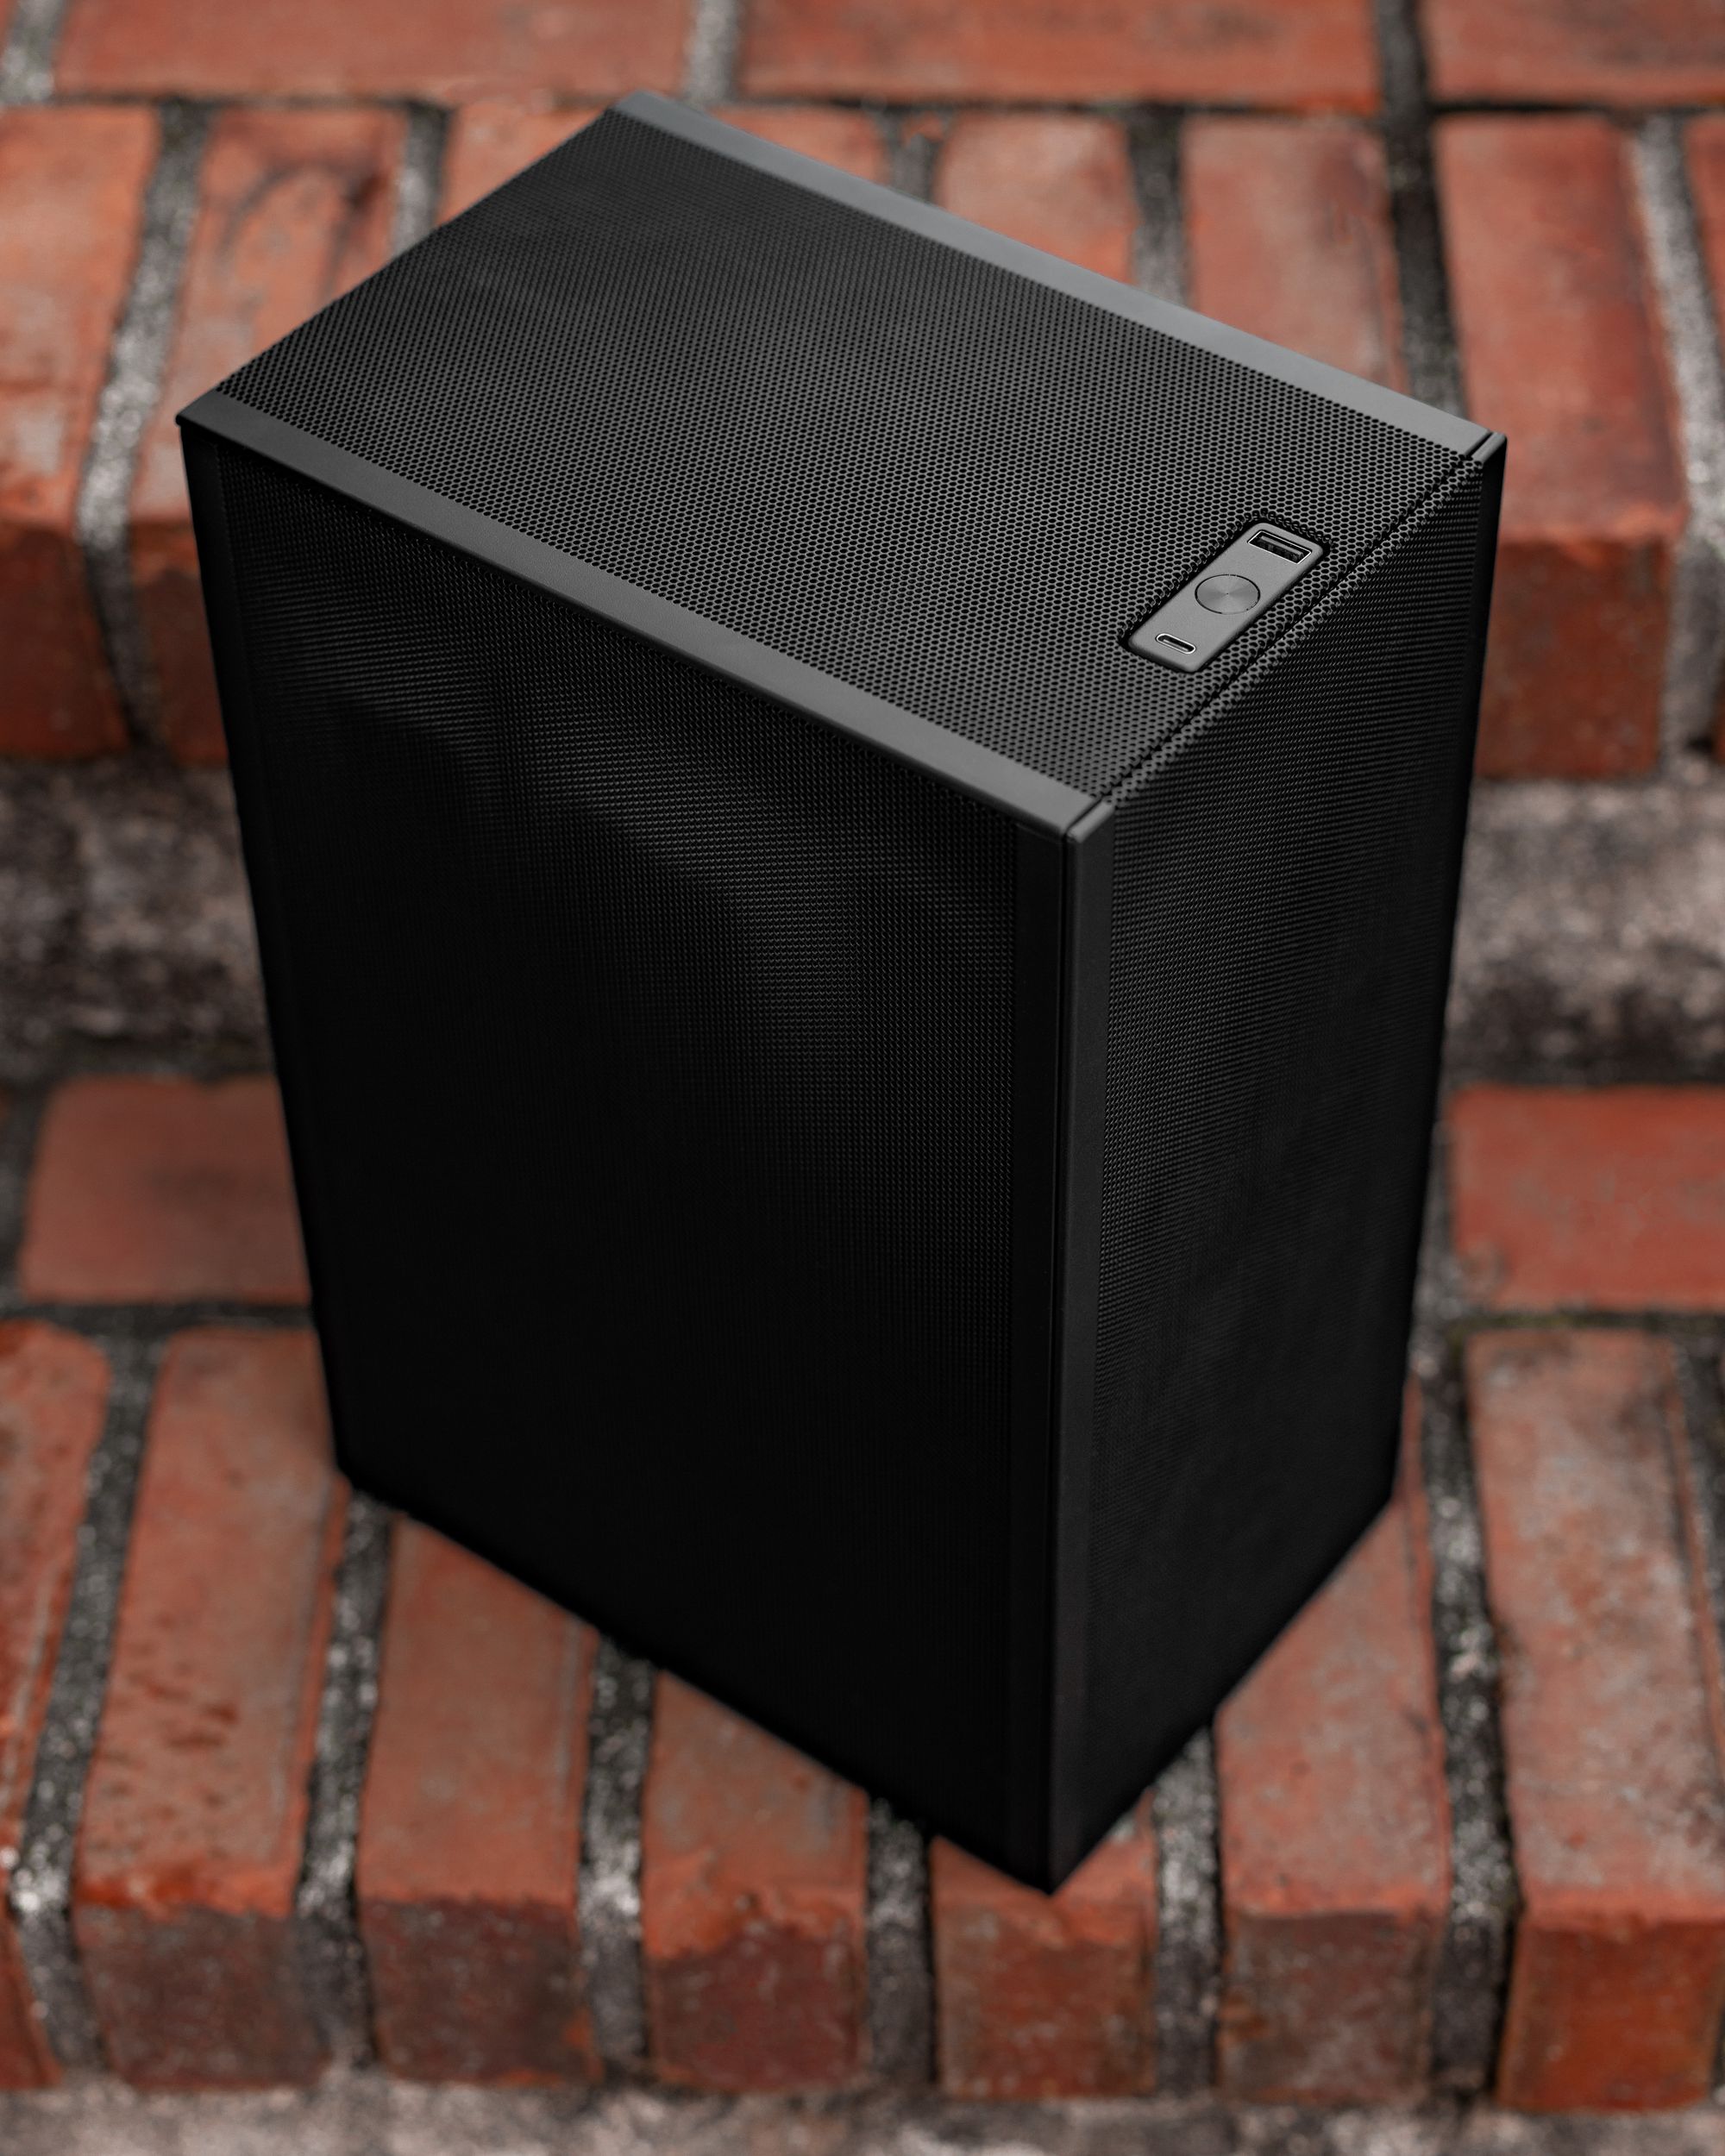
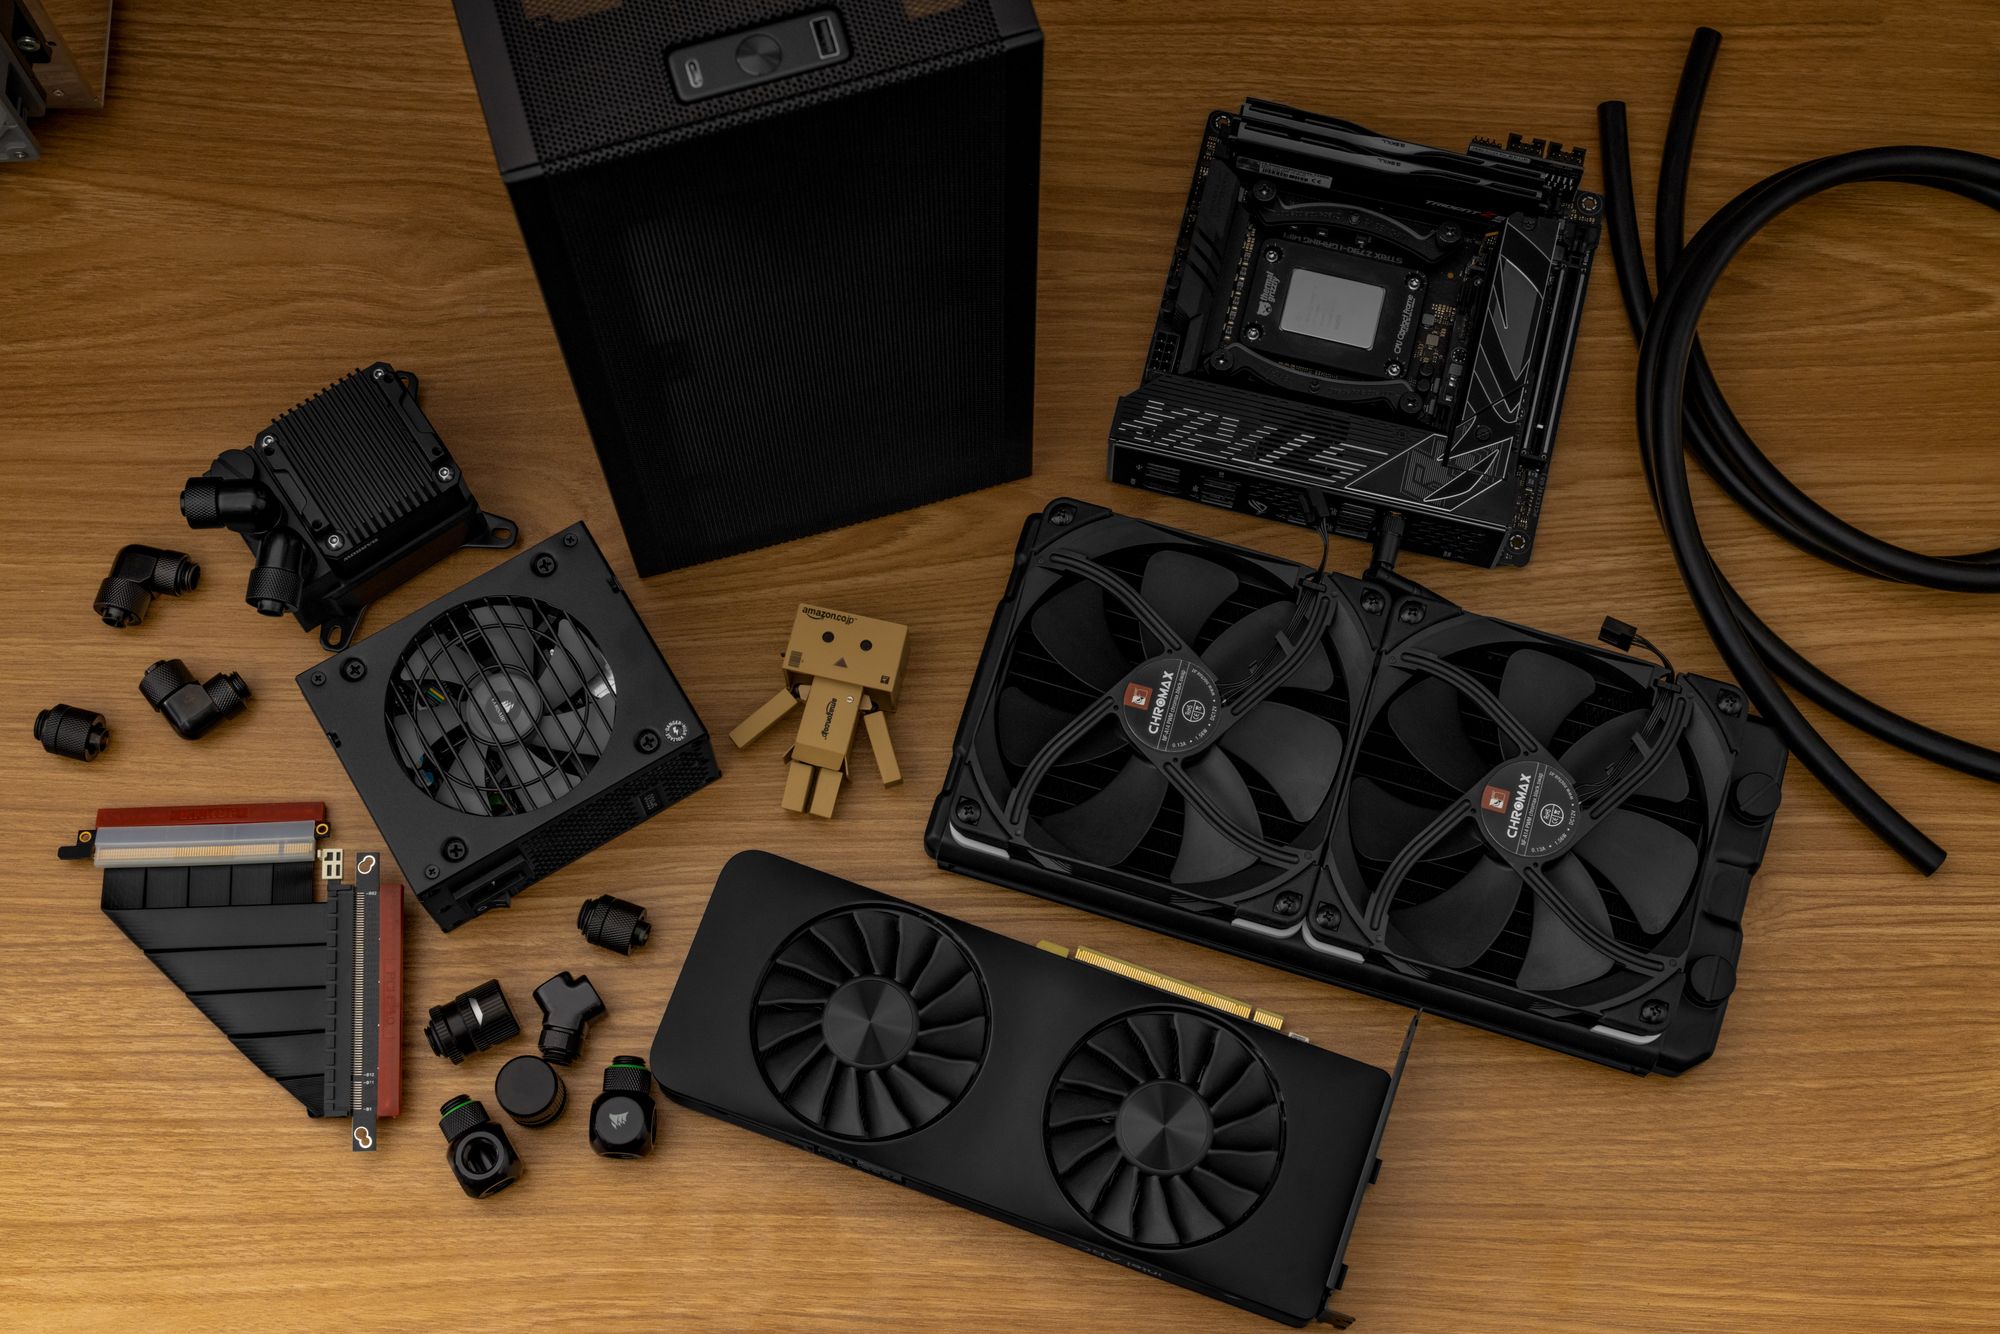
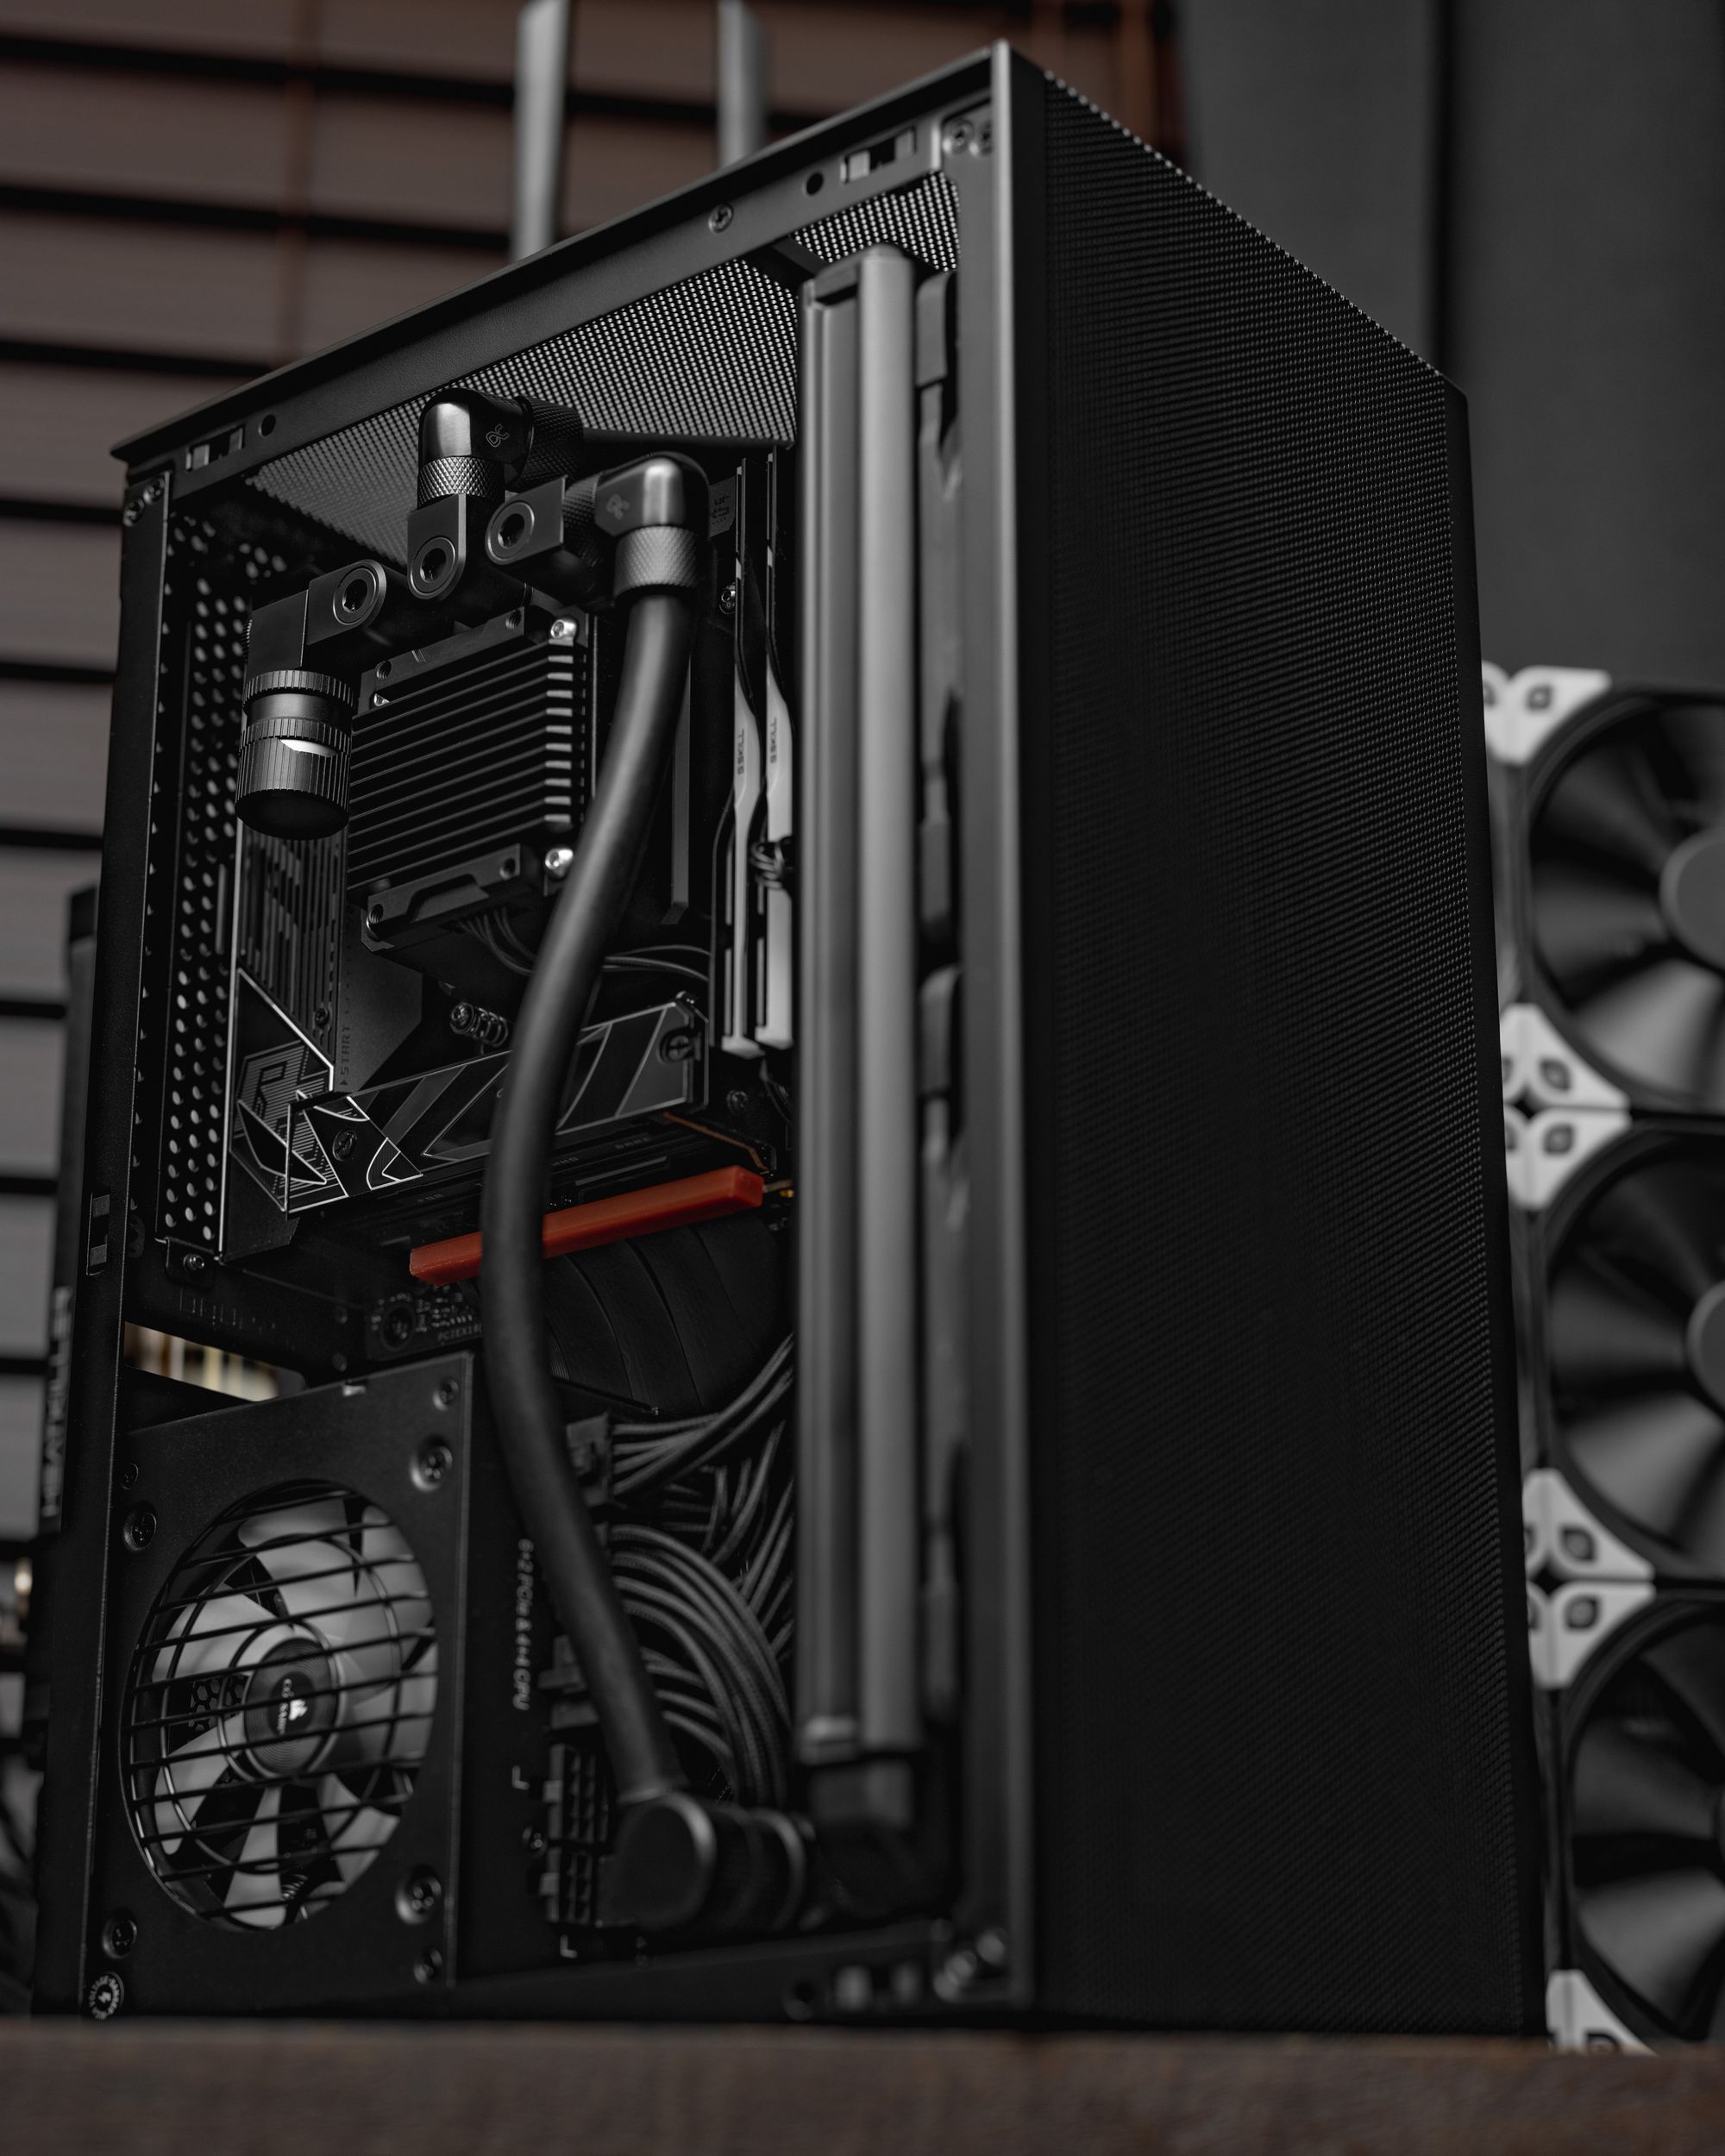
After mulling over a case, I picked the SSUPD Meshlicious. It was a good balance of in-stock, and sensible. Everyone had it on sale in the last few weeks of 2022. I considered the FormD T1, but it would have taken weeks. My next choice was an AIO… until I scrolled the SSUPD subreddit and immediately pivoted to a CPU-only custom loop. This turned out to be perfect because I’ve wanted to use the Barrow LTPRP-04I in a build since like 2020.
The Loop
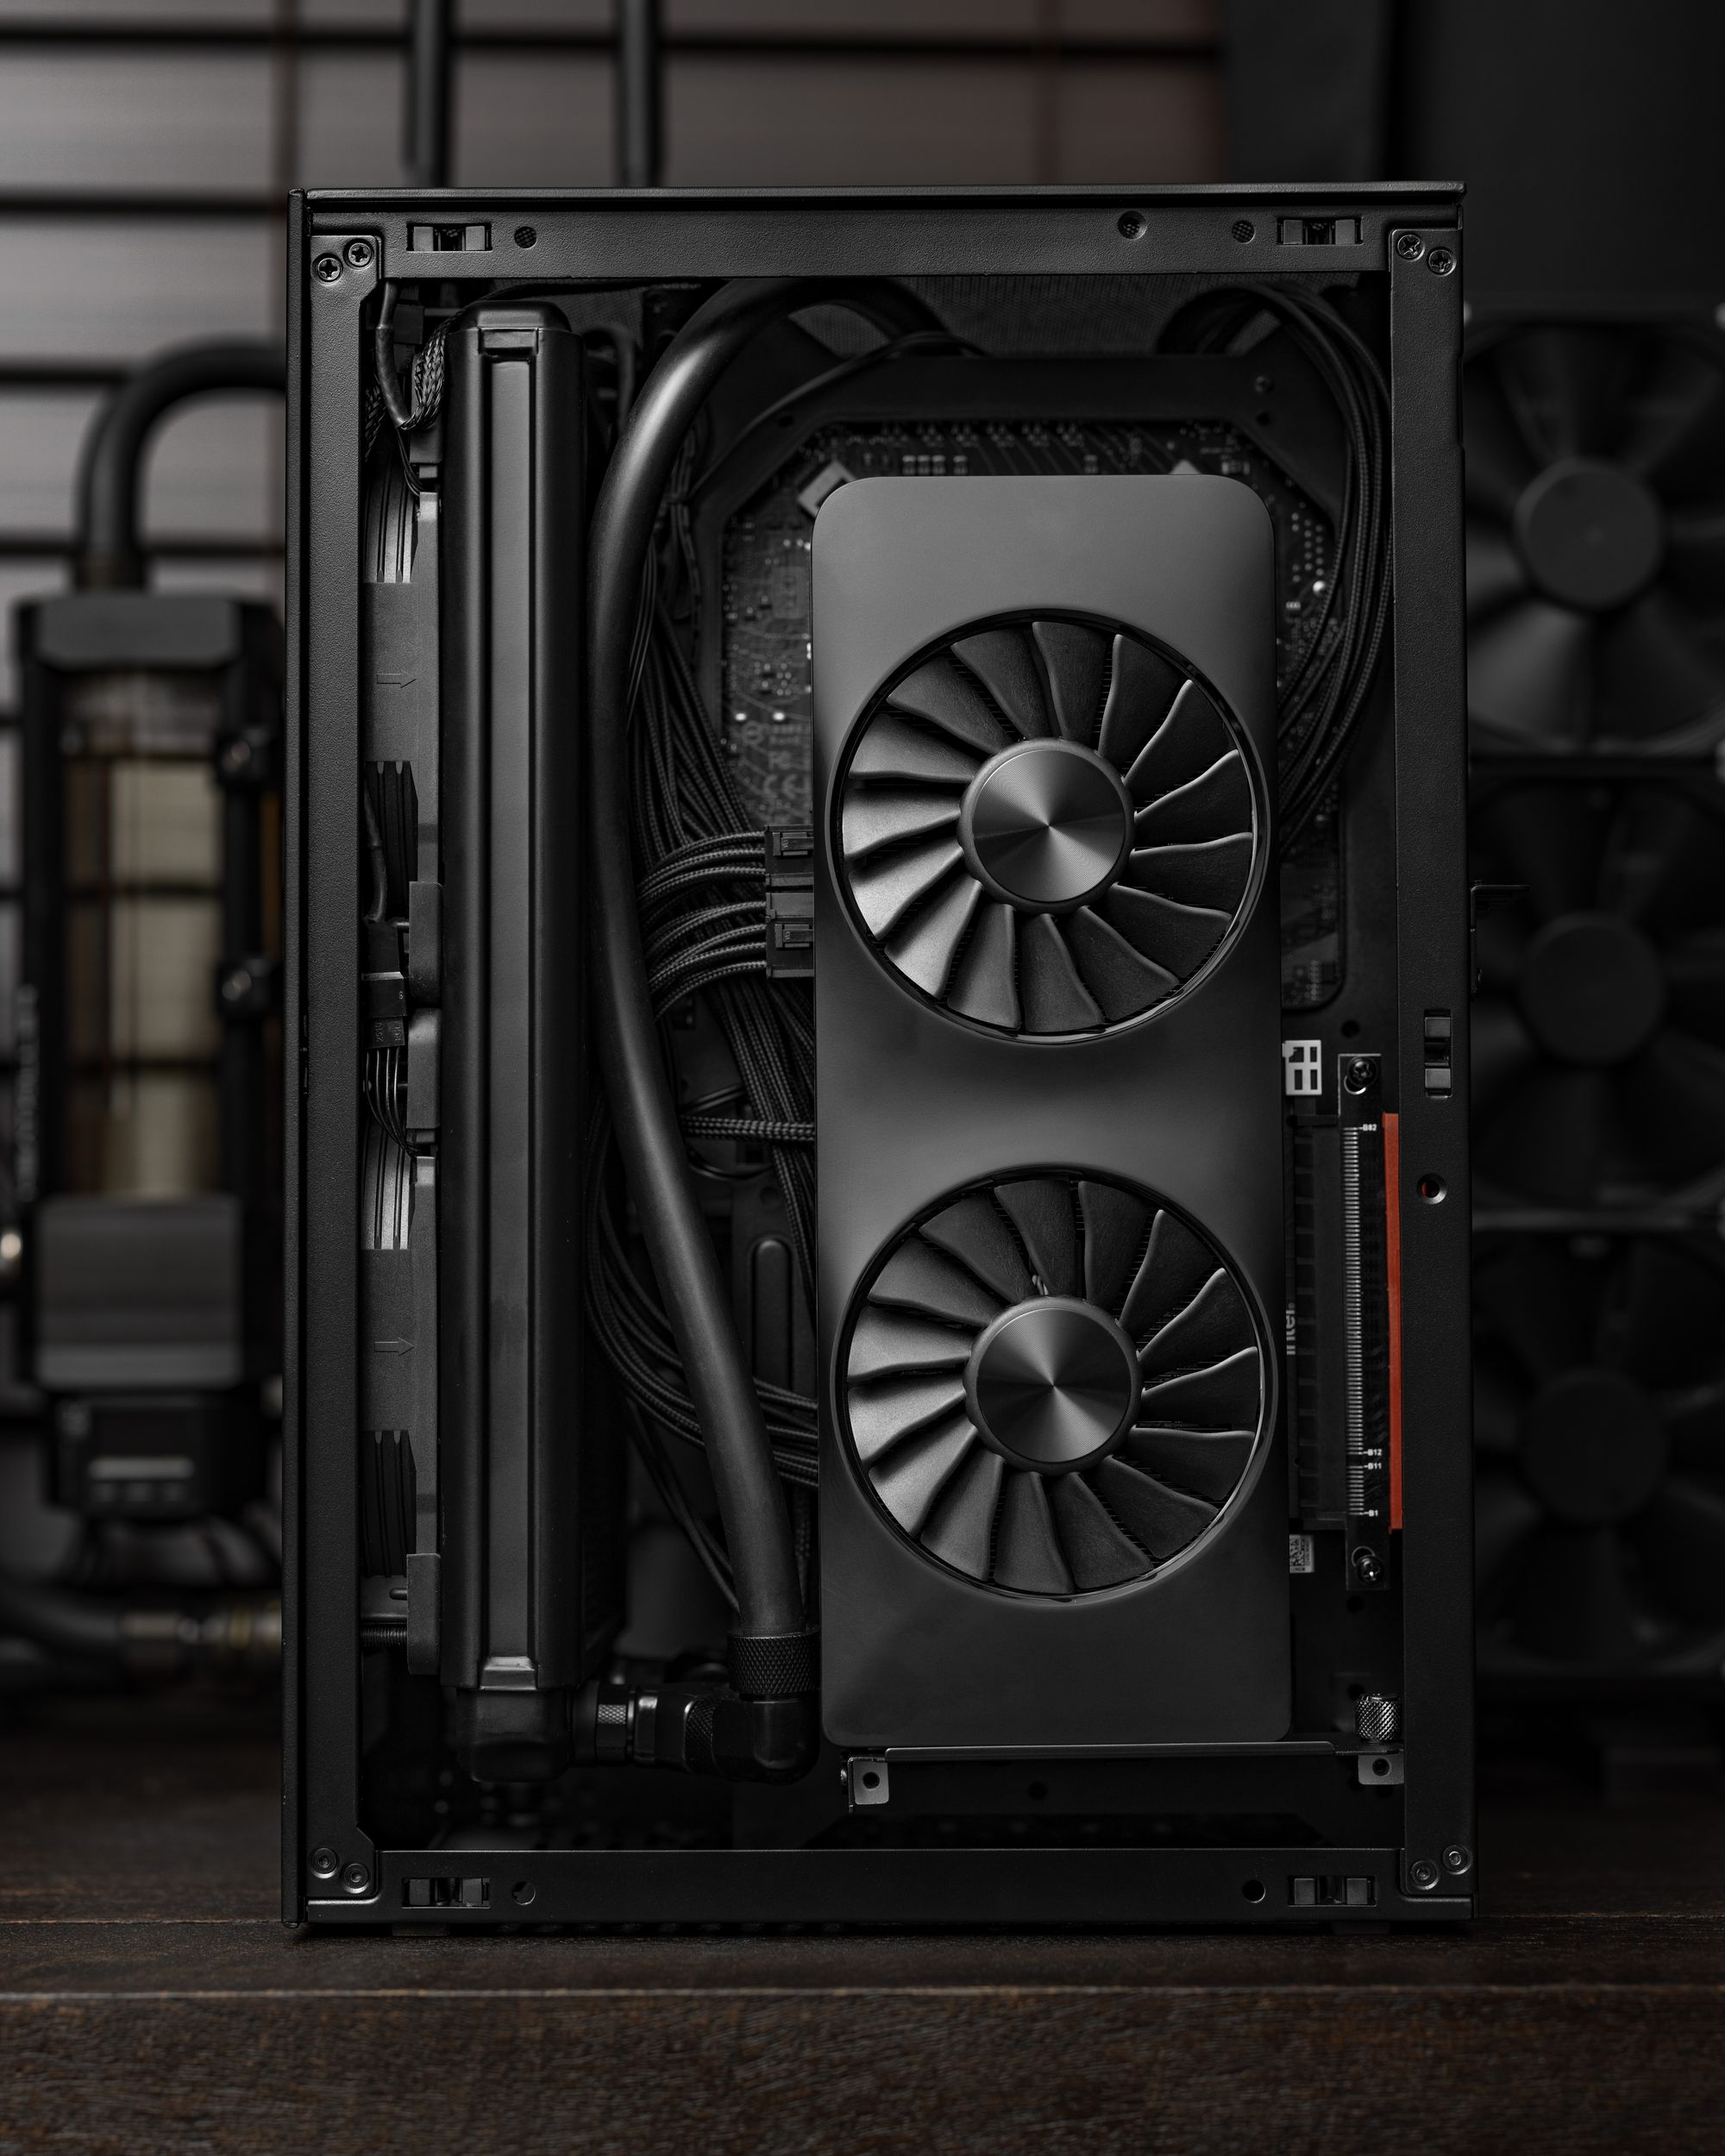
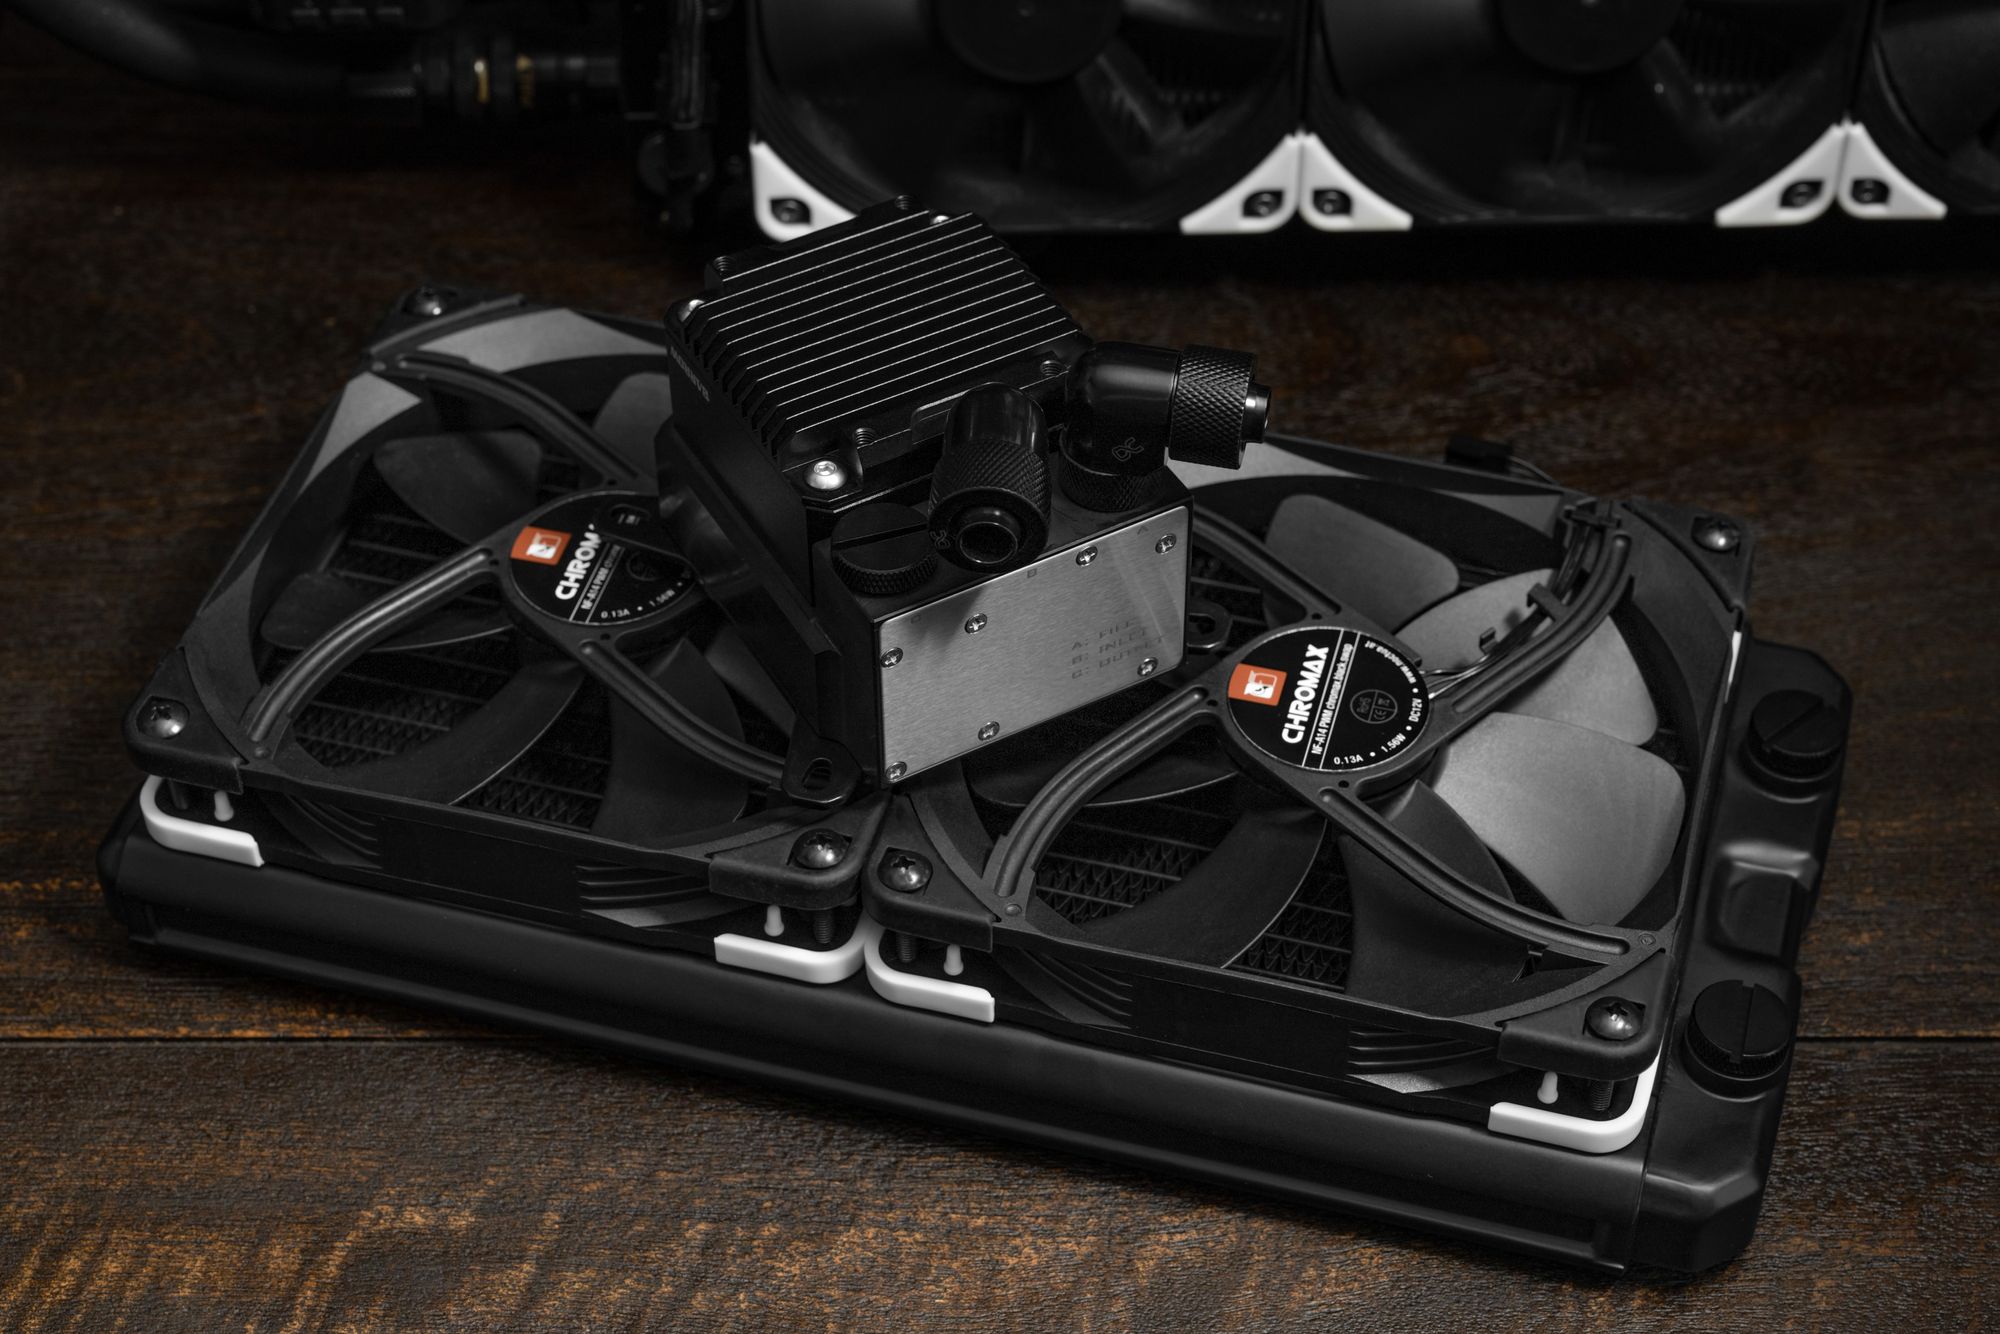
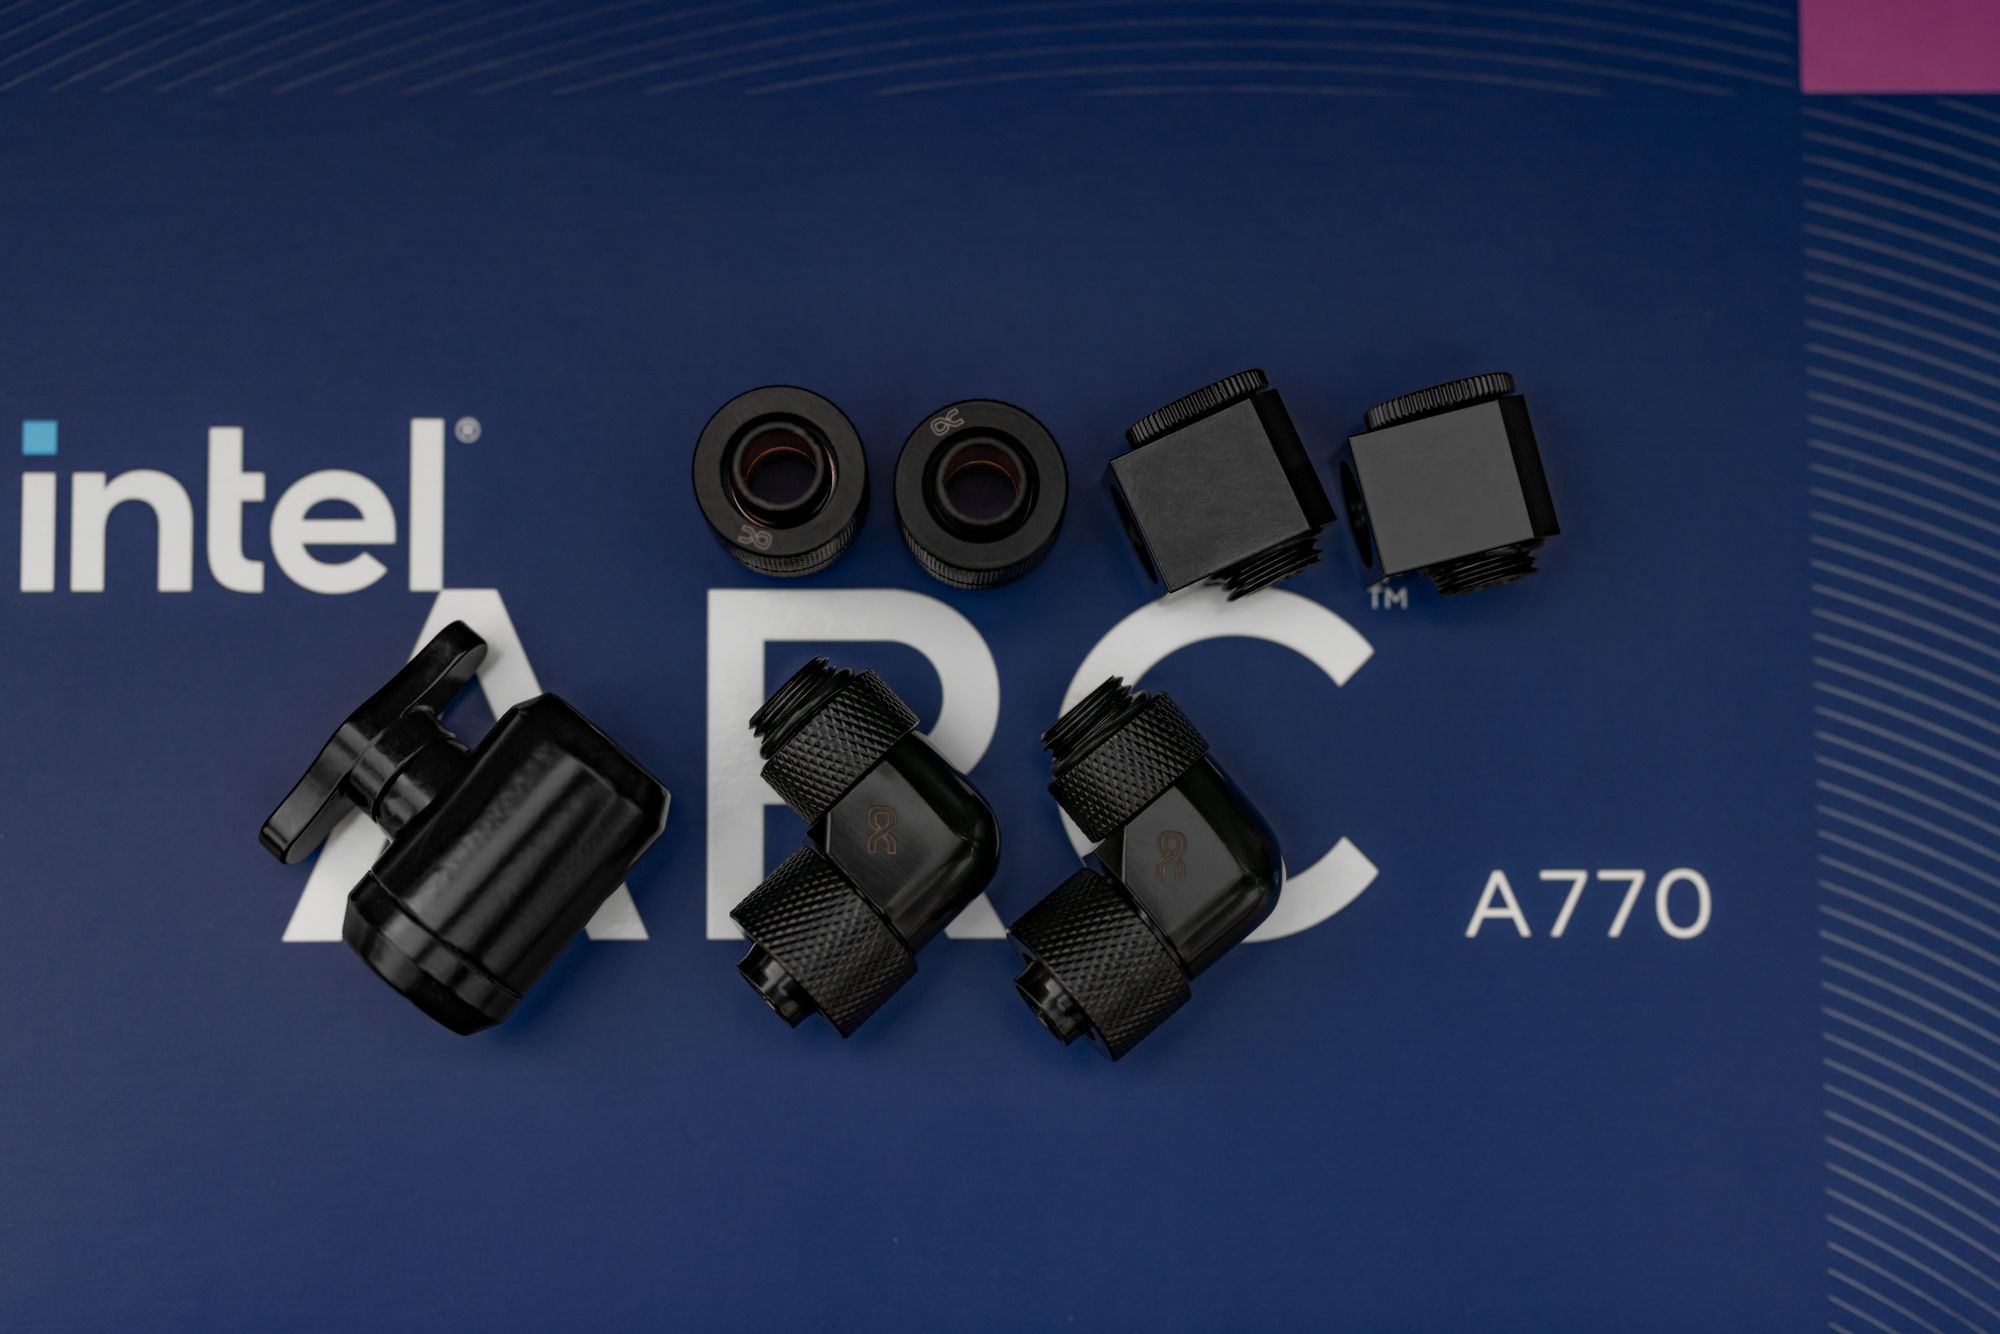
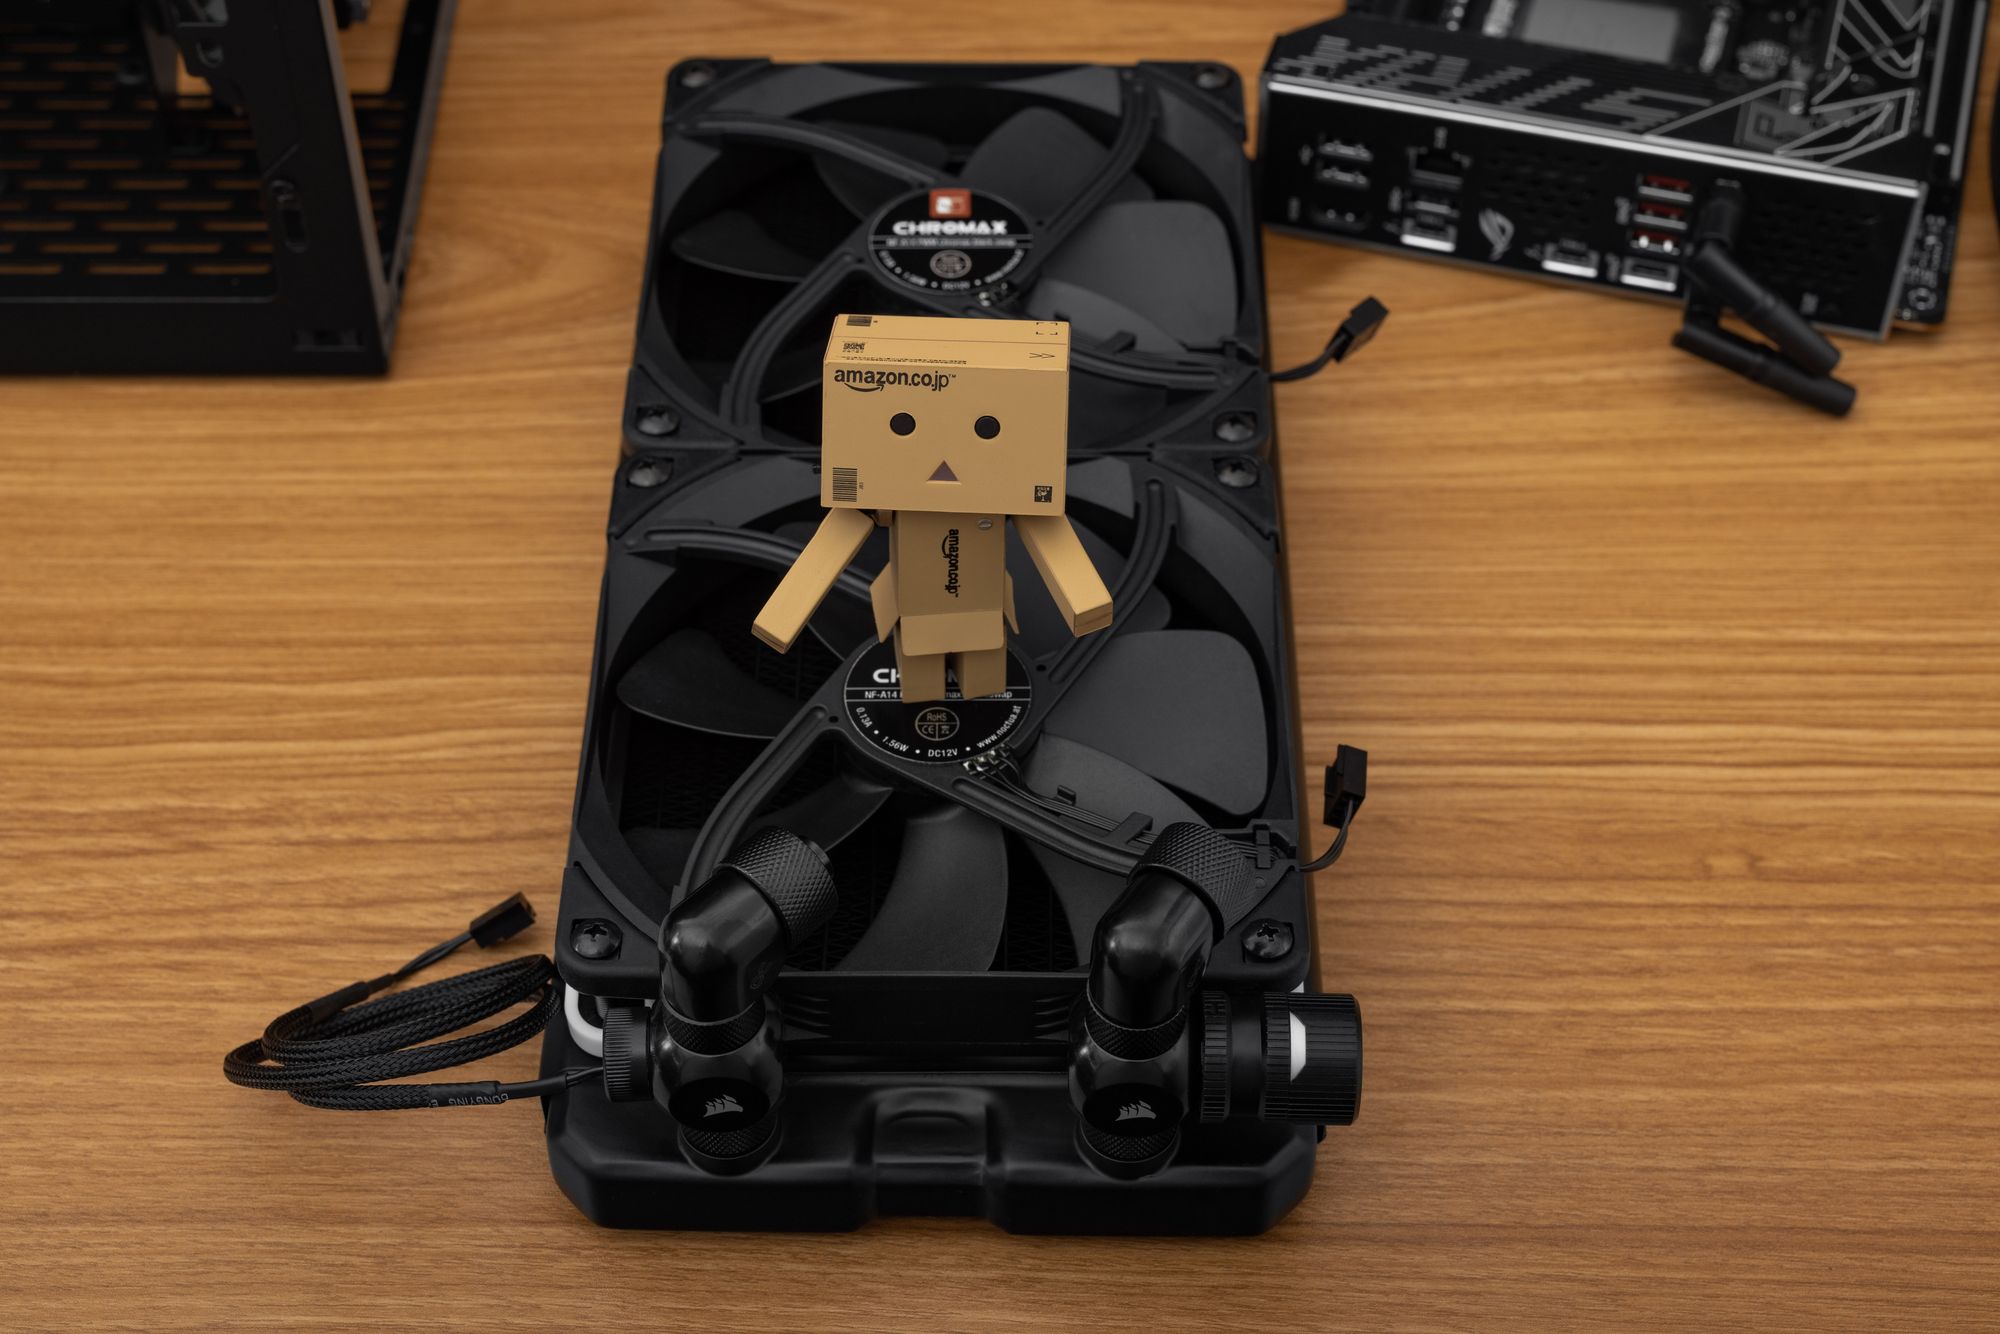
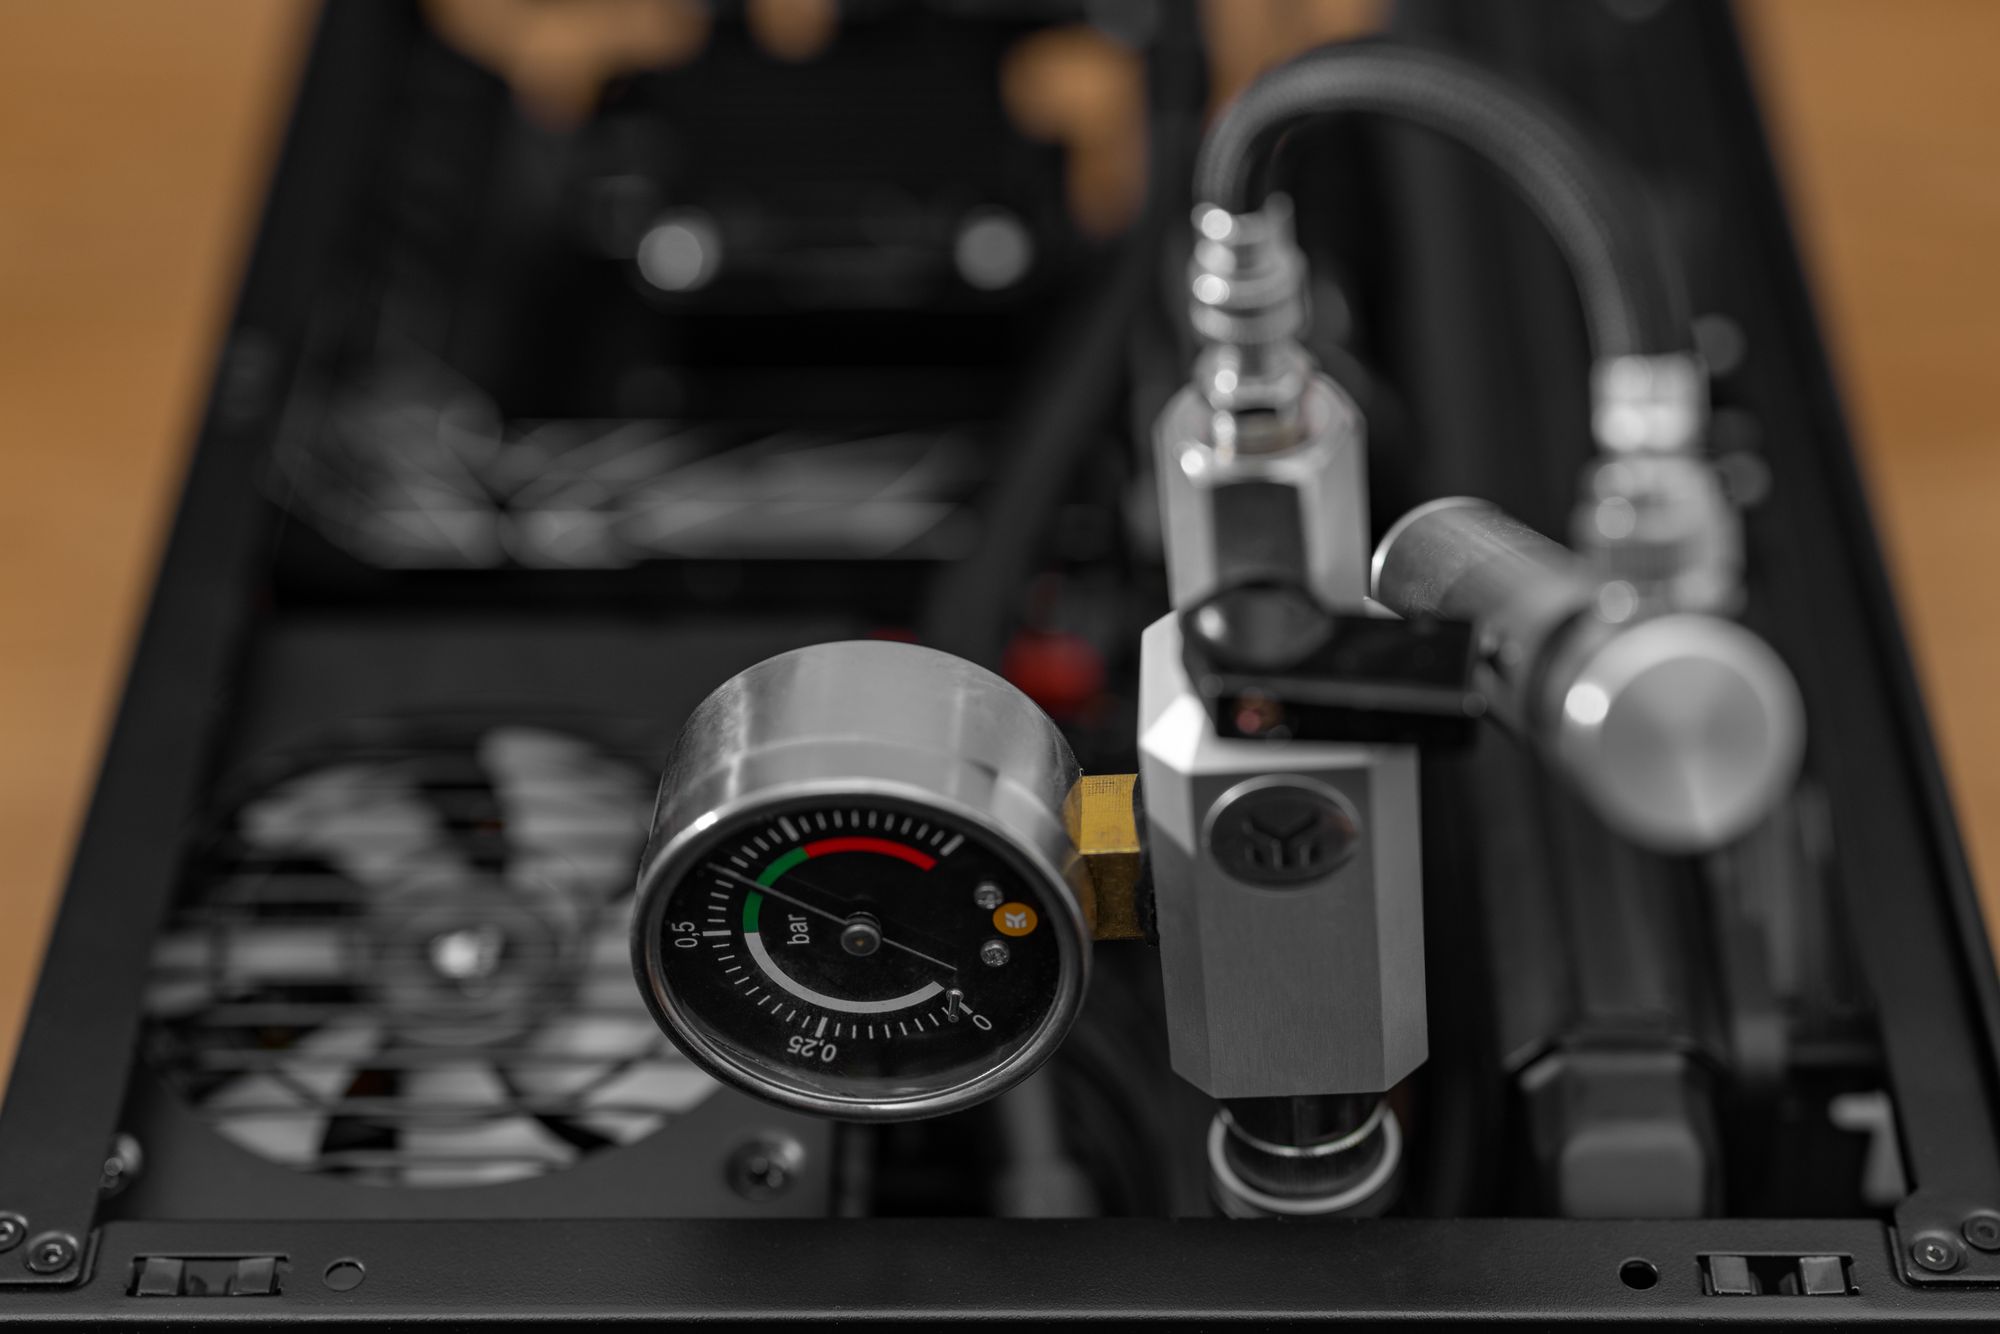
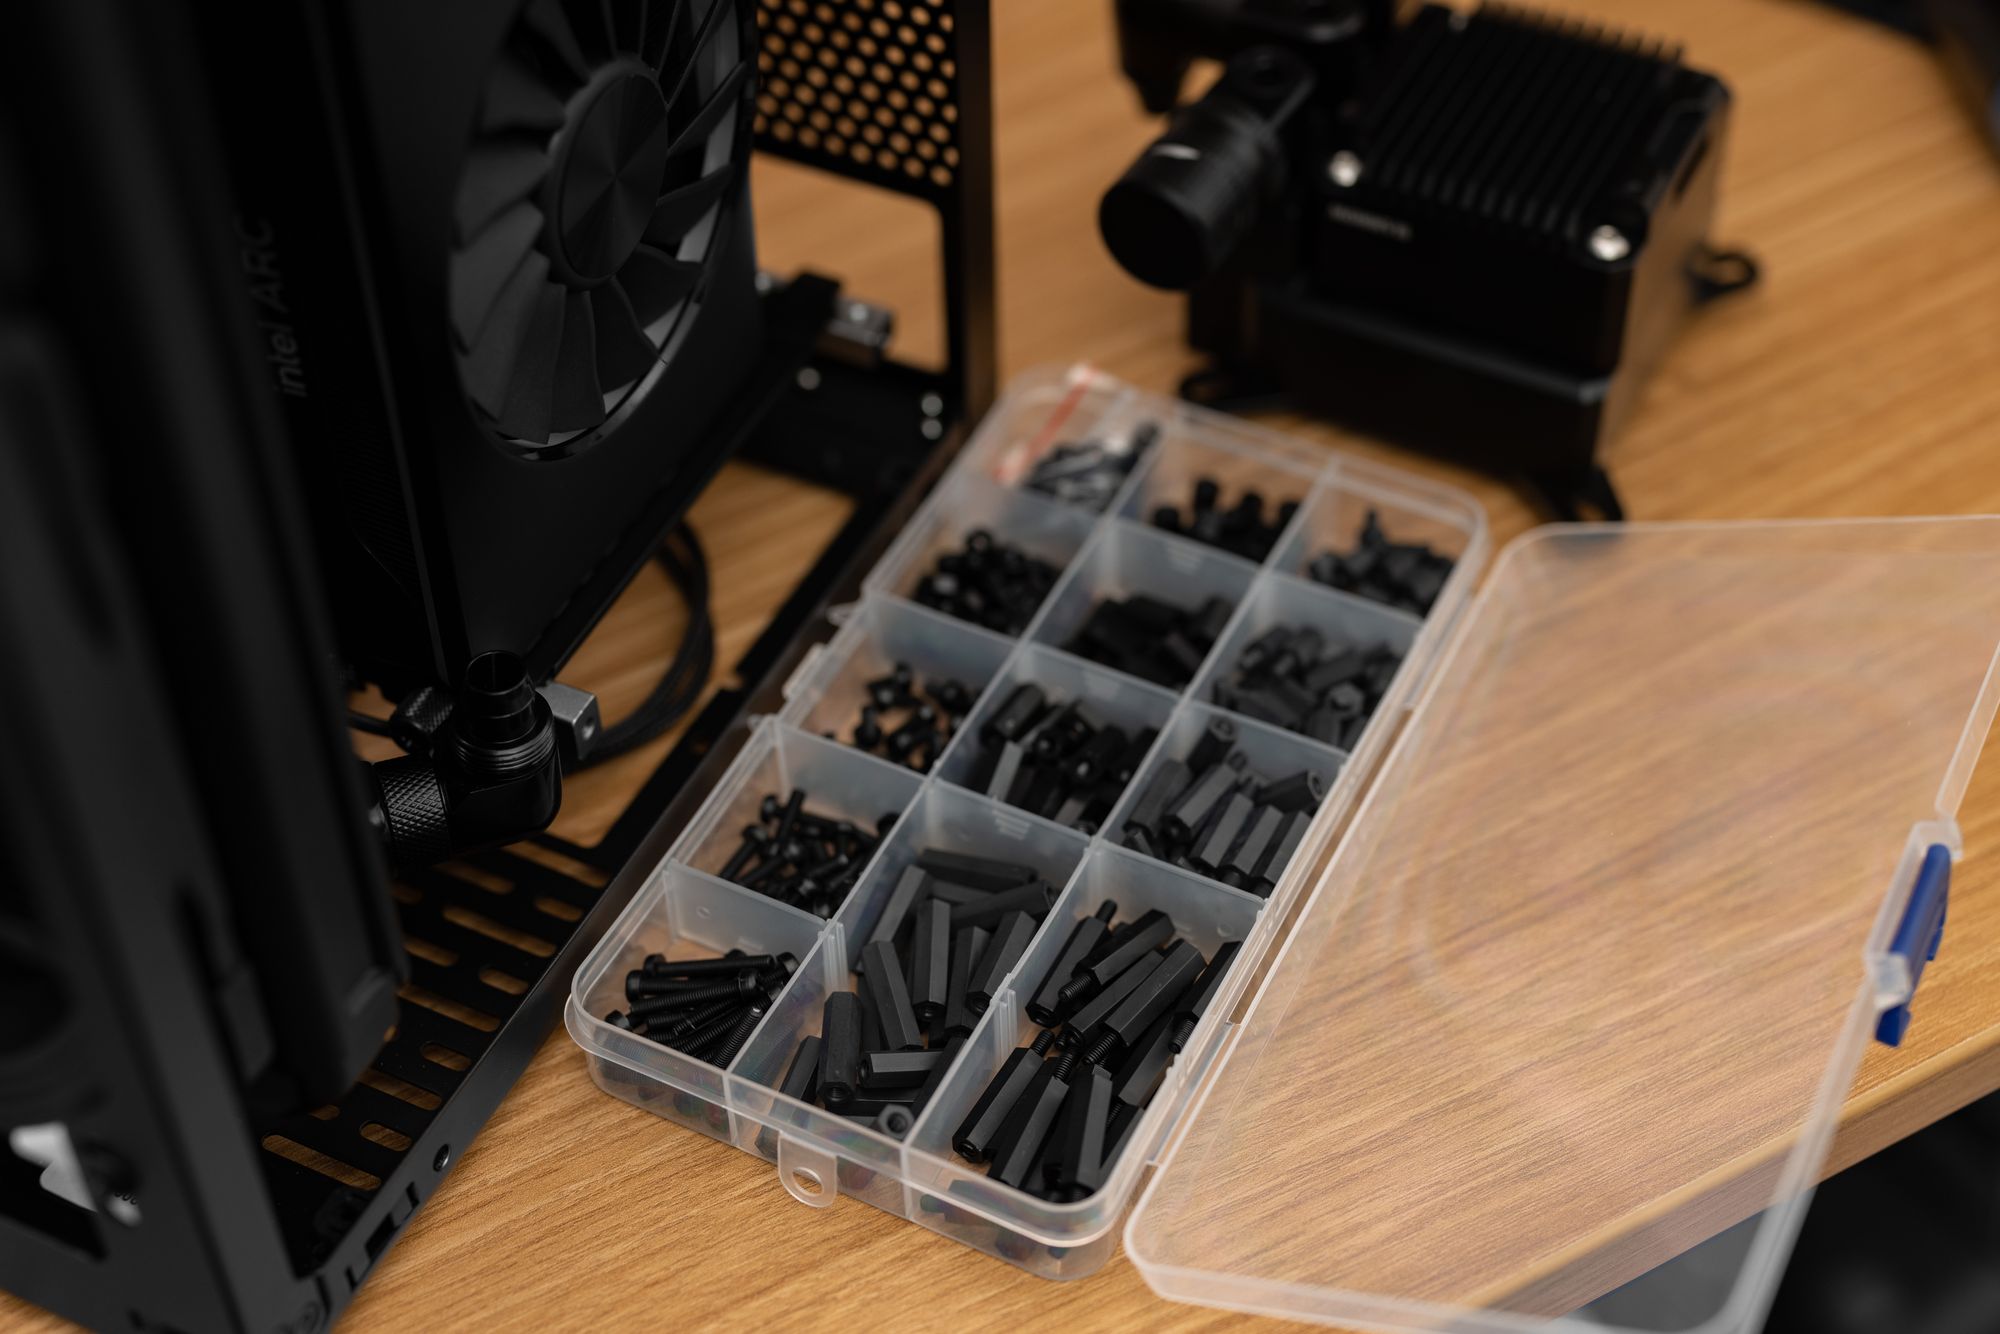
Going shopping for fittings was interesting. There are lots of low-profile options now. Far more than the first time I considered SFF water cooling. I went with smaller diameter tubing to see if it would make the agonizing process of getting compression fittings over EPDM easier. It did not. My hands are still a tad sore even after soaking the ends of the tubing in distilled water. I am happy with the smaller footprint of the tube runs though. Alphacool makes 10/13 EPDM (aka ZMT) tubing and low-profile fittings to match. I used 3x EK-Quantum Torque Micro Rotary 90s, 2x EK-Quantum Torque drain valves, a Koolance NZL-LXG2-BK and Y-Splitter, a Corsair XF Rotary Y-Splitter and temp sensor, and a Hardware Labs Black Ice Nemesis 280GTS.
The EK Micro 90s are amazing. They come in slightly taller than the Koolance fittings, but the rotary aspect is infinitely more appealing. Tightening via Allen key is easier than the Koolance fittings’ coin slot. Some of the Koolance marketing language had swivel in it, but this was later changed to “adjustable” since it could lead some to think they are rotary. They are not. They cannot be moved in any direction once in place.
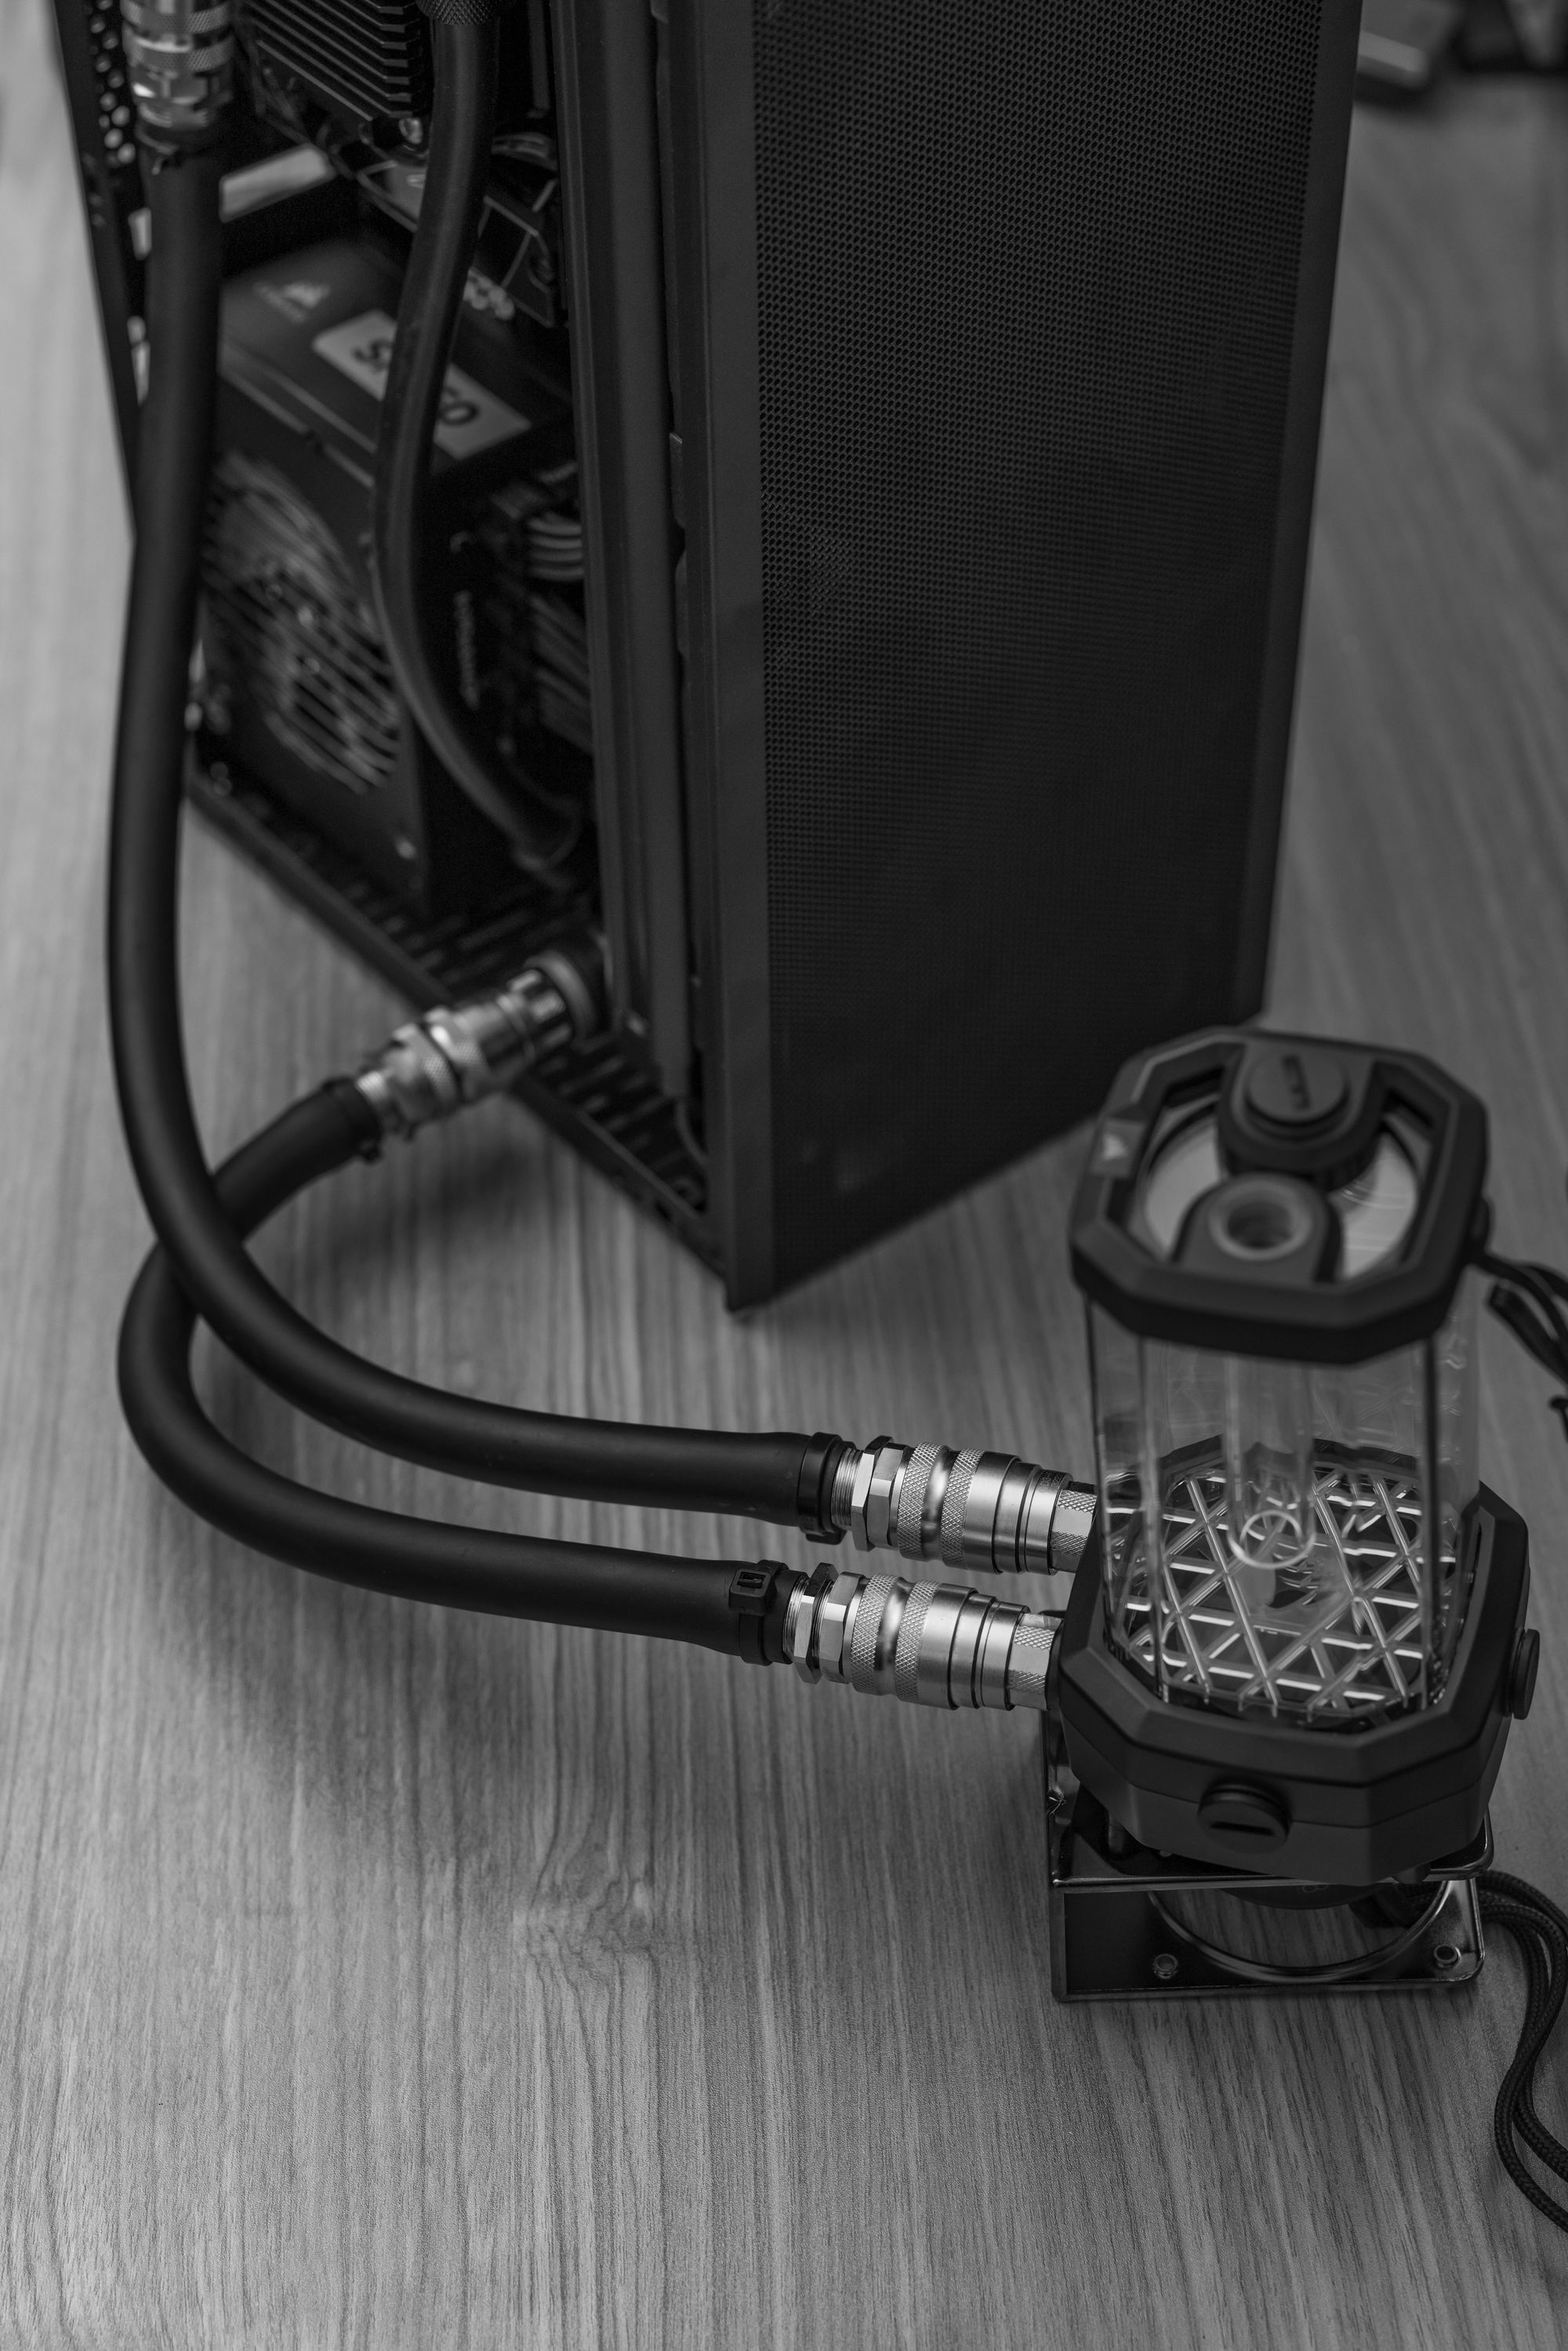
You may be asking why I have two drain valves. This enabled me to cheat by using a pump/res combo to externally fill the loop. I did not want to take any chances that I under-filled since the pump/block is acetal, and no part of the loop is transparent. I spent far less time twisting, turning, and shaking to bleed the loop than if I had used the fill port. I was done in about 30 minutes. If you repeat this trick, just beware of the small amount of liquid that will sit between the drain valve and the QDC when you disconnect. Have a paper towel handy and it will absorb what little remains.
This is my first time using a DDC pump. My previous builds have always had space for a D5. I am sure I could have put one in here, but I really wanted to use the Barrow pump/block. I had concerns about volume, as I am sure most do when considering a DDC, but it really wasn’t bad. It’s the vibration that made me turn the pump down. I wonder if I could have put a silicone gasket behind the retention bracket to reduce it. At around 50%, the vibration becomes negligible. Testing from full power to 50% didn’t see any change in temperature under common workloads.
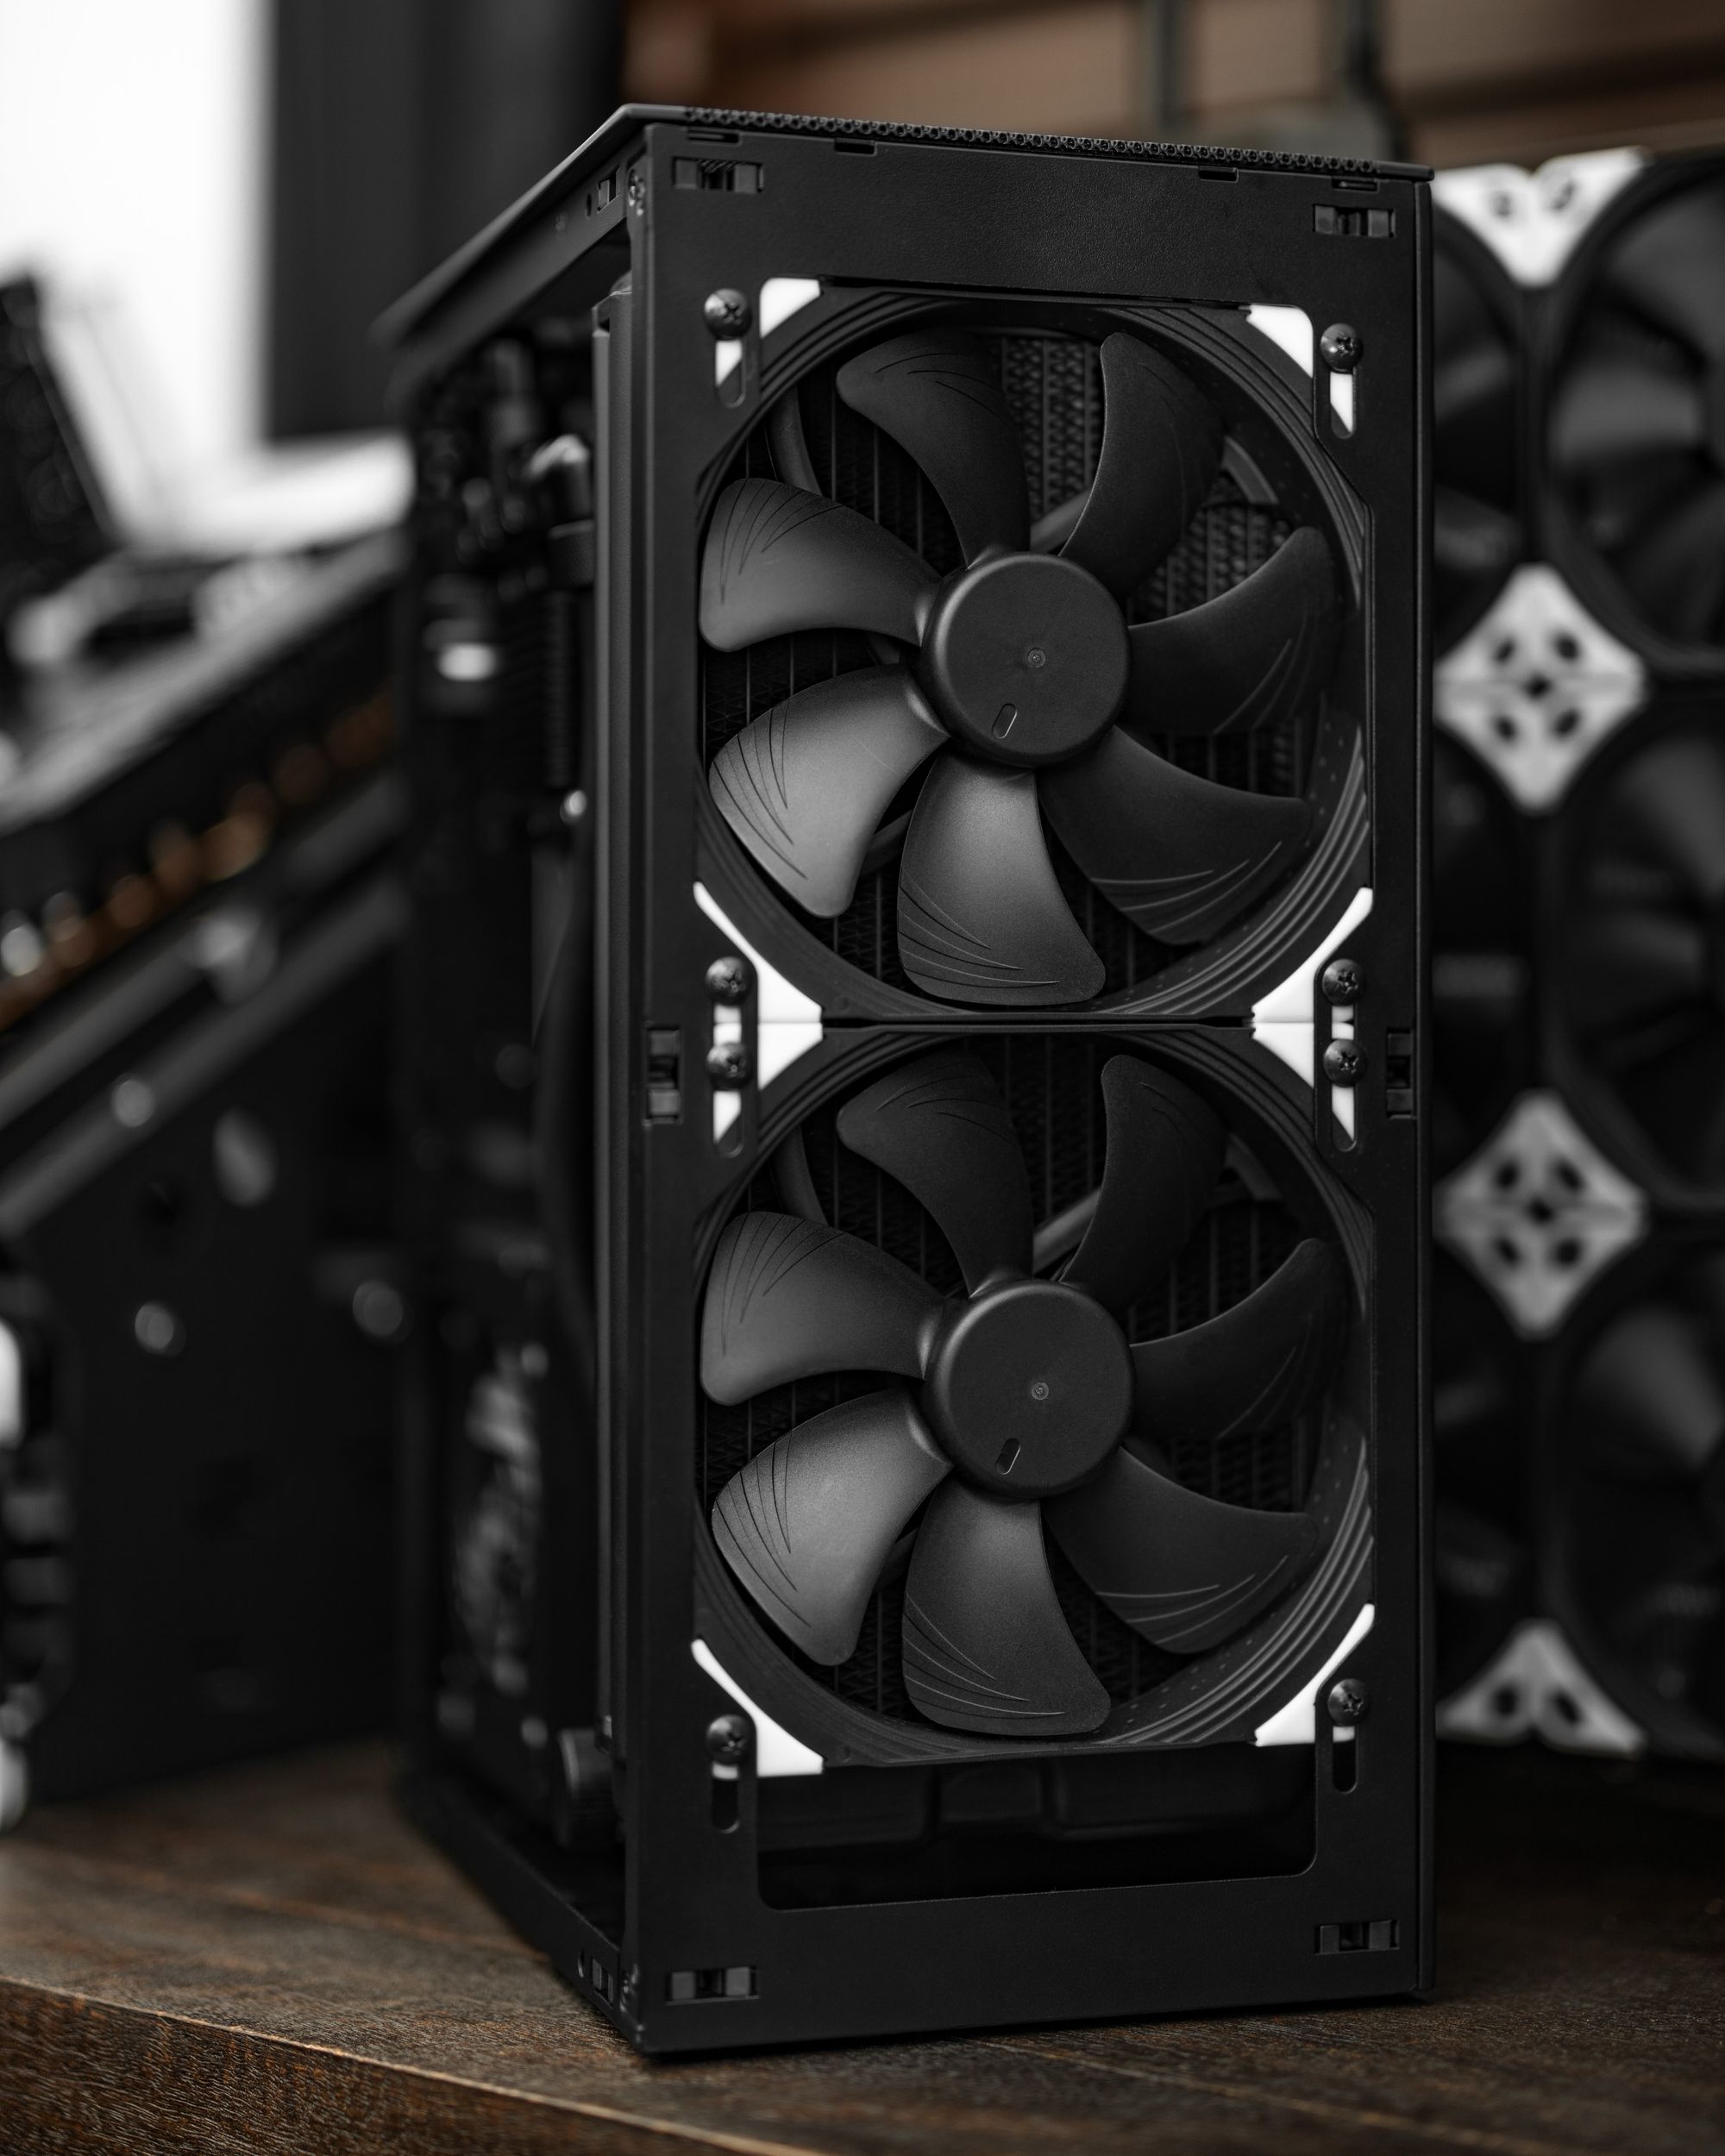
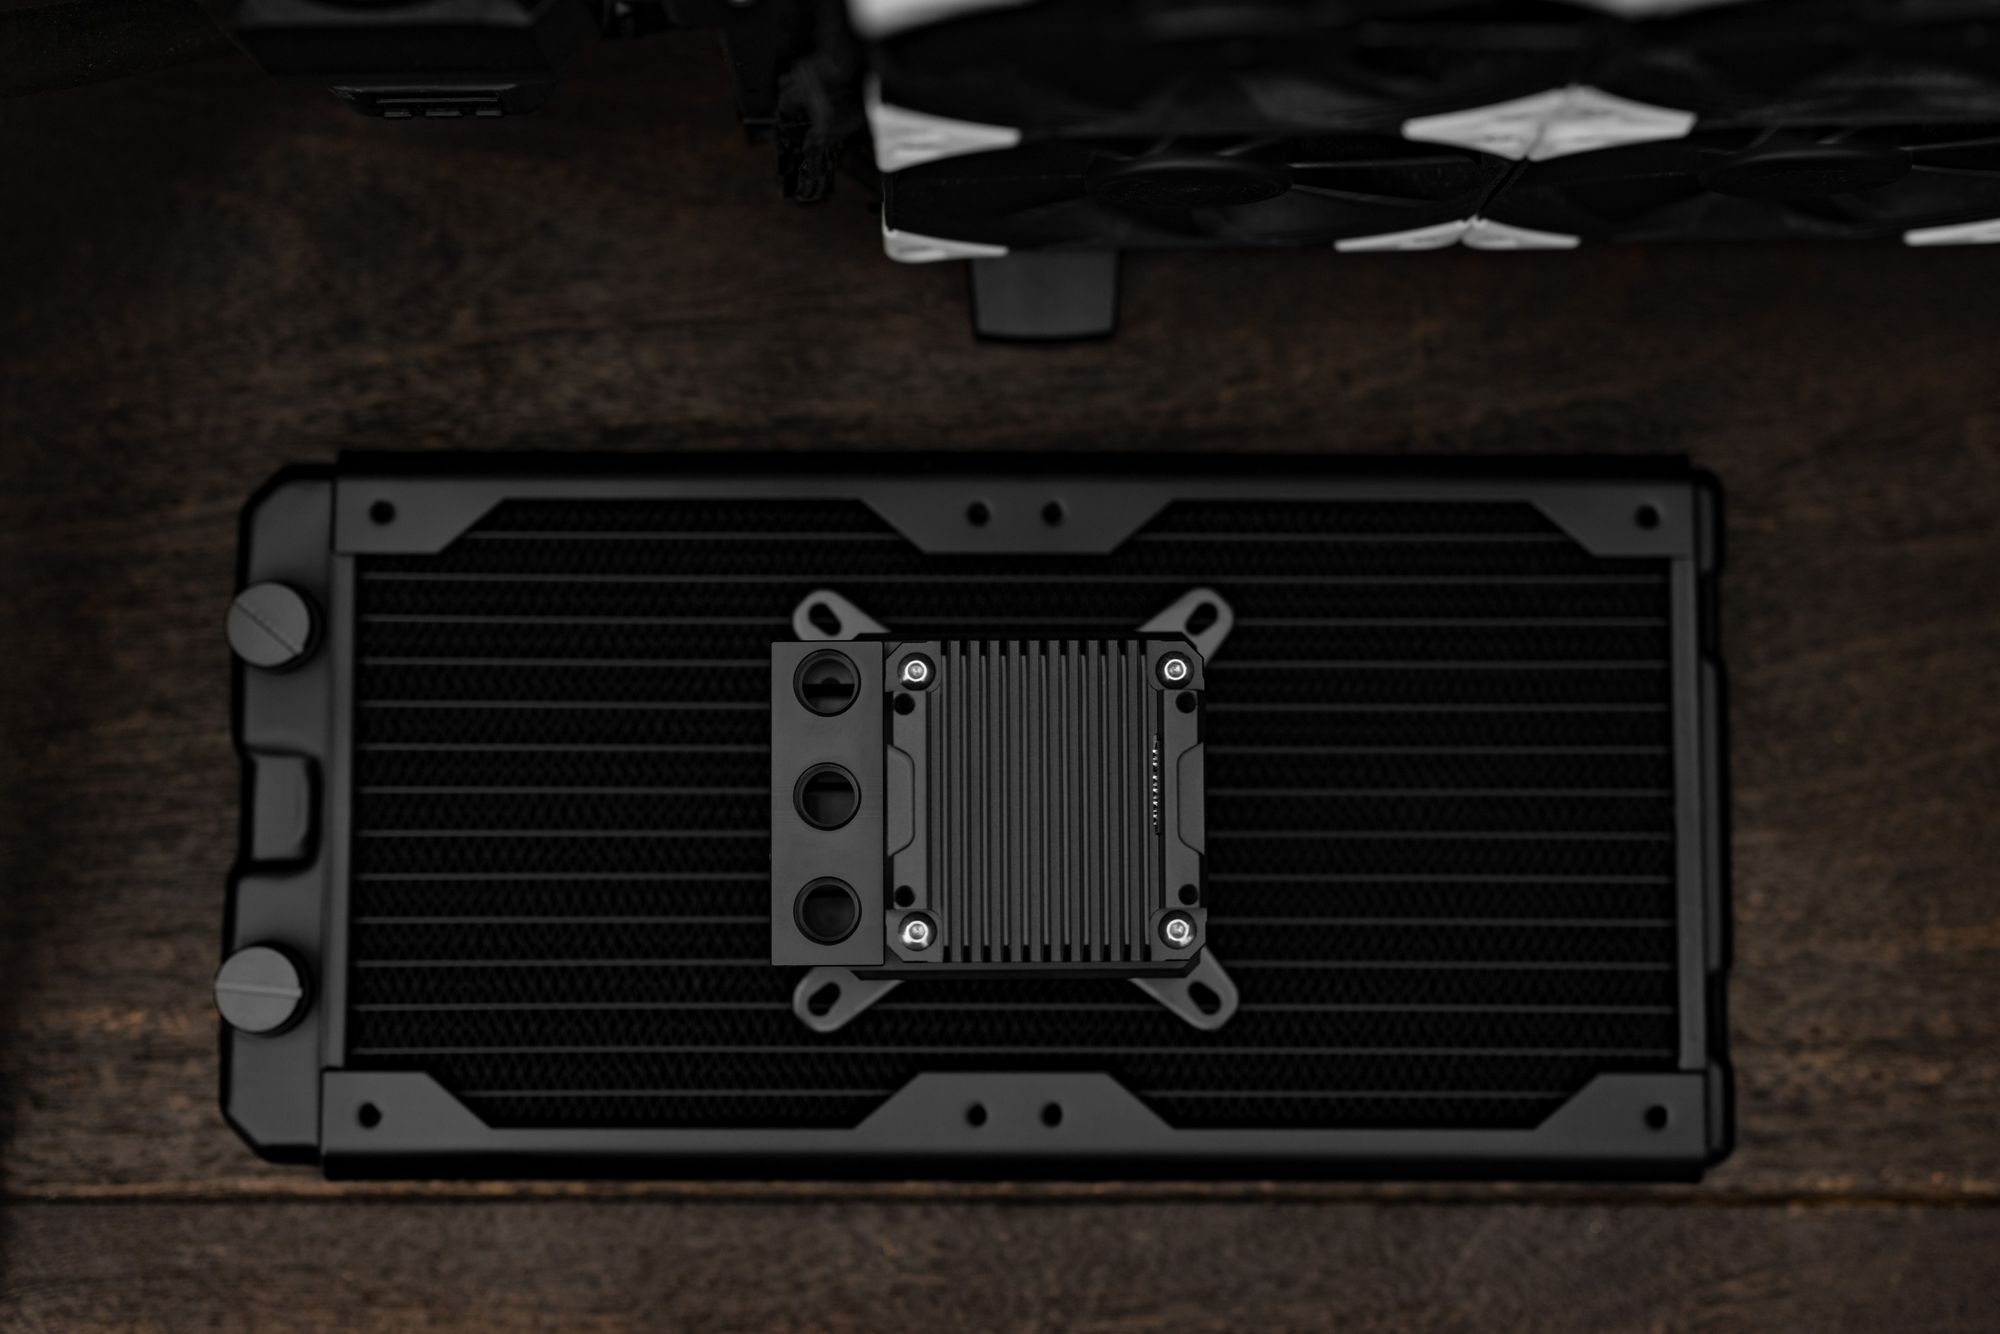
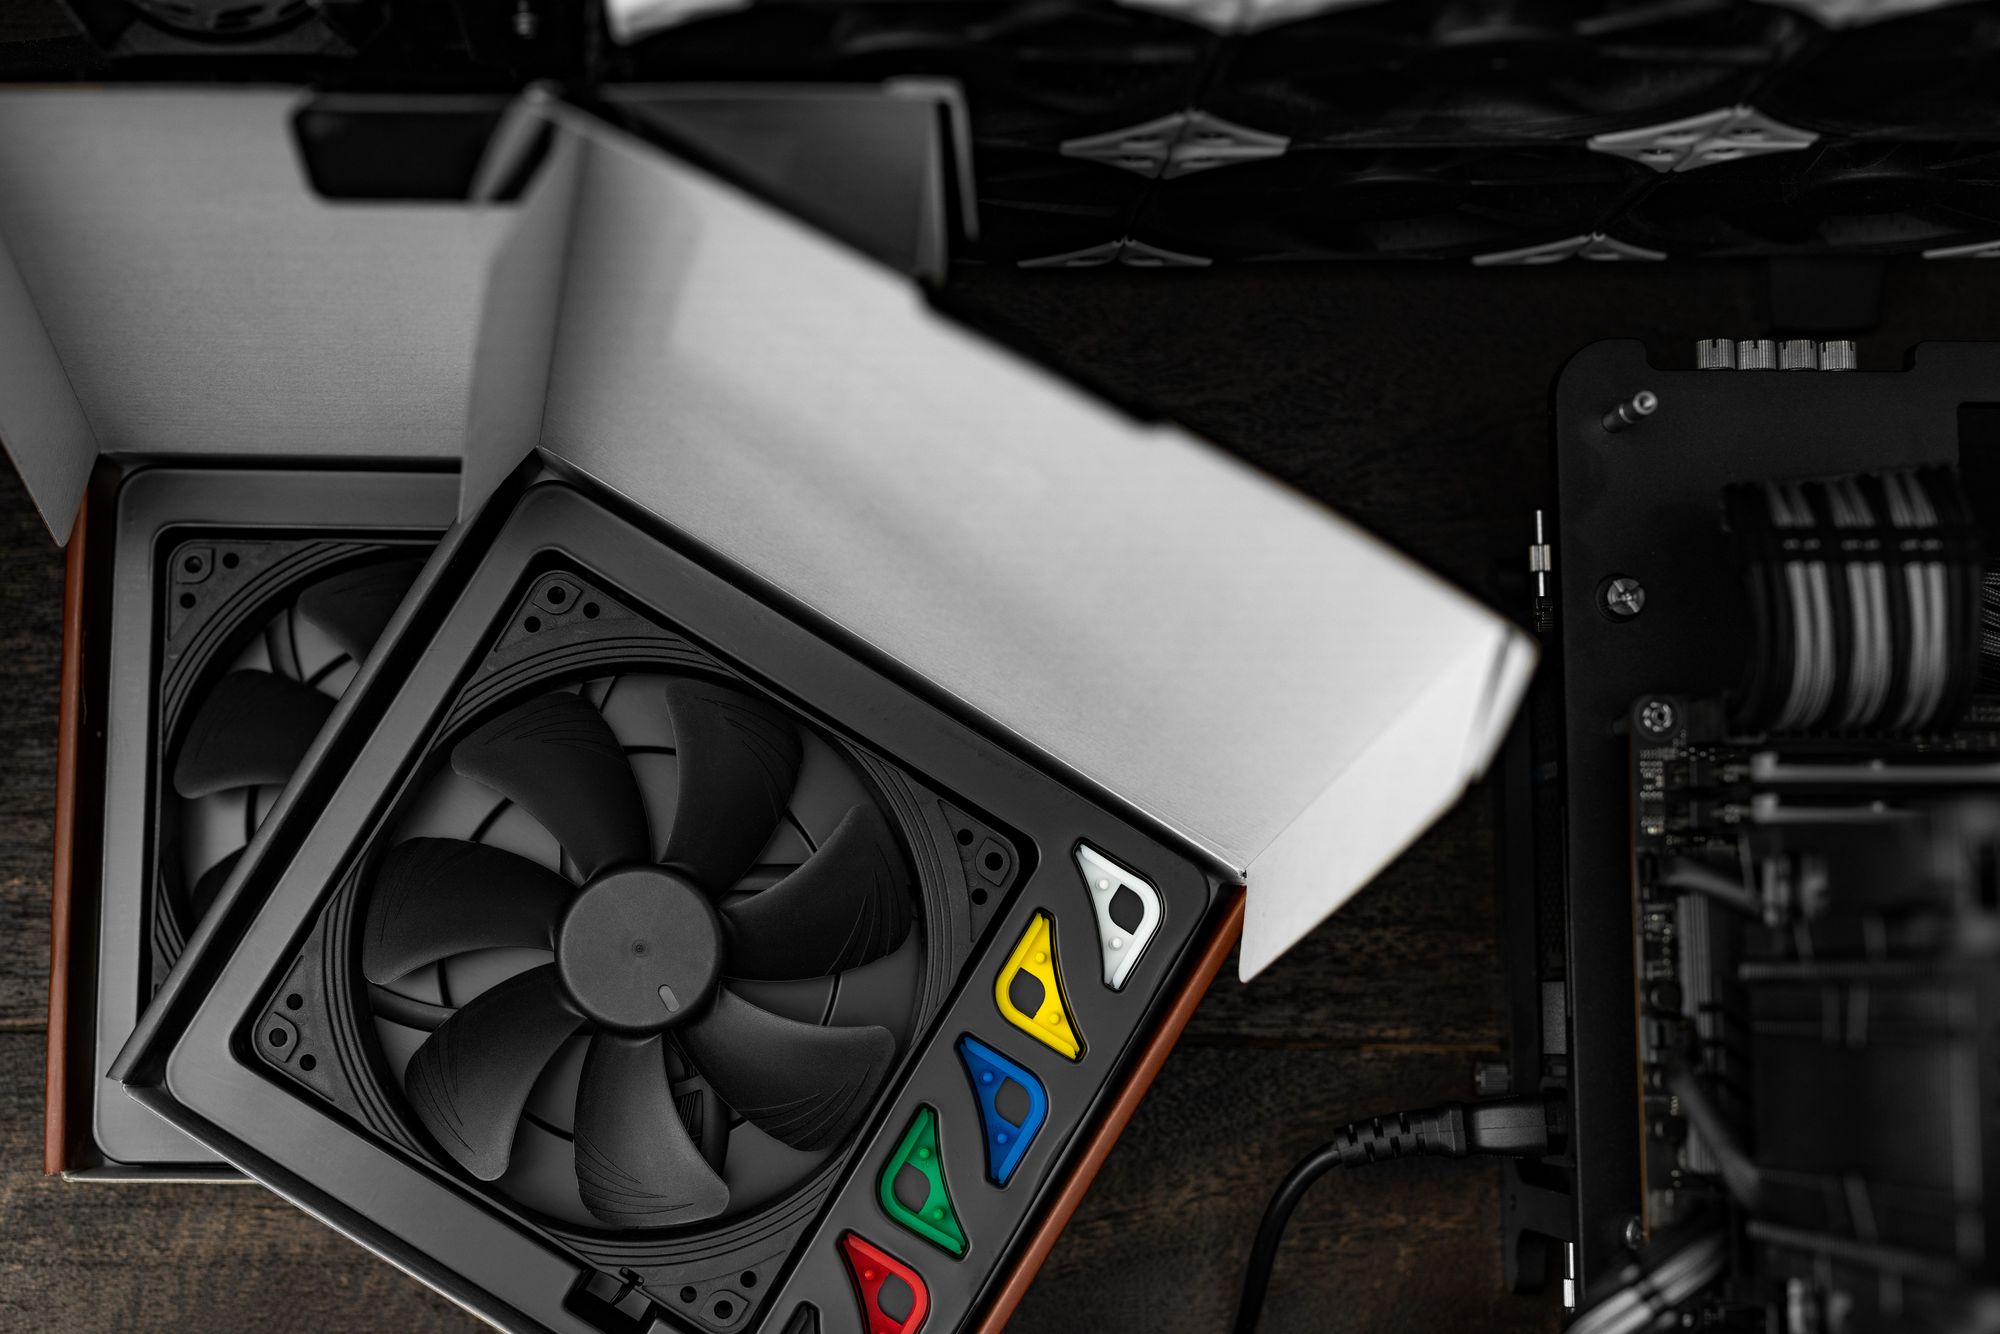
I chose the Hardware Labs 280GTS radiator because Hardware Labs has an excellent reputation (They are the OEM for Corsair’s XR5 and XR7 rads). The 30mm profile allowed plenty of space for my splitter/drain config to line up perfectly with the bottom of the case. I paired it with Noctua NF-A14 fans since it looks like we’re waiting another year for Sterrox based versions. There are other things out there like the T30s, but Noctua is my go-to. I’ve used their fans for years and they go above and beyond in terms of customer service (i.e., that time they tracked down a discontinued fan for me and replaced it at no cost even though I destroyed it in a moment of carelessness). The motor noise also stays quiet over the years. Something I value after the Corsair and Fractal fans in previous builds became significantly louder.
The Build Process
While SFF builds can be challenging, I wouldn’t say this was one of those times. Every panel but the bottom is removable on the Meshlicious. It’s almost like cheating. Nothing is hard to reach until you’ve got almost everything installed. The part that gave me the most trouble was installing the GPU pegs. This came down to my choice of radiator and Y splitter fittings, so I had to attach 1 peg to the GPU, then screw that into the case from the other side. I did this using a right-angle micro-Phillips screwdriver. It was worth it to make sure I had a temperature sensor. Fan ramping based on CPU temp would otherwise drive me mad.
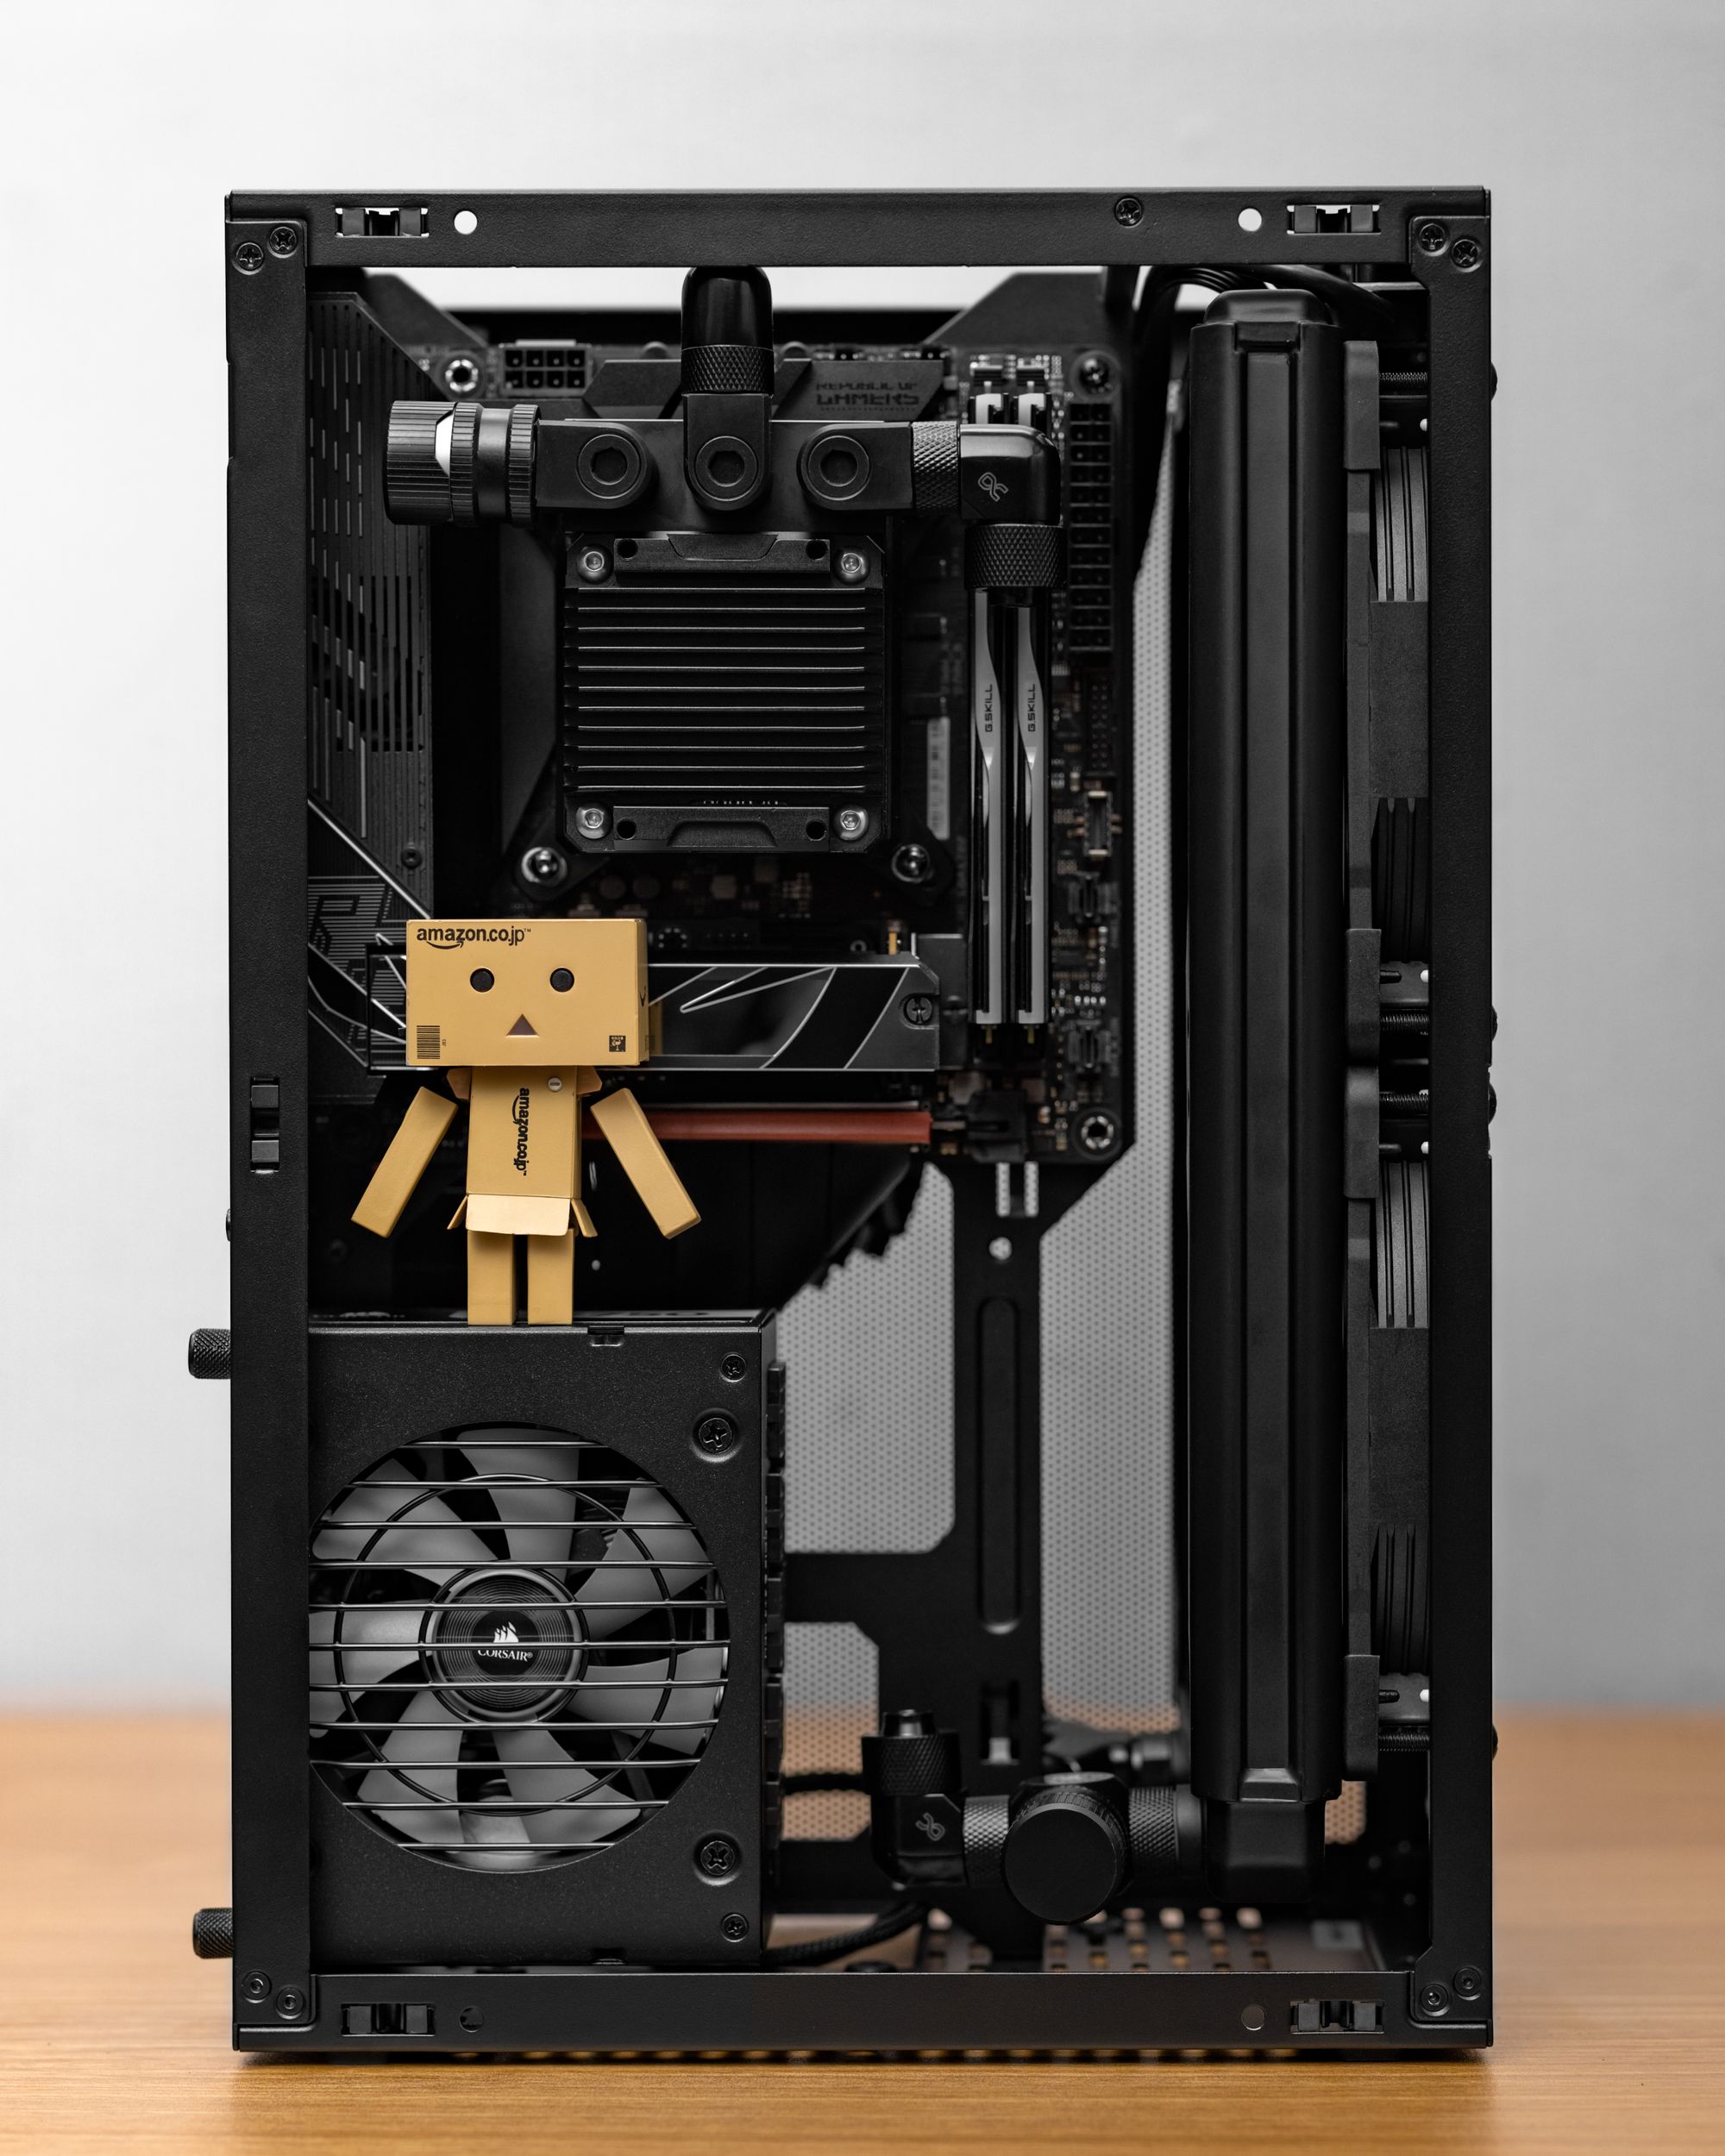
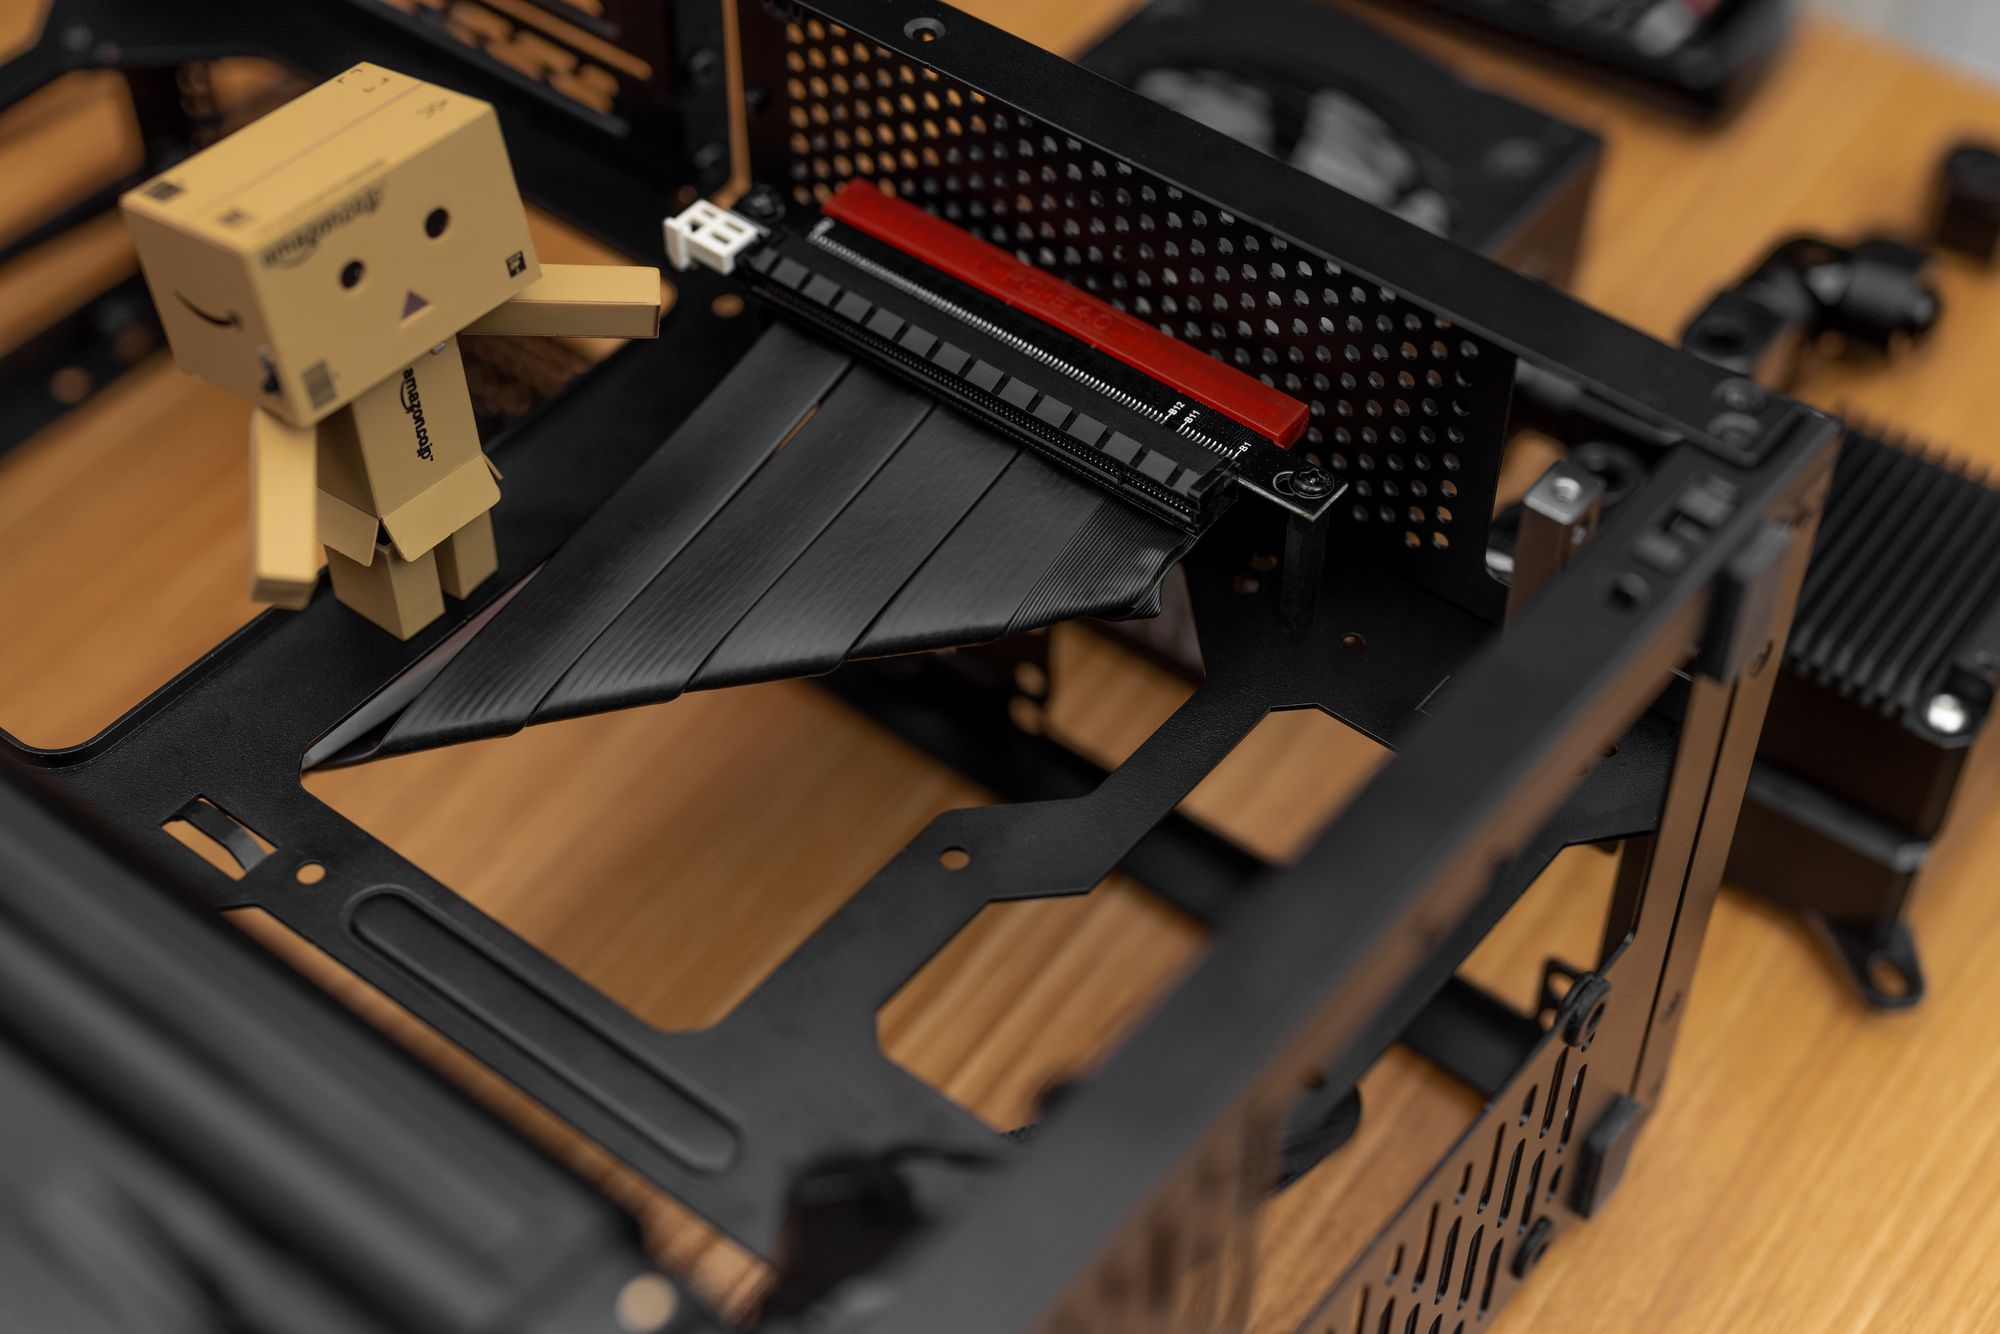
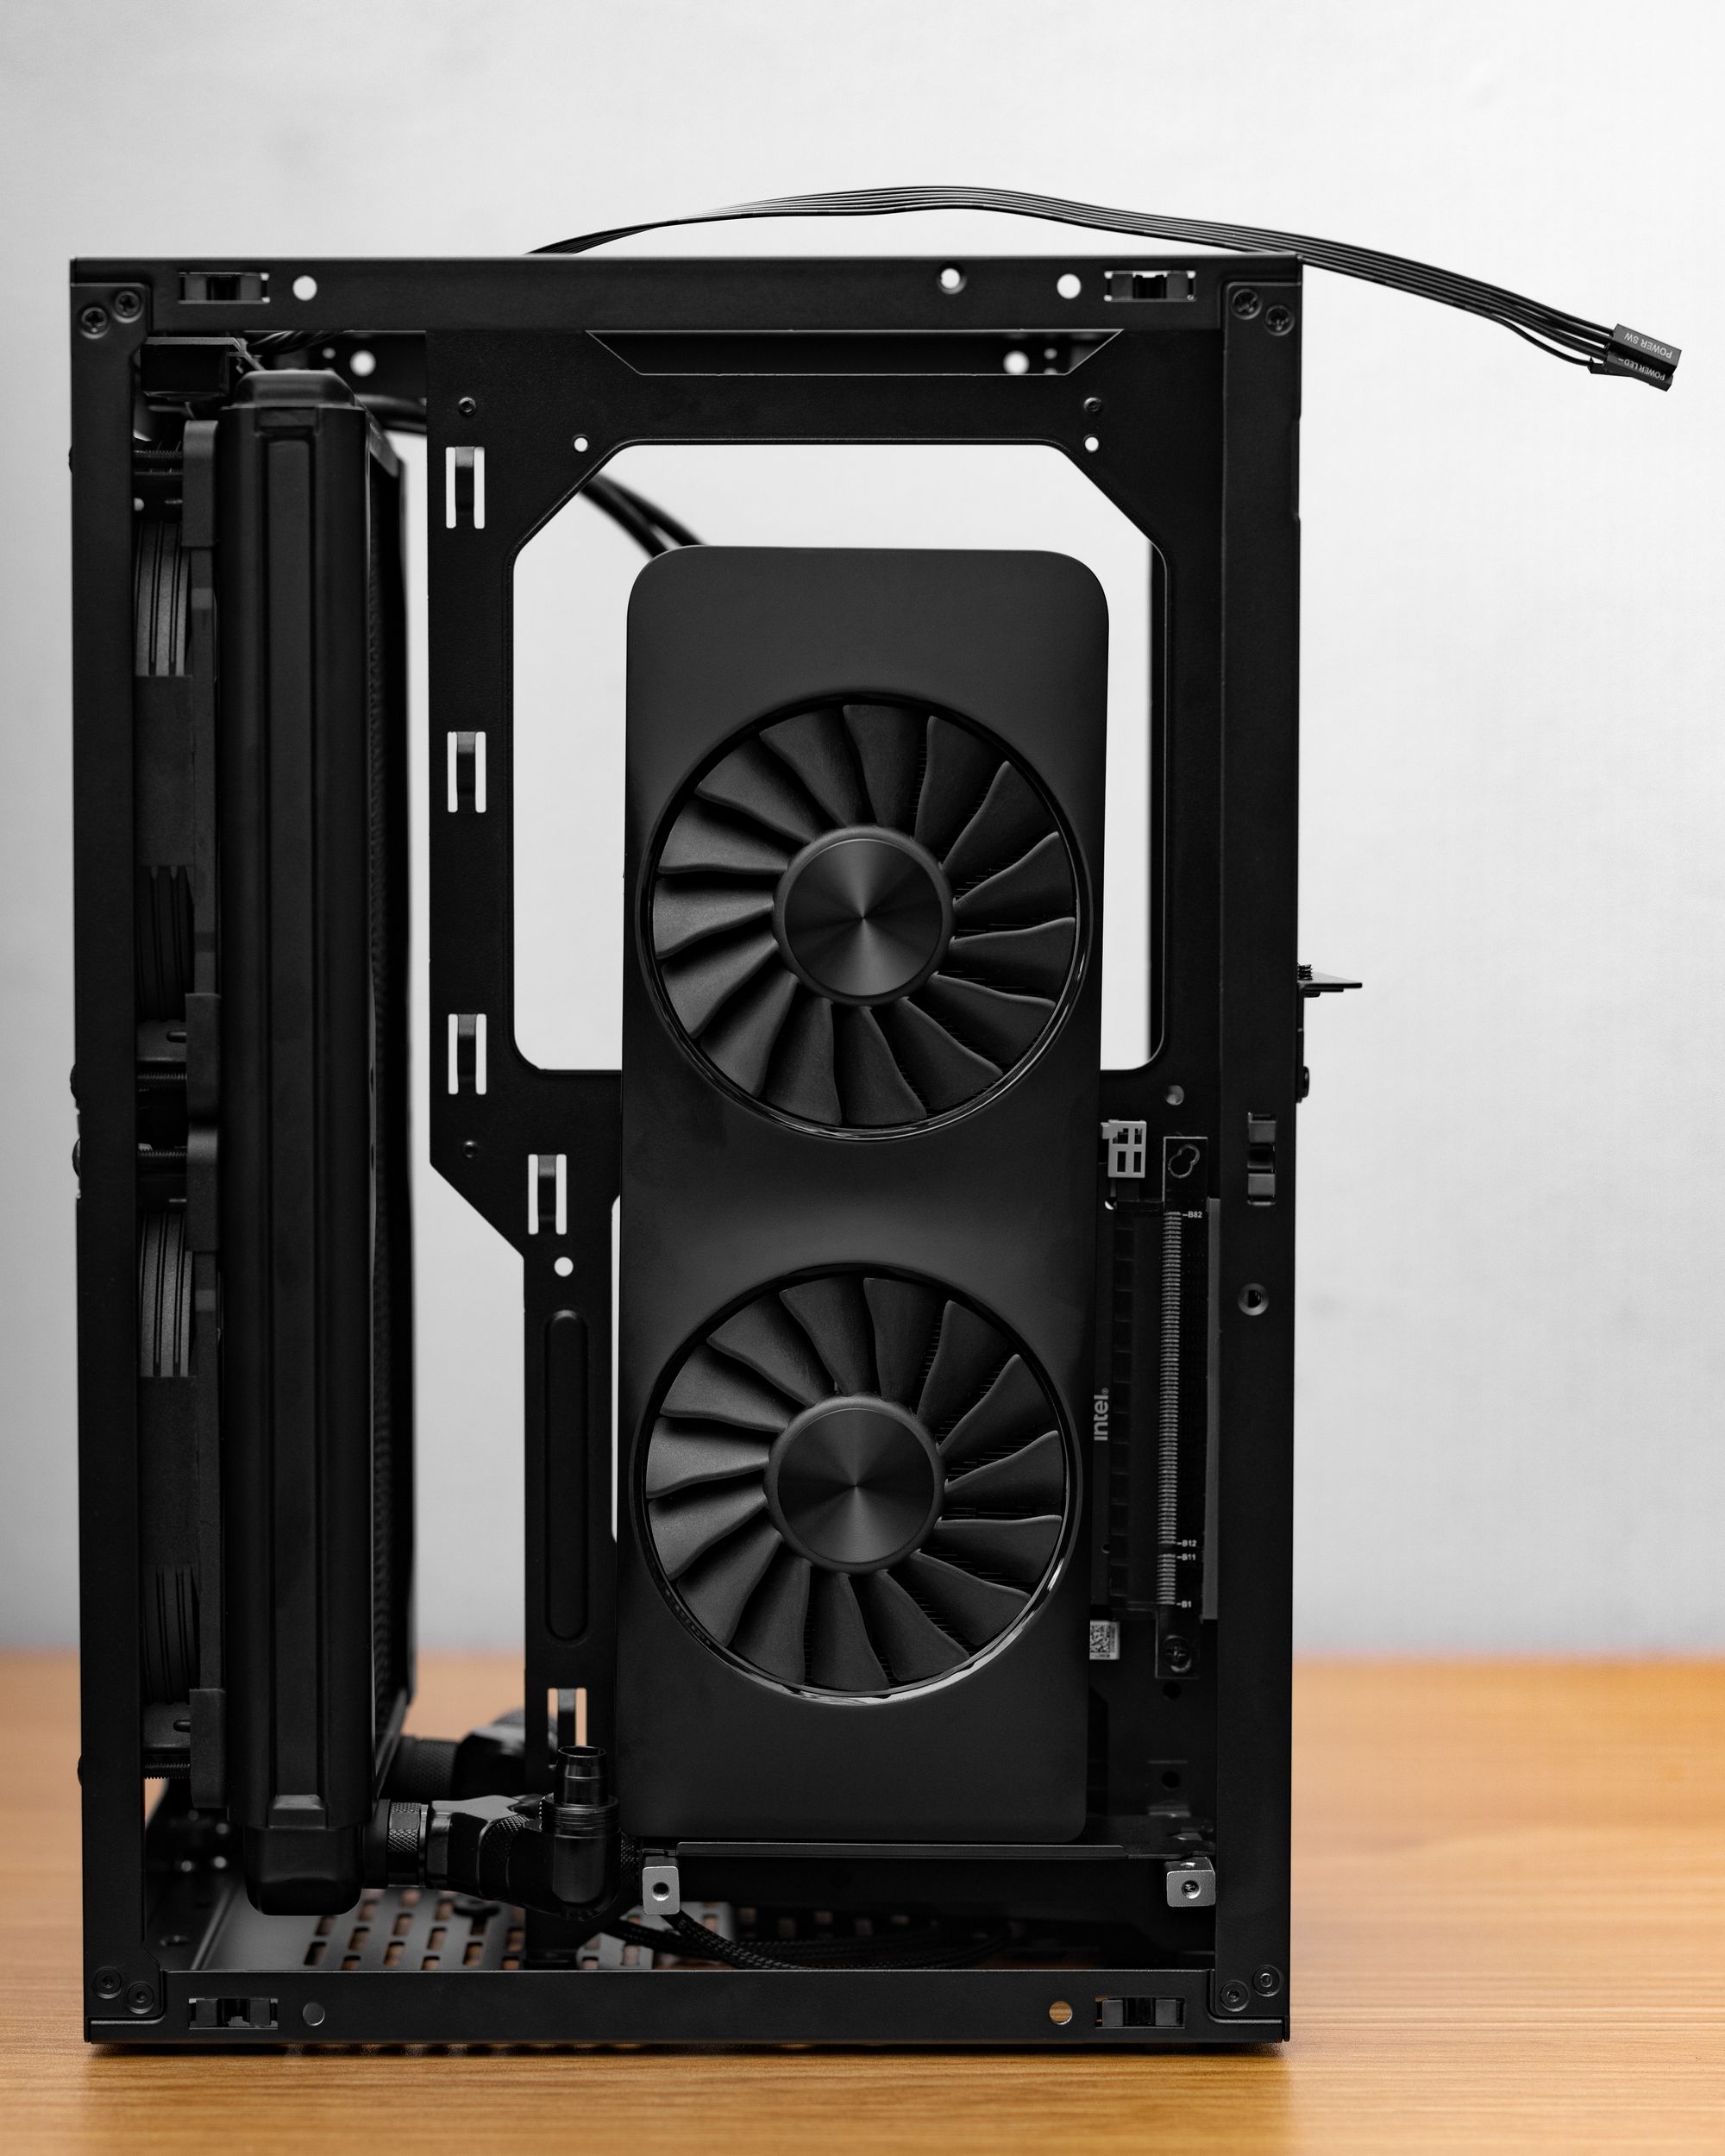
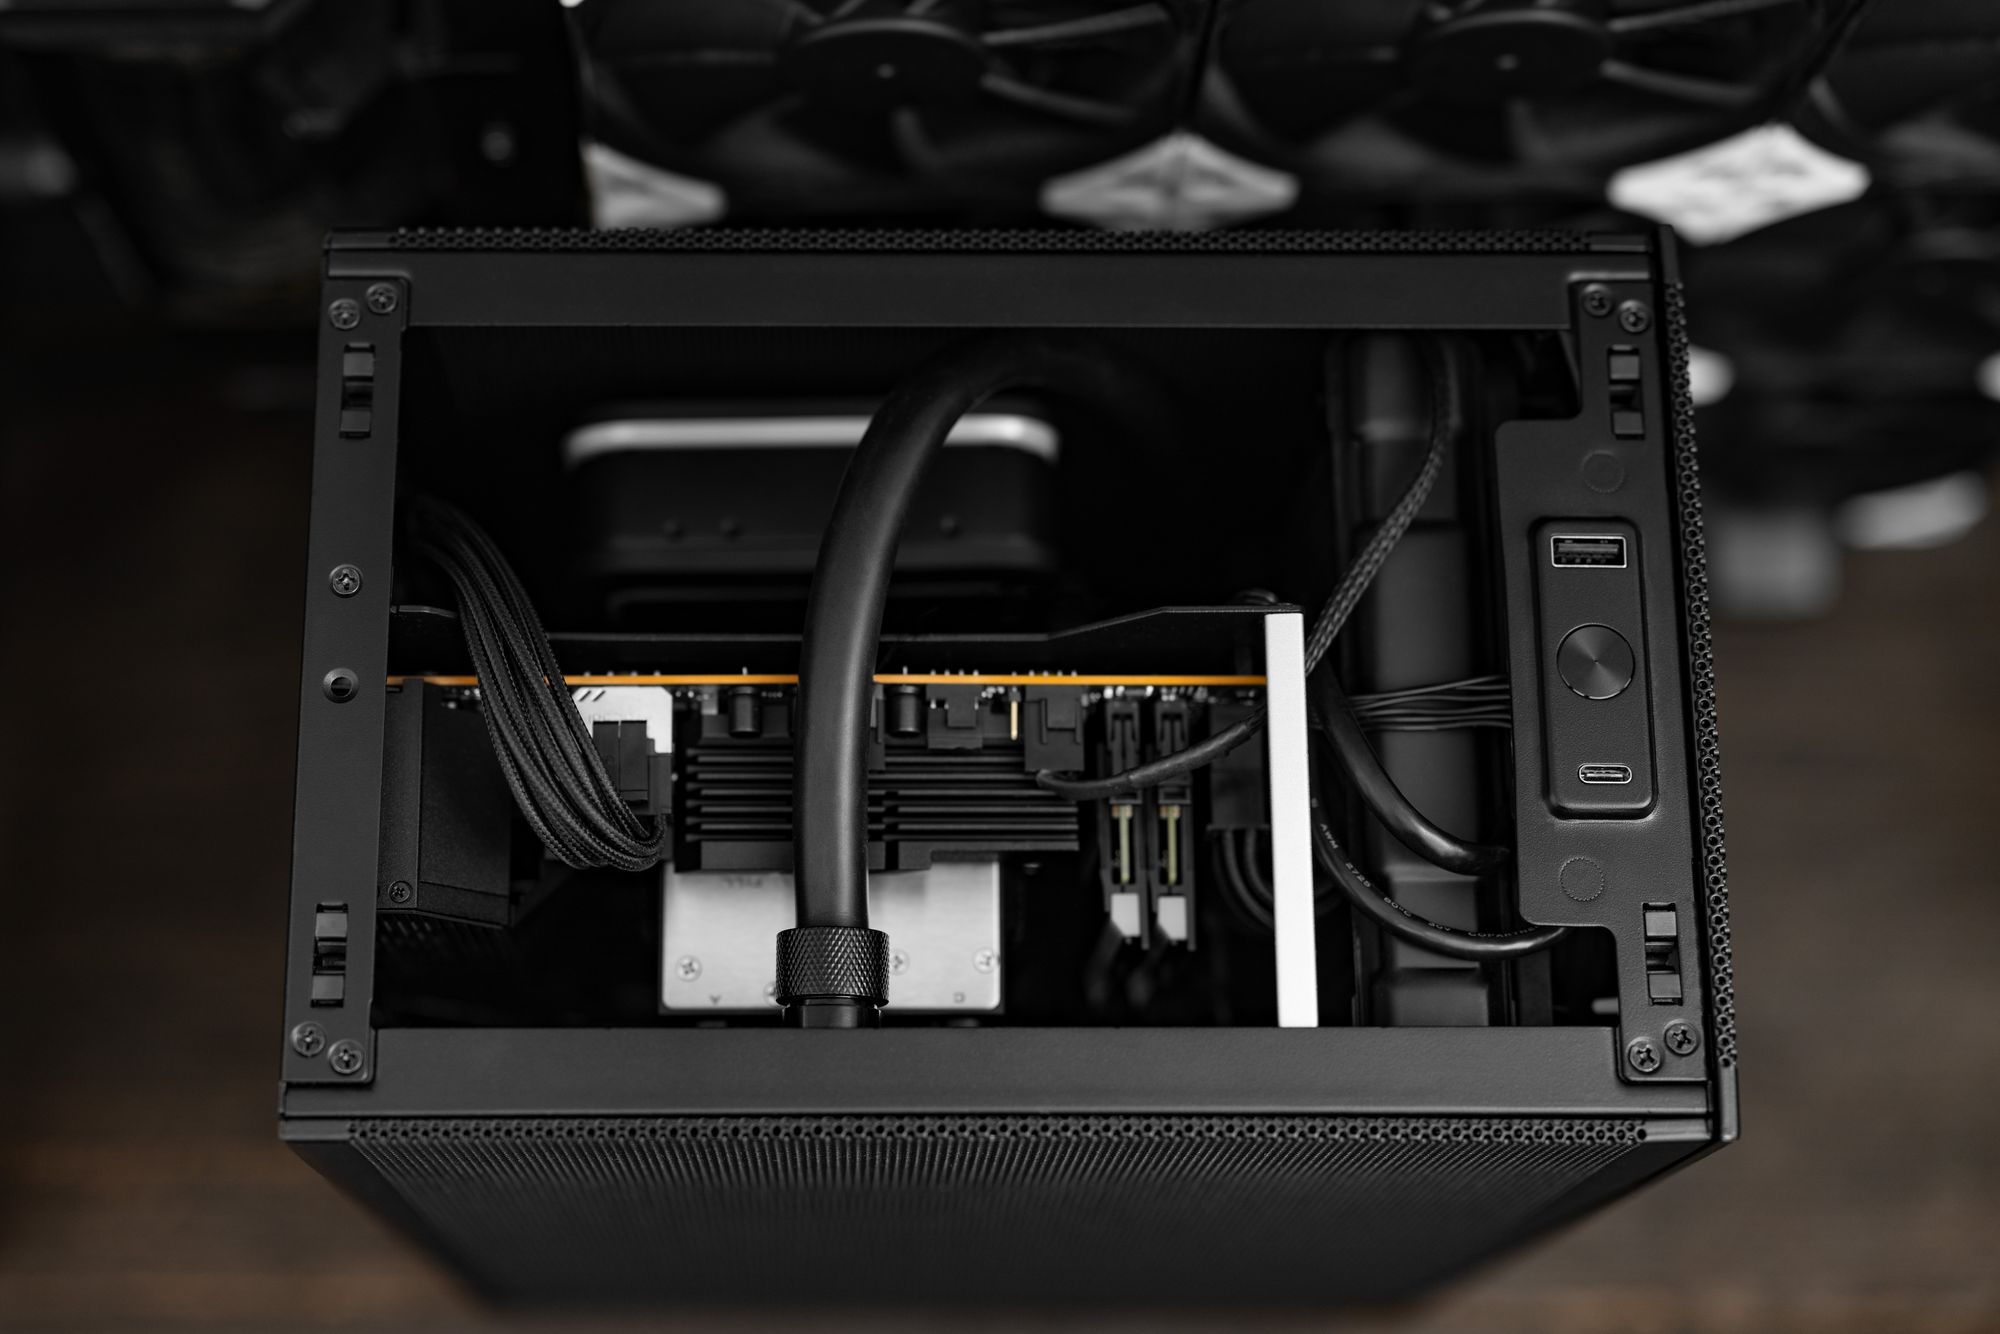
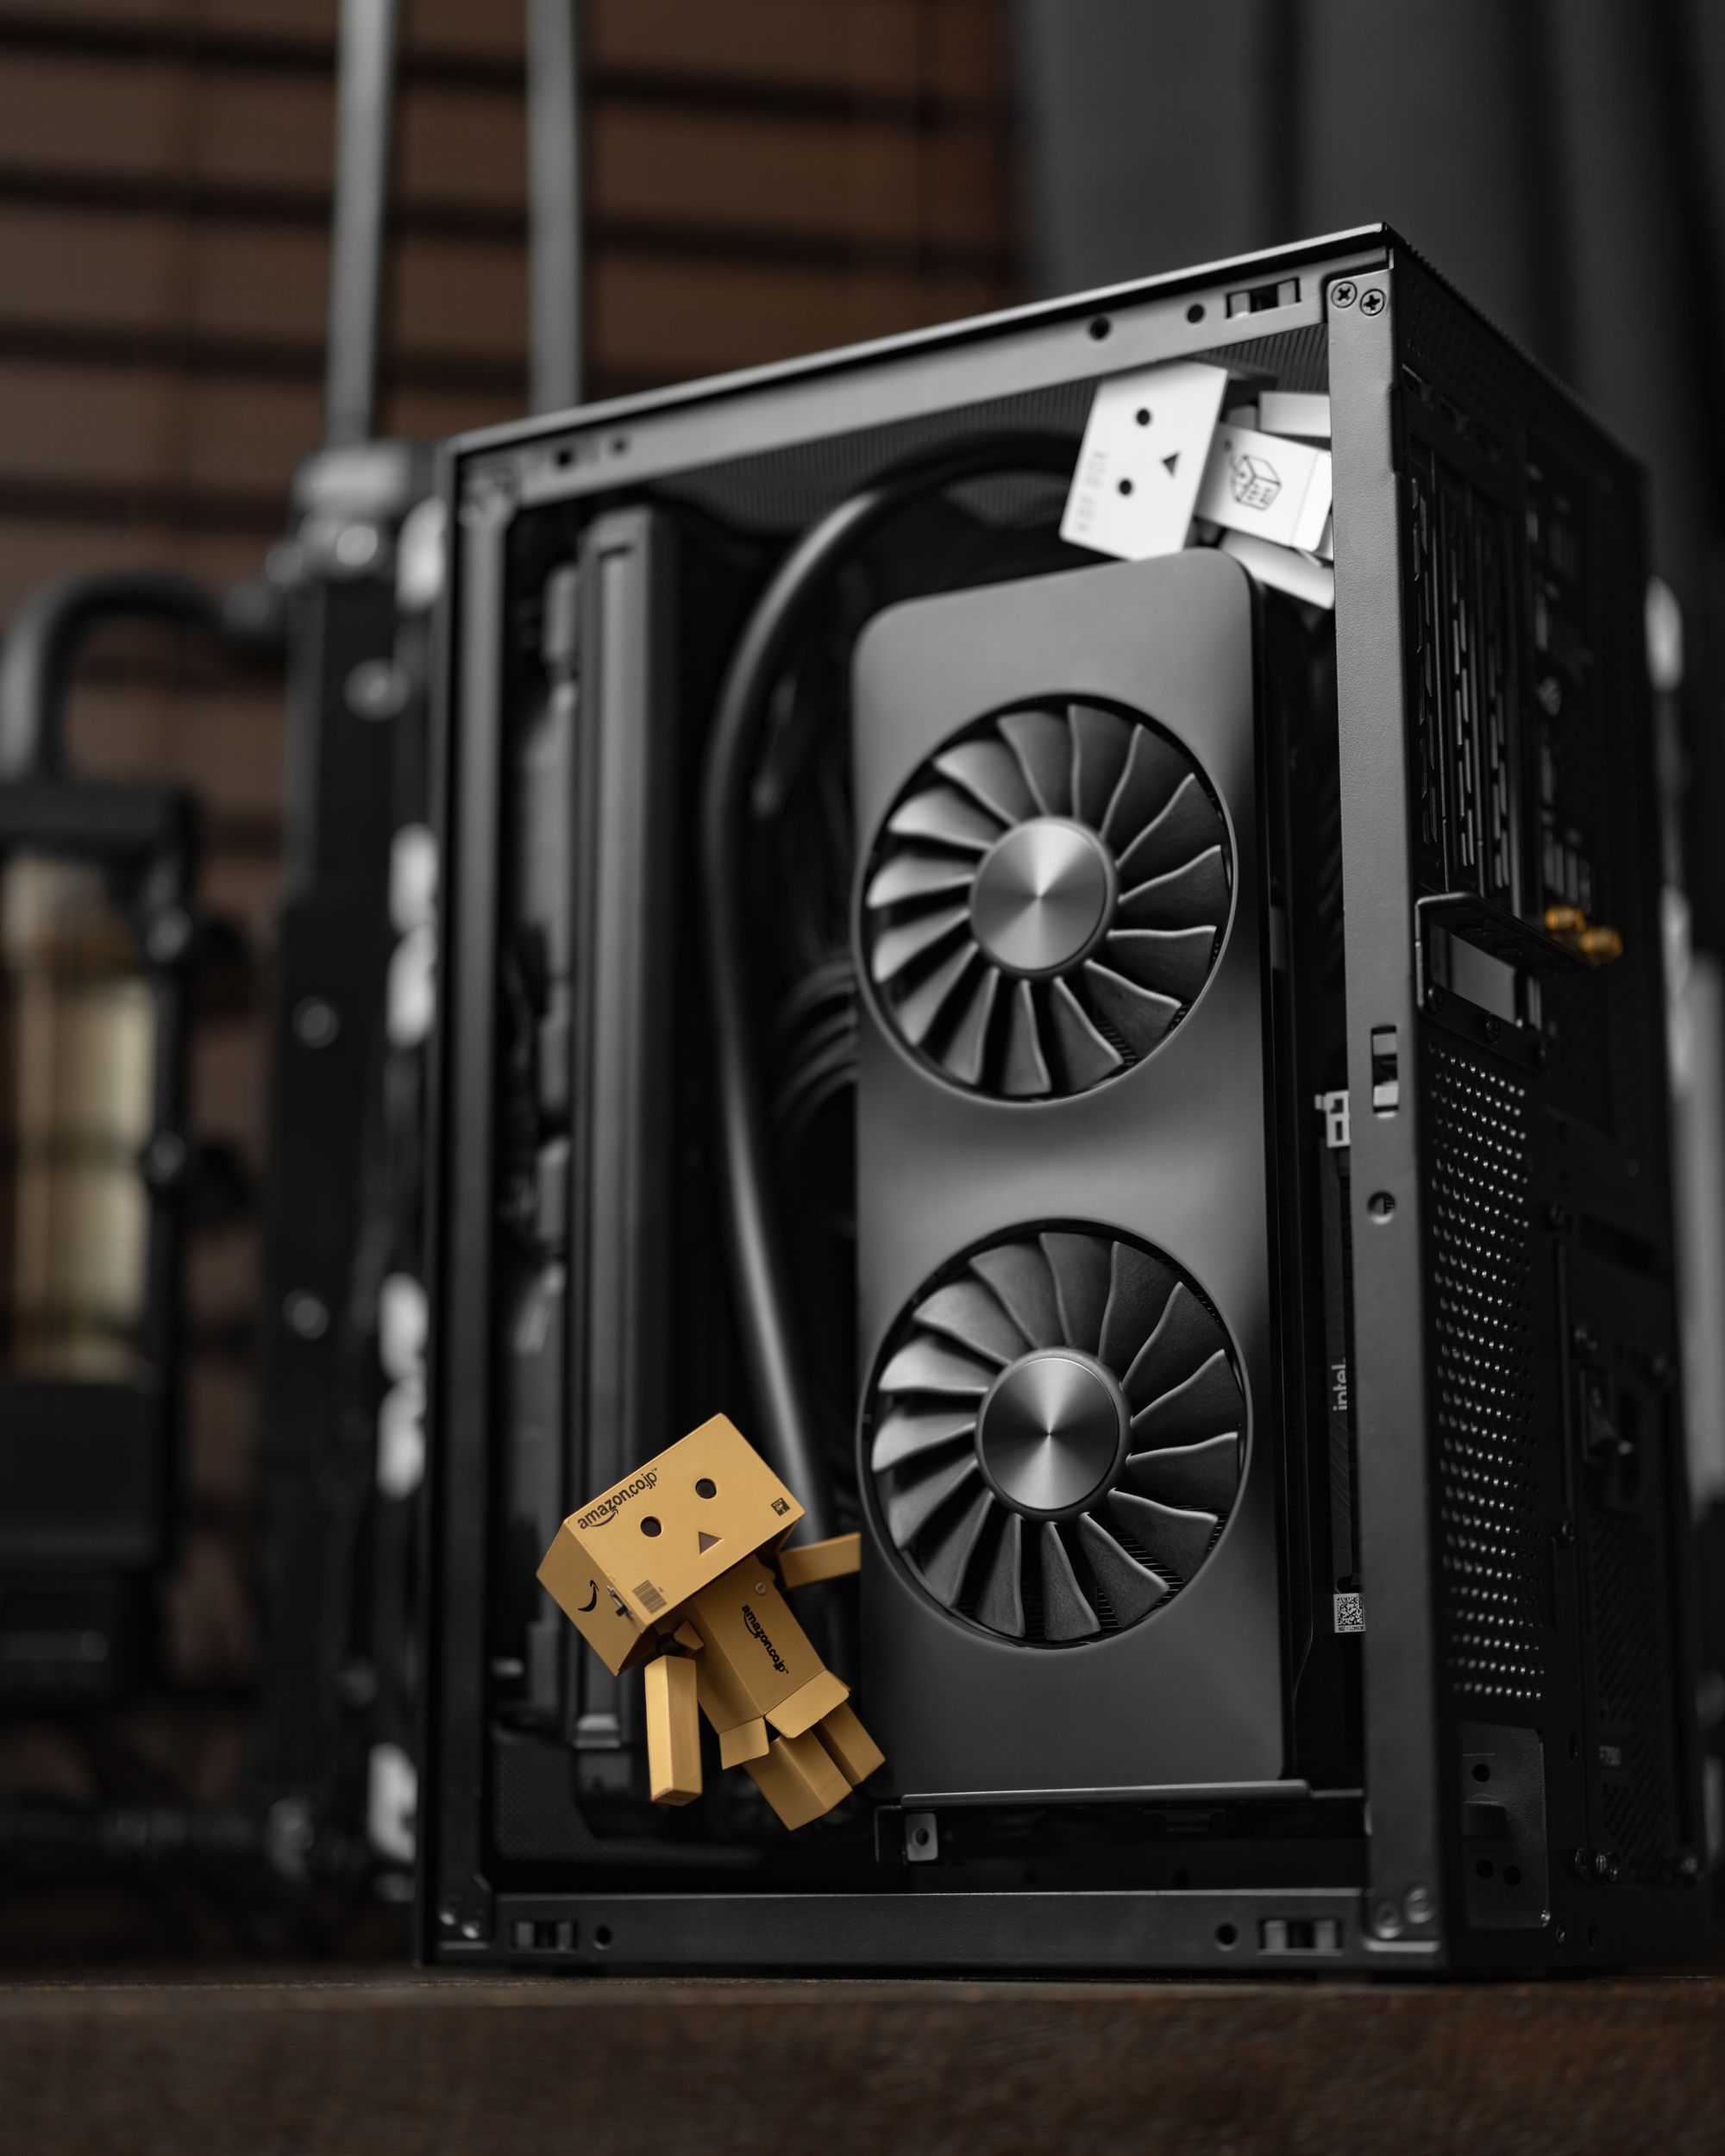
As long as your order or operations is sane, things like PSU cable installation and cable management are easy enough to get through. I did the standoff mod for the Meshlicious to give me some space behind the GPU for cable management. This also made sure the A770 was against the mesh, pulling in the freshest air. My Meshlicious came with the Gen 3 PCIe riser installed and the Gen 4 in a bag. The provided standoffs and screws didn’t line up, but the riser mod fixed that anyway. The only cable tie I used in the entire build was to keep the pump speed sensor cable bundled up. The pump speed knob is hidden in the riser cable so that it is managed, but still accessible if I need to adjust in the future.
I can see why there are SO MANY builds utilizing this case. Aside from the higher cost of components and lack of PCIe expansion, you give up very little to gain A LOT of extra desk space. Sure, nearly 15 liters isn’t the bleeding edge of SFF, but cases like this are what ensure we have enough builders in the SFF community to keep development of SFF focused parts like EK and Koolance’s micro fittings viable.
The Components
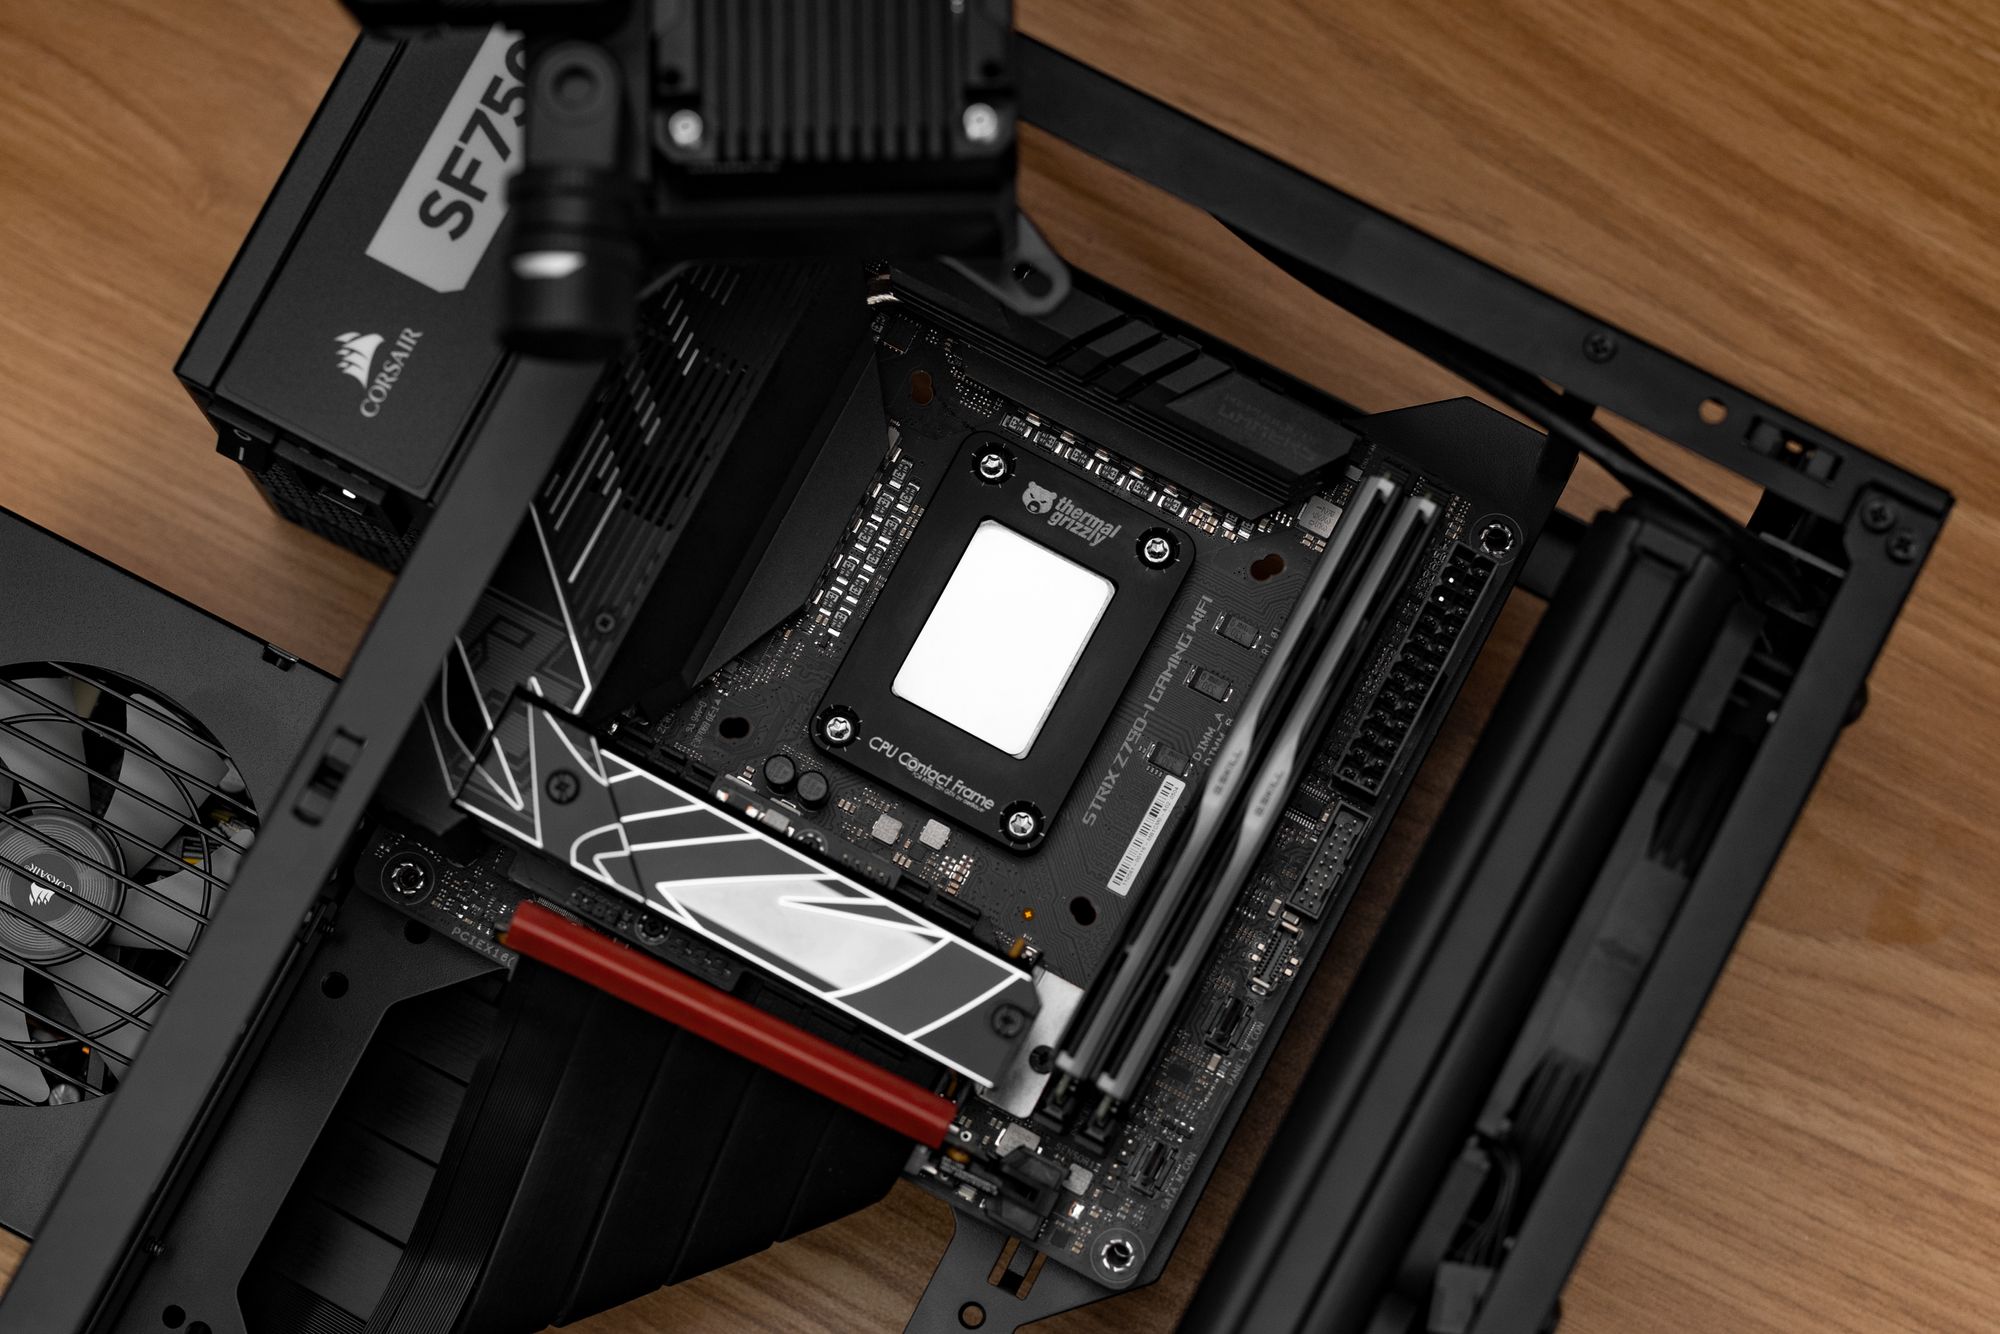
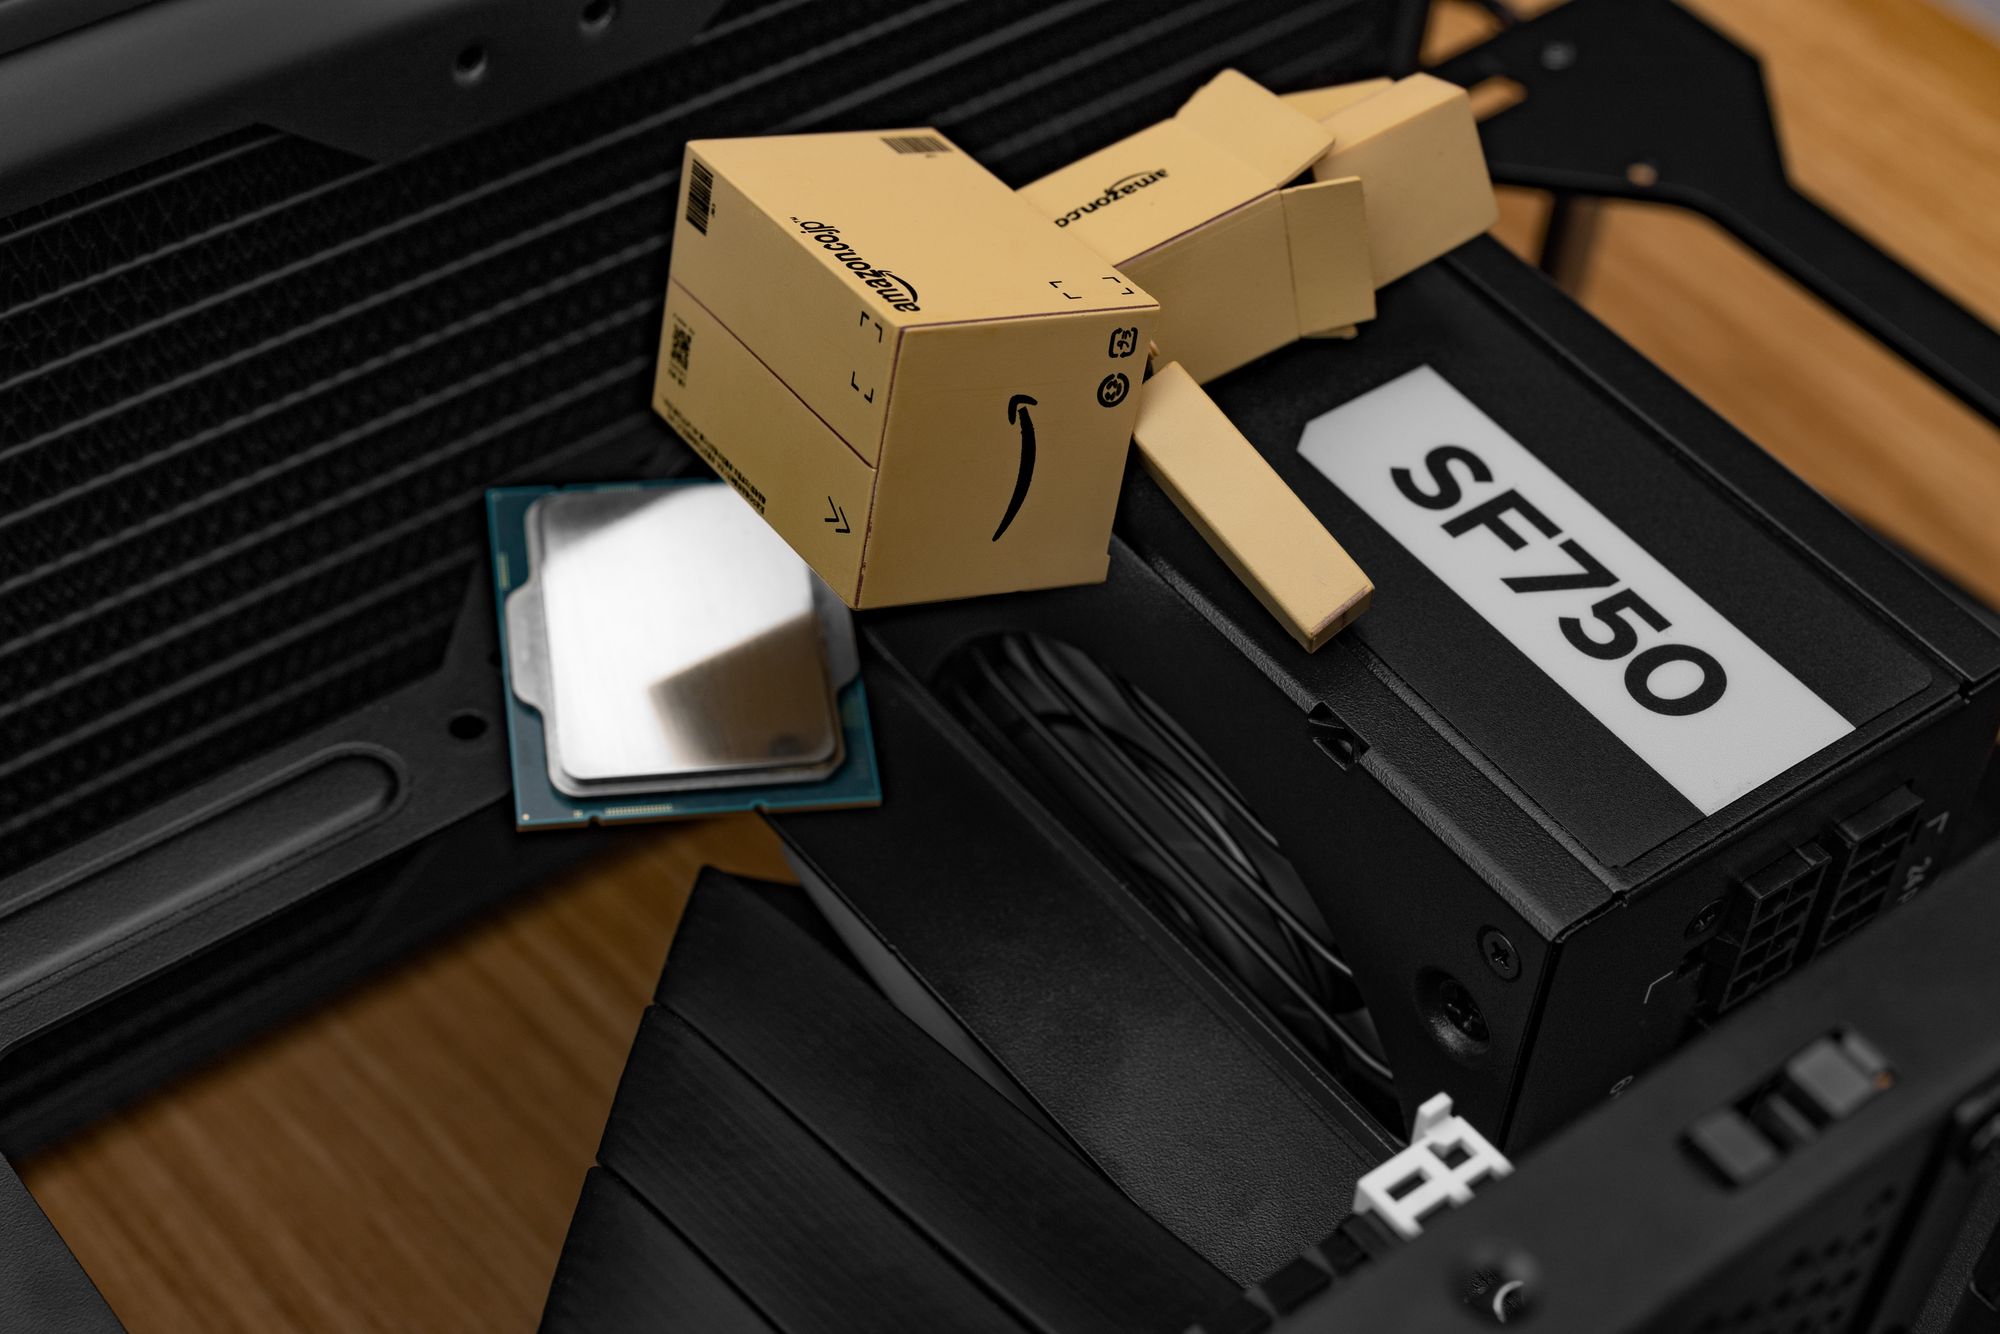
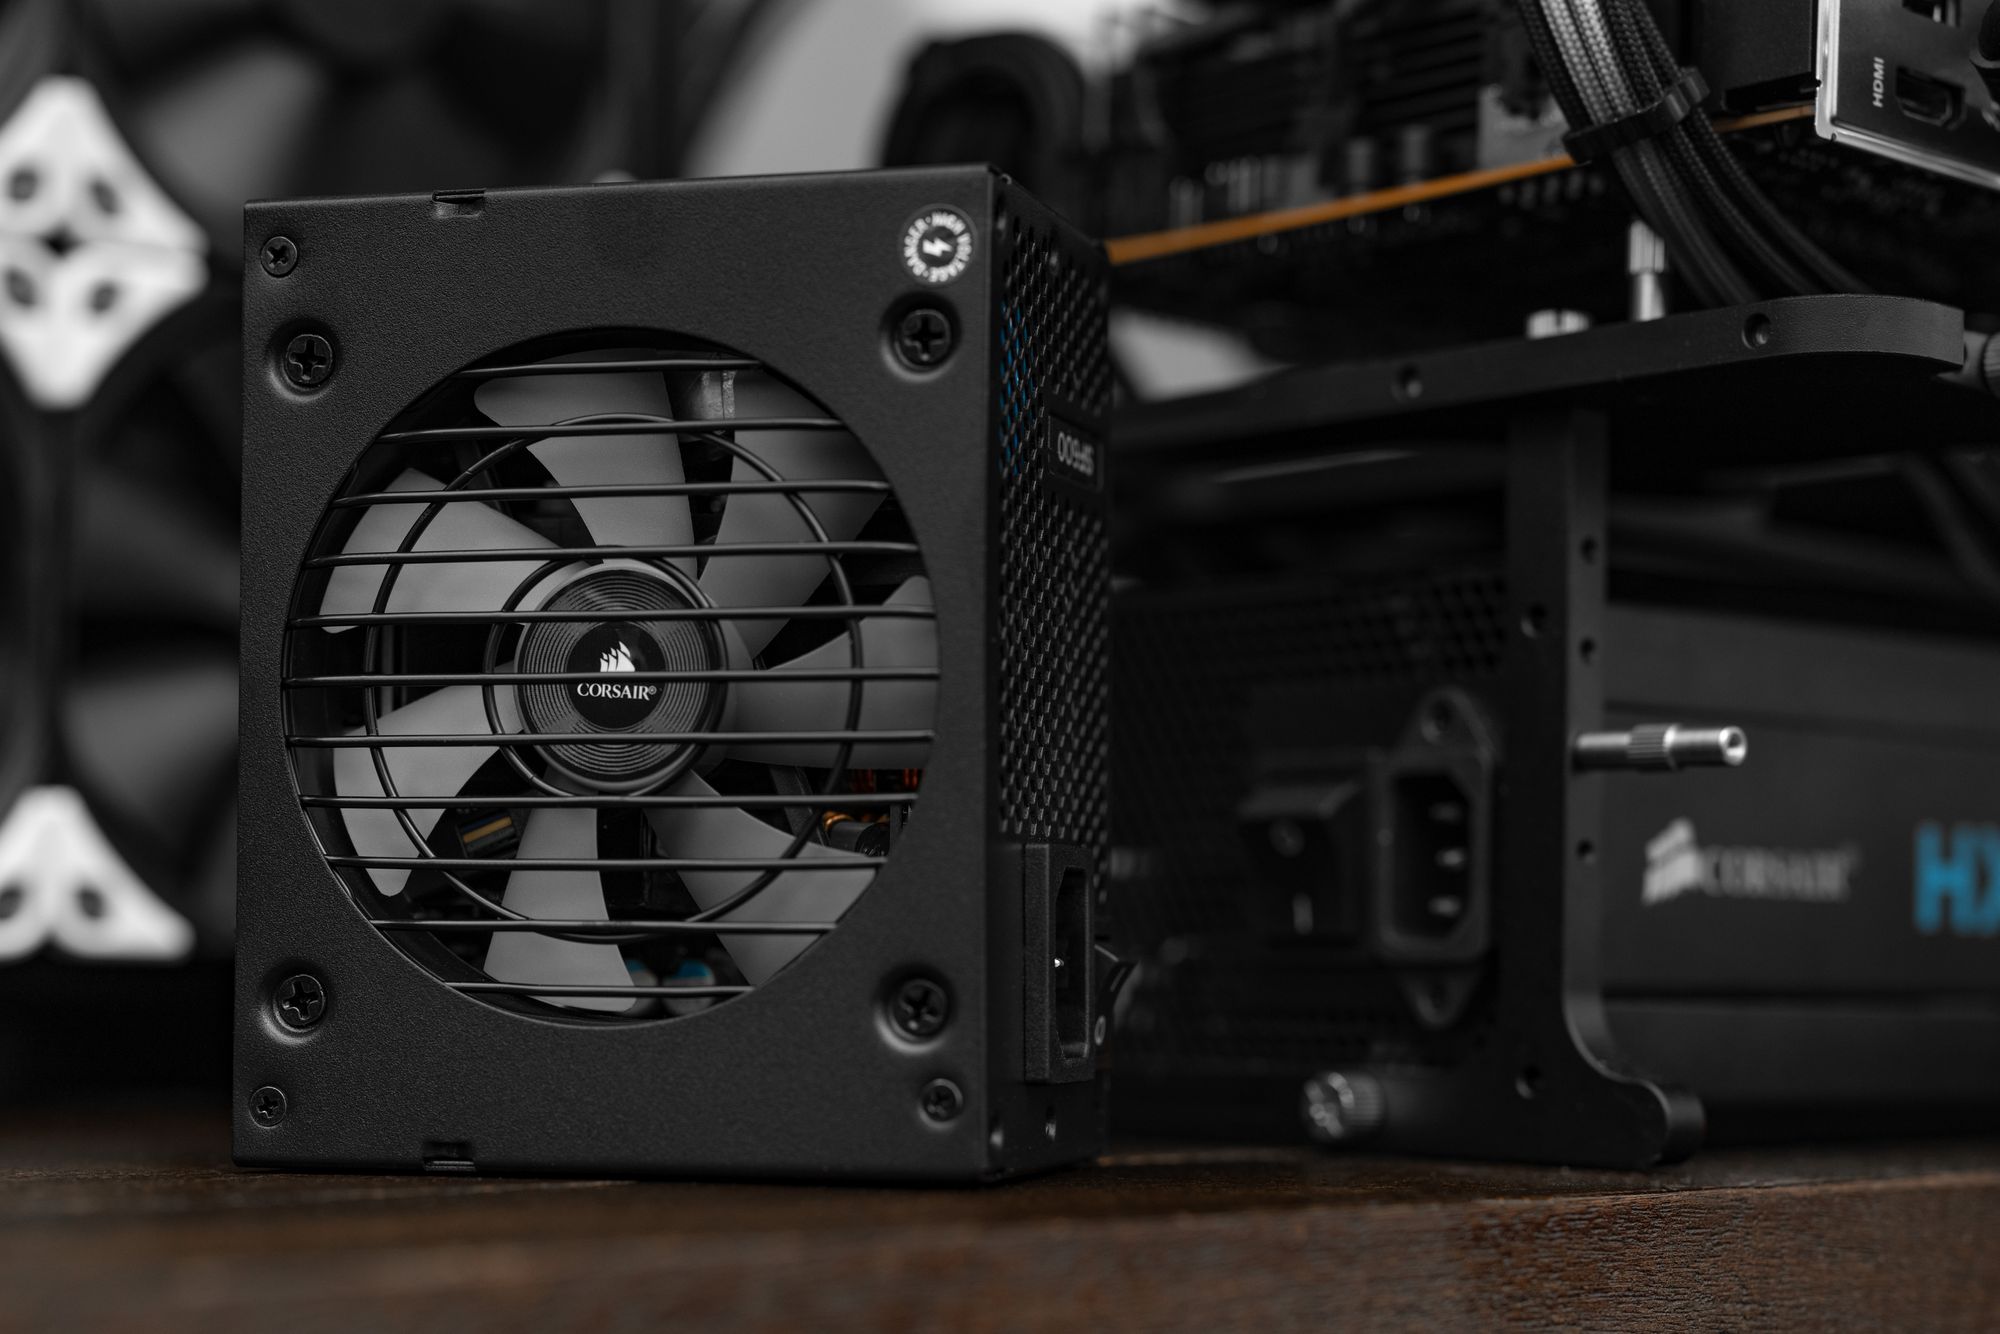
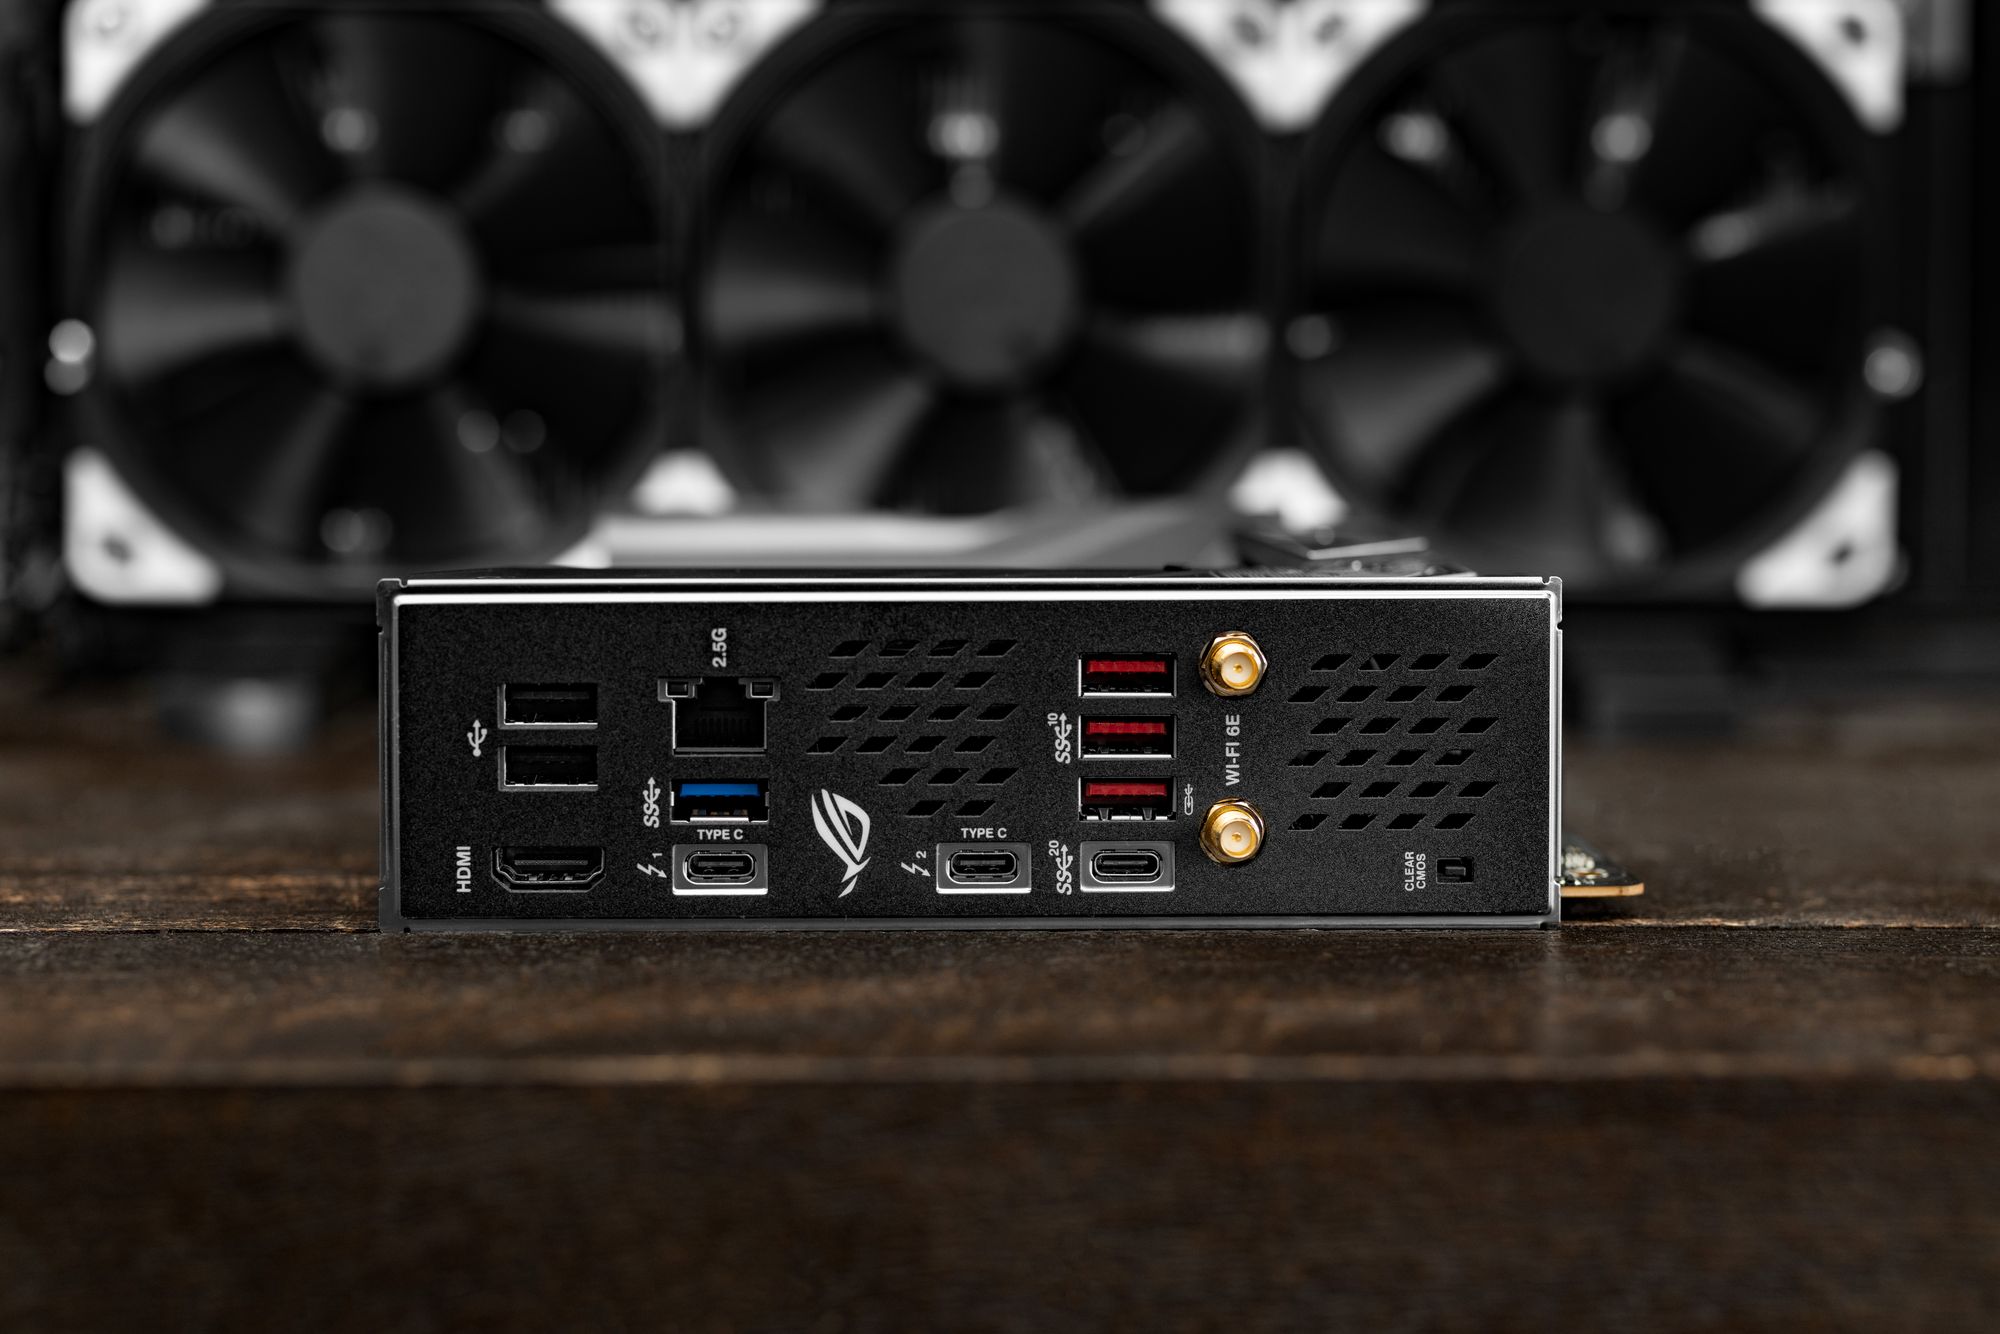
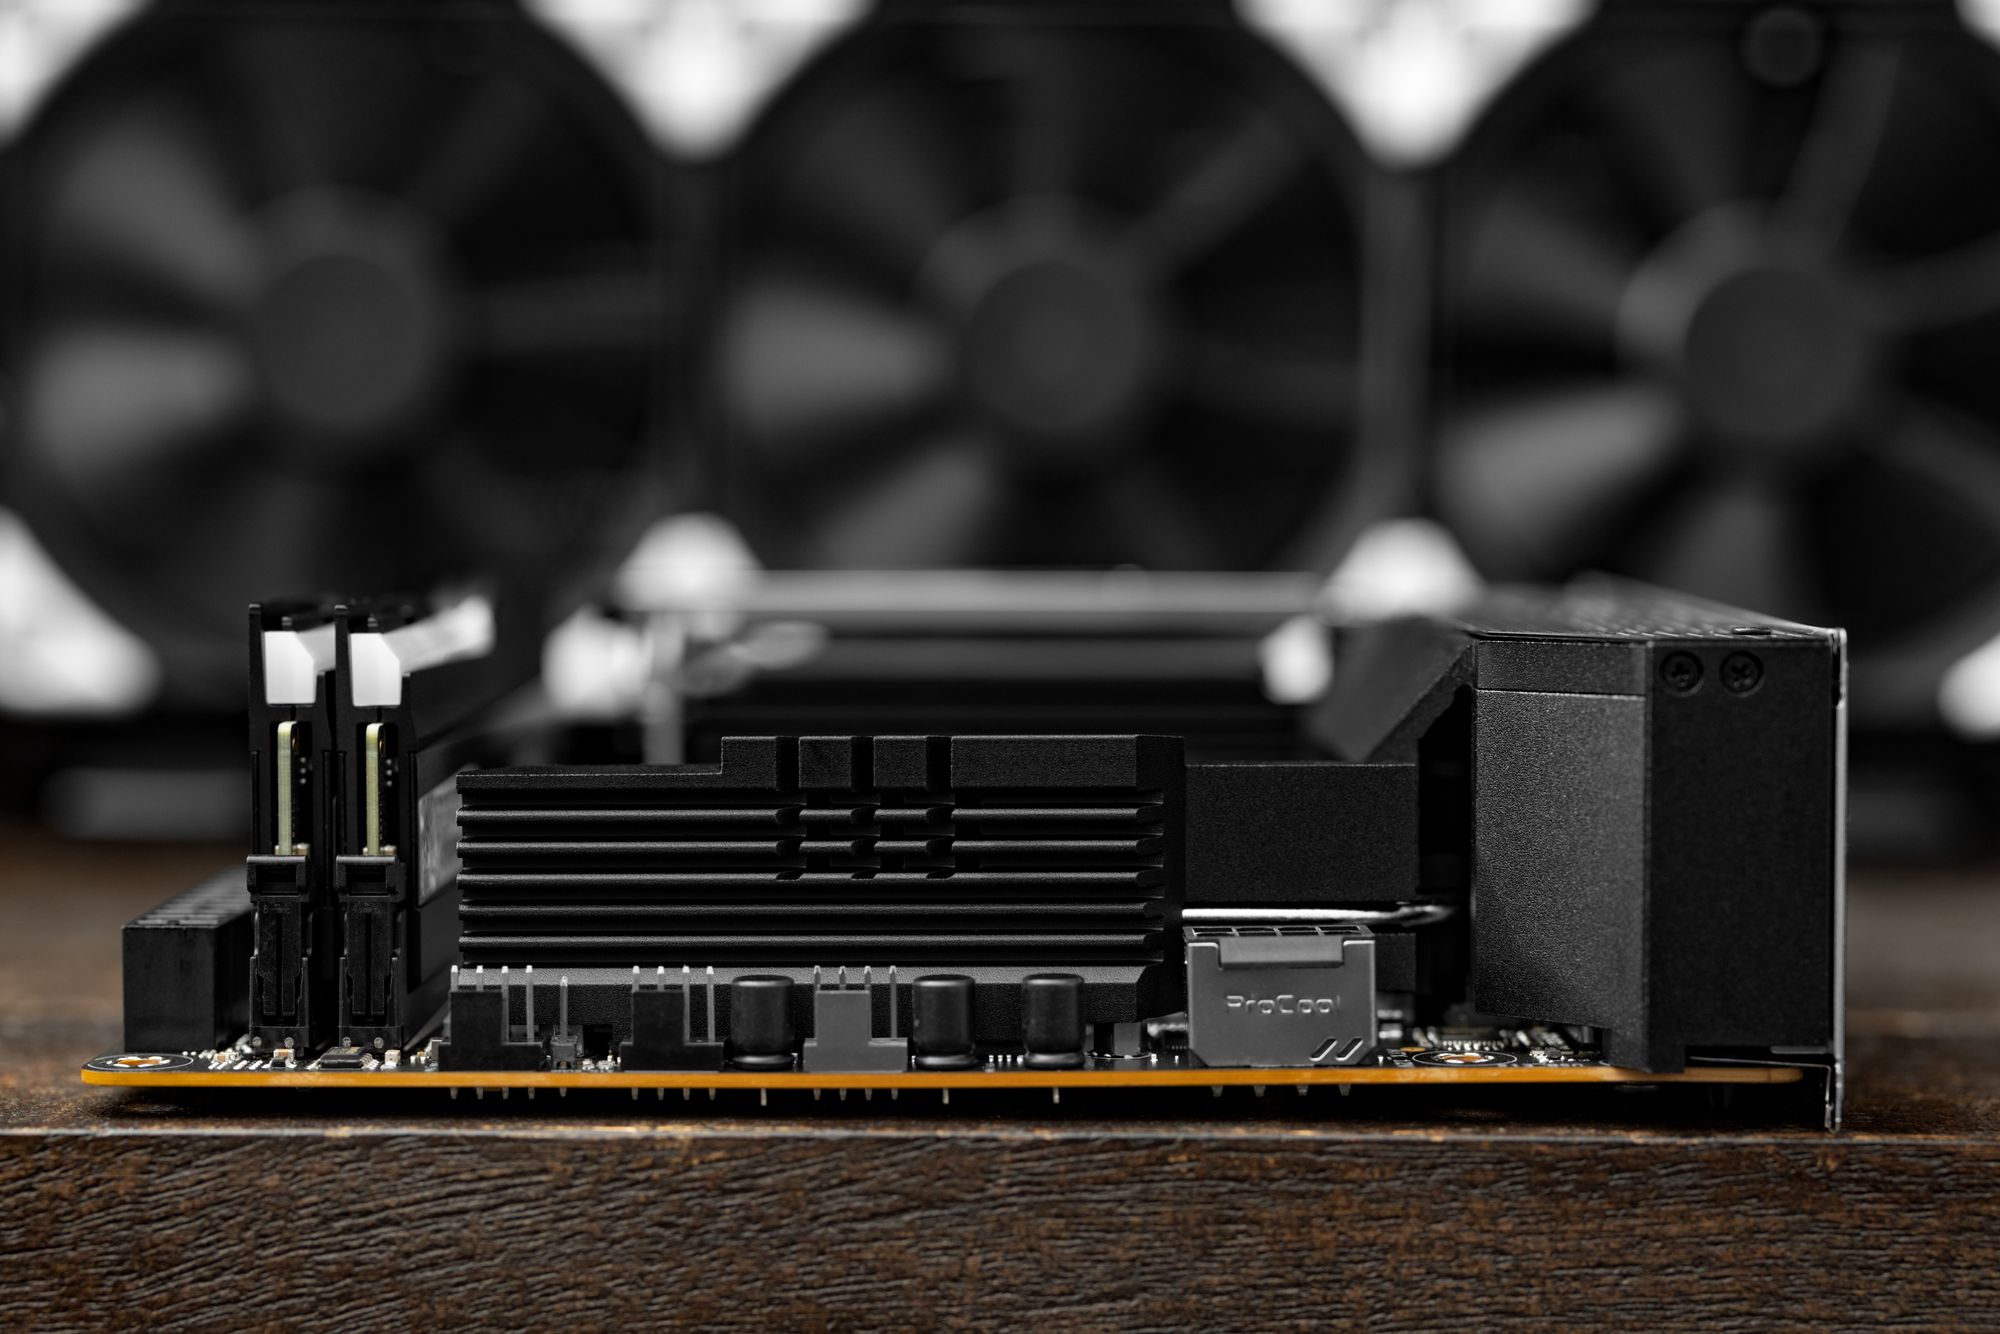
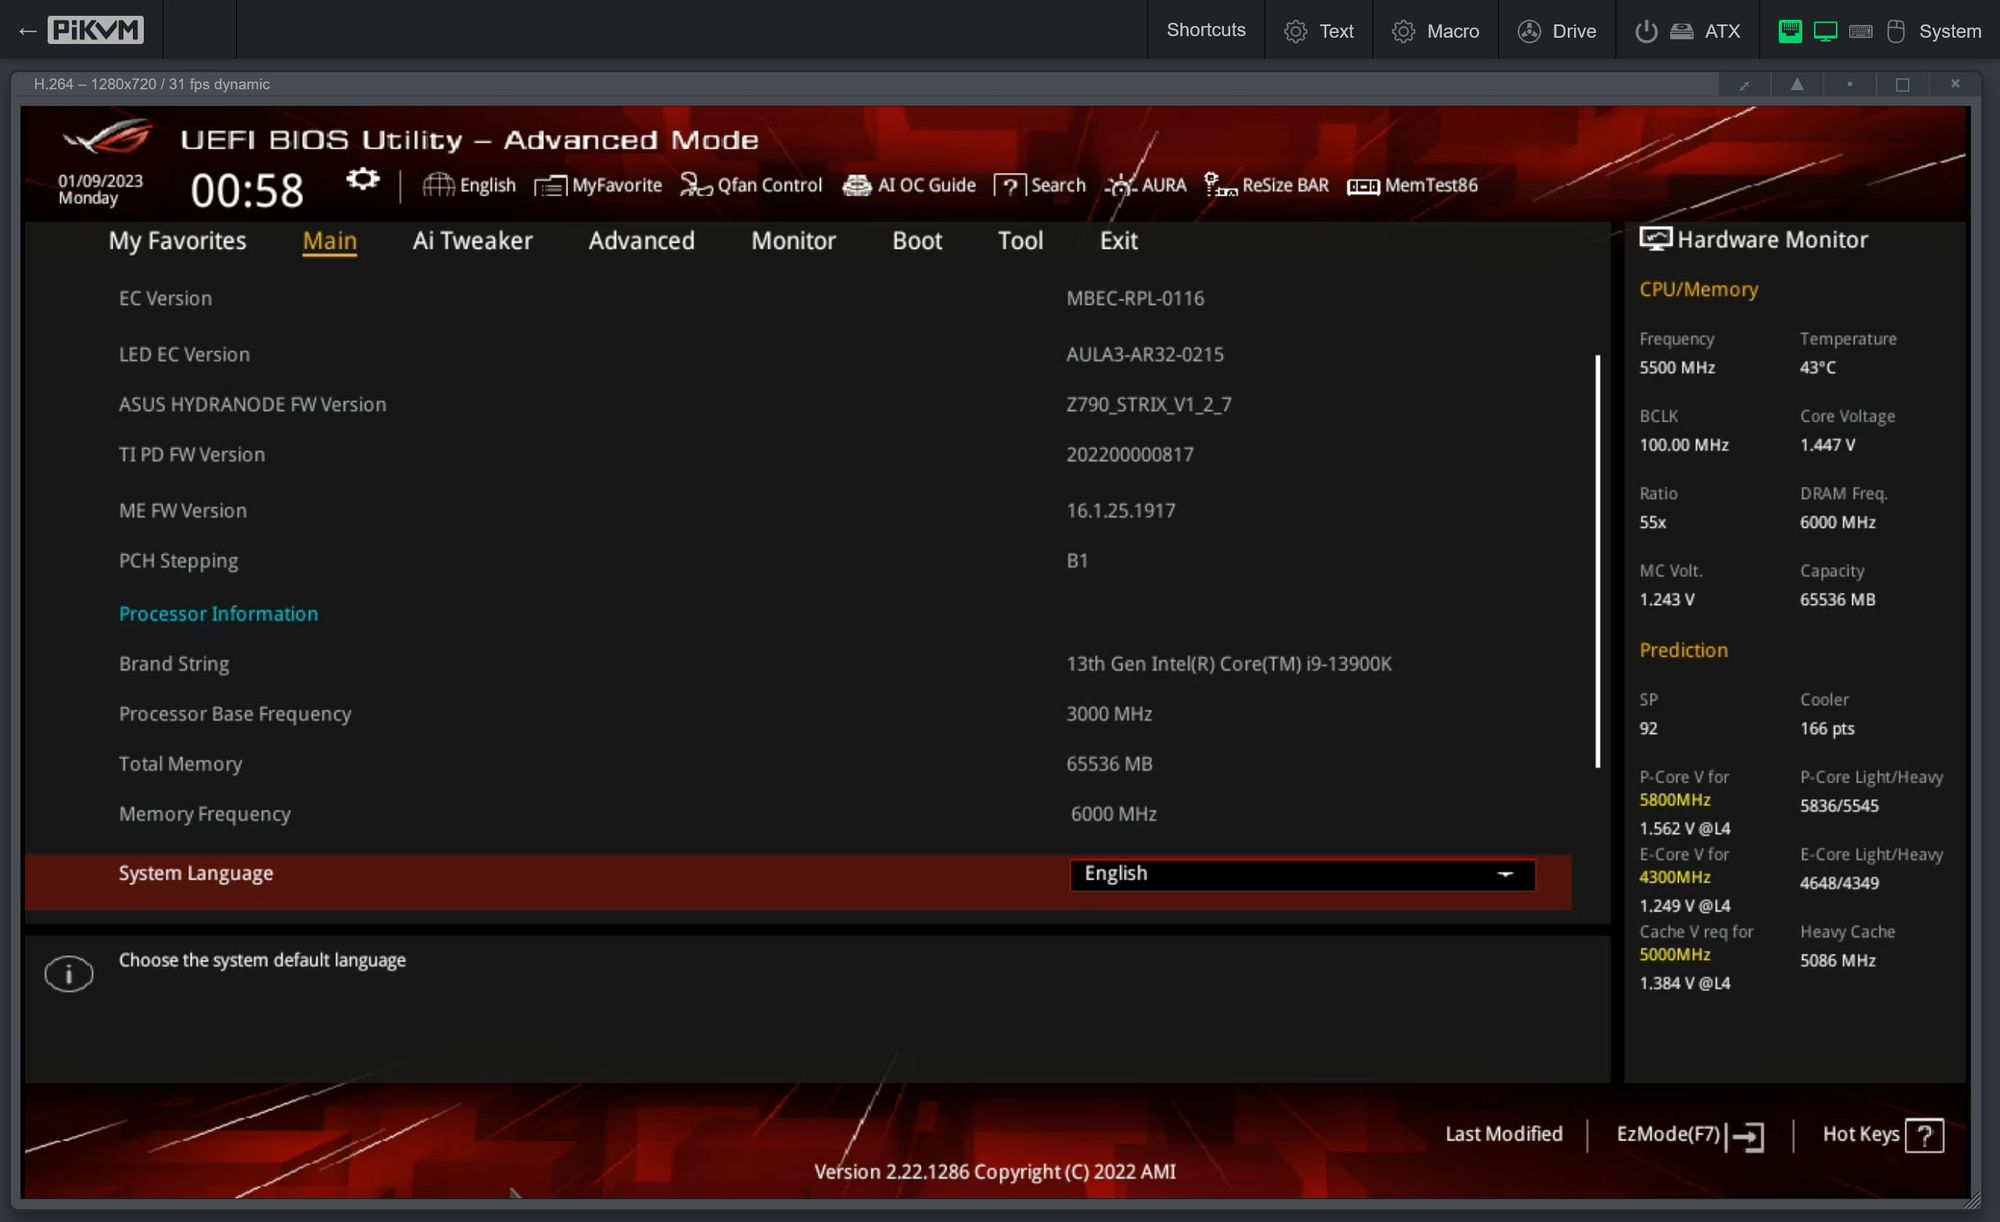
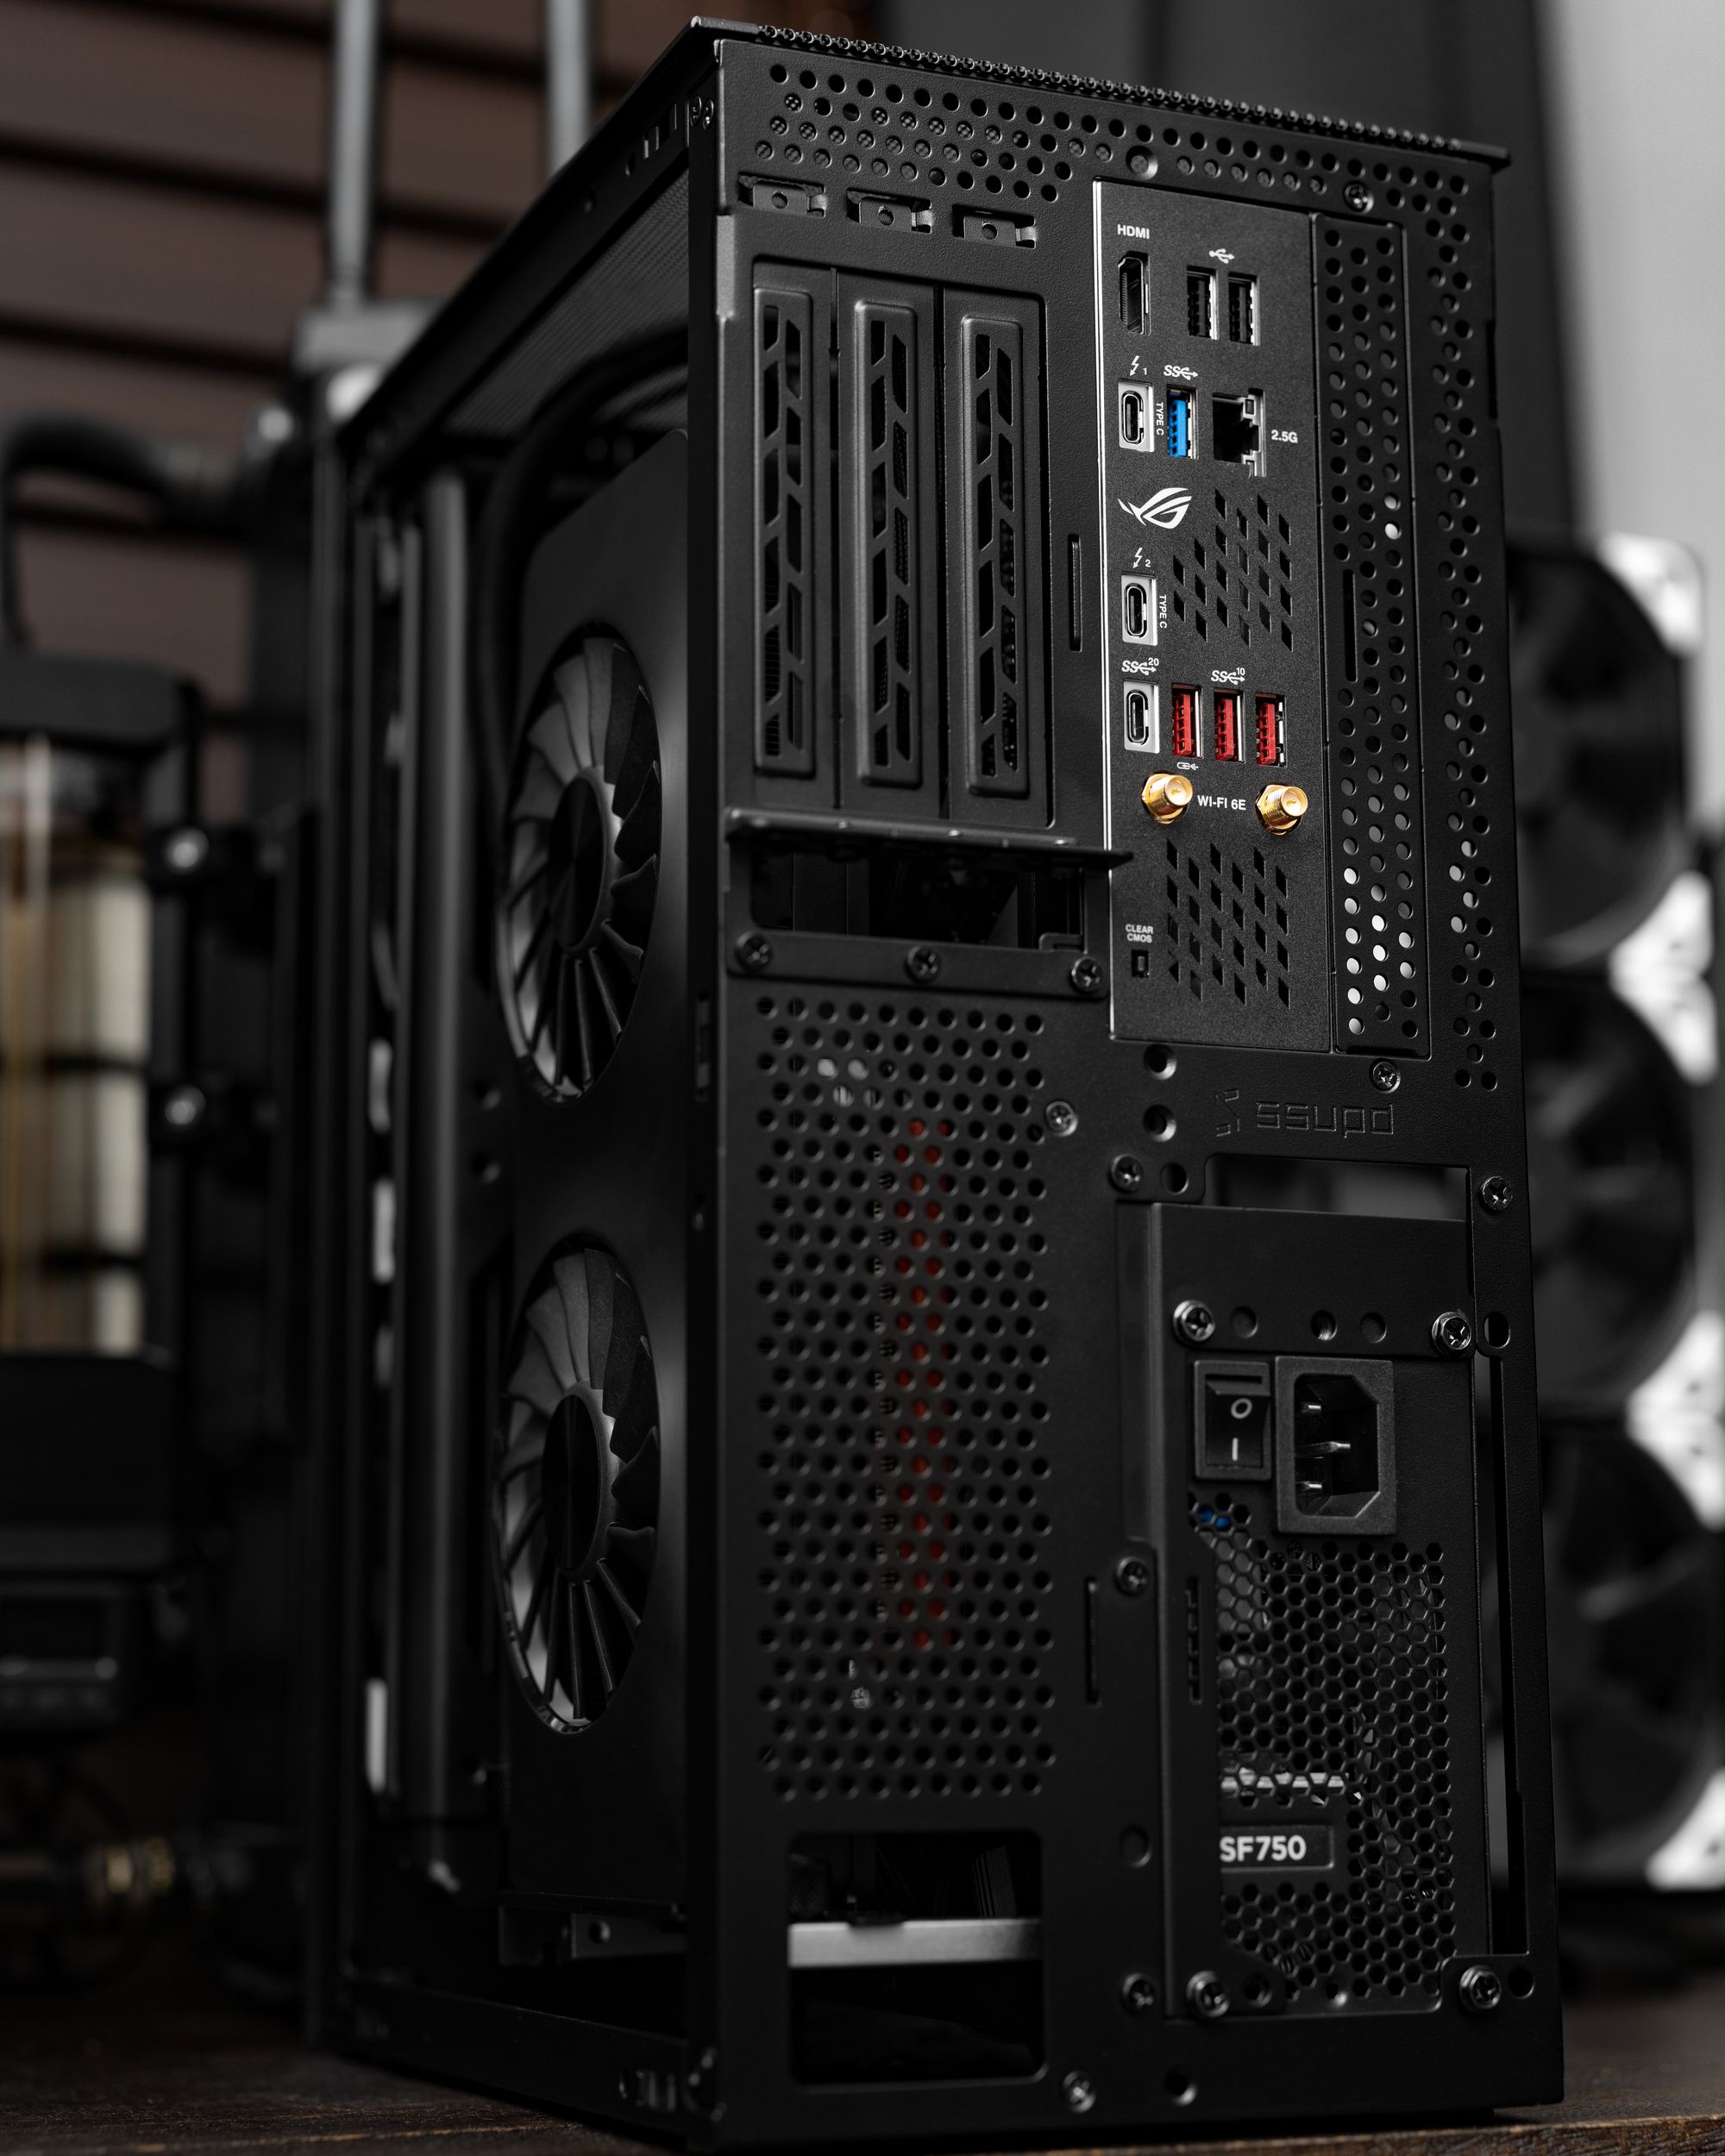
The 13700K evolved into a 13900K. It lost its lid, got some liquid metal, and had its IHS lapped and replated. A bunch more E-cores is nice. After that, the SF600 became an SF750 Platinum. I love the ASUS ROG STRIX Z790-I Gaming. Not the price, for sure… but the board is very nice. My favorite feature is the daughter board (FPS-II) that contains the front IO, USB, SATA temp sensors, PCIe mode switch, and a few other OC friendly things. Being able to plug in all that stuff comfortably, THEN place it into the system cured a lot of my pre-build anxiety. There is no M.2 slot on the rear of this board, instead you get an M.2 and metal sandwich where the onboard audio would have gone. There is a fan to the left of the stack that keeps drive temperatures under control. I have not seen temps recorded higher than 62C under 10 mins of CrystalDiskMark load.
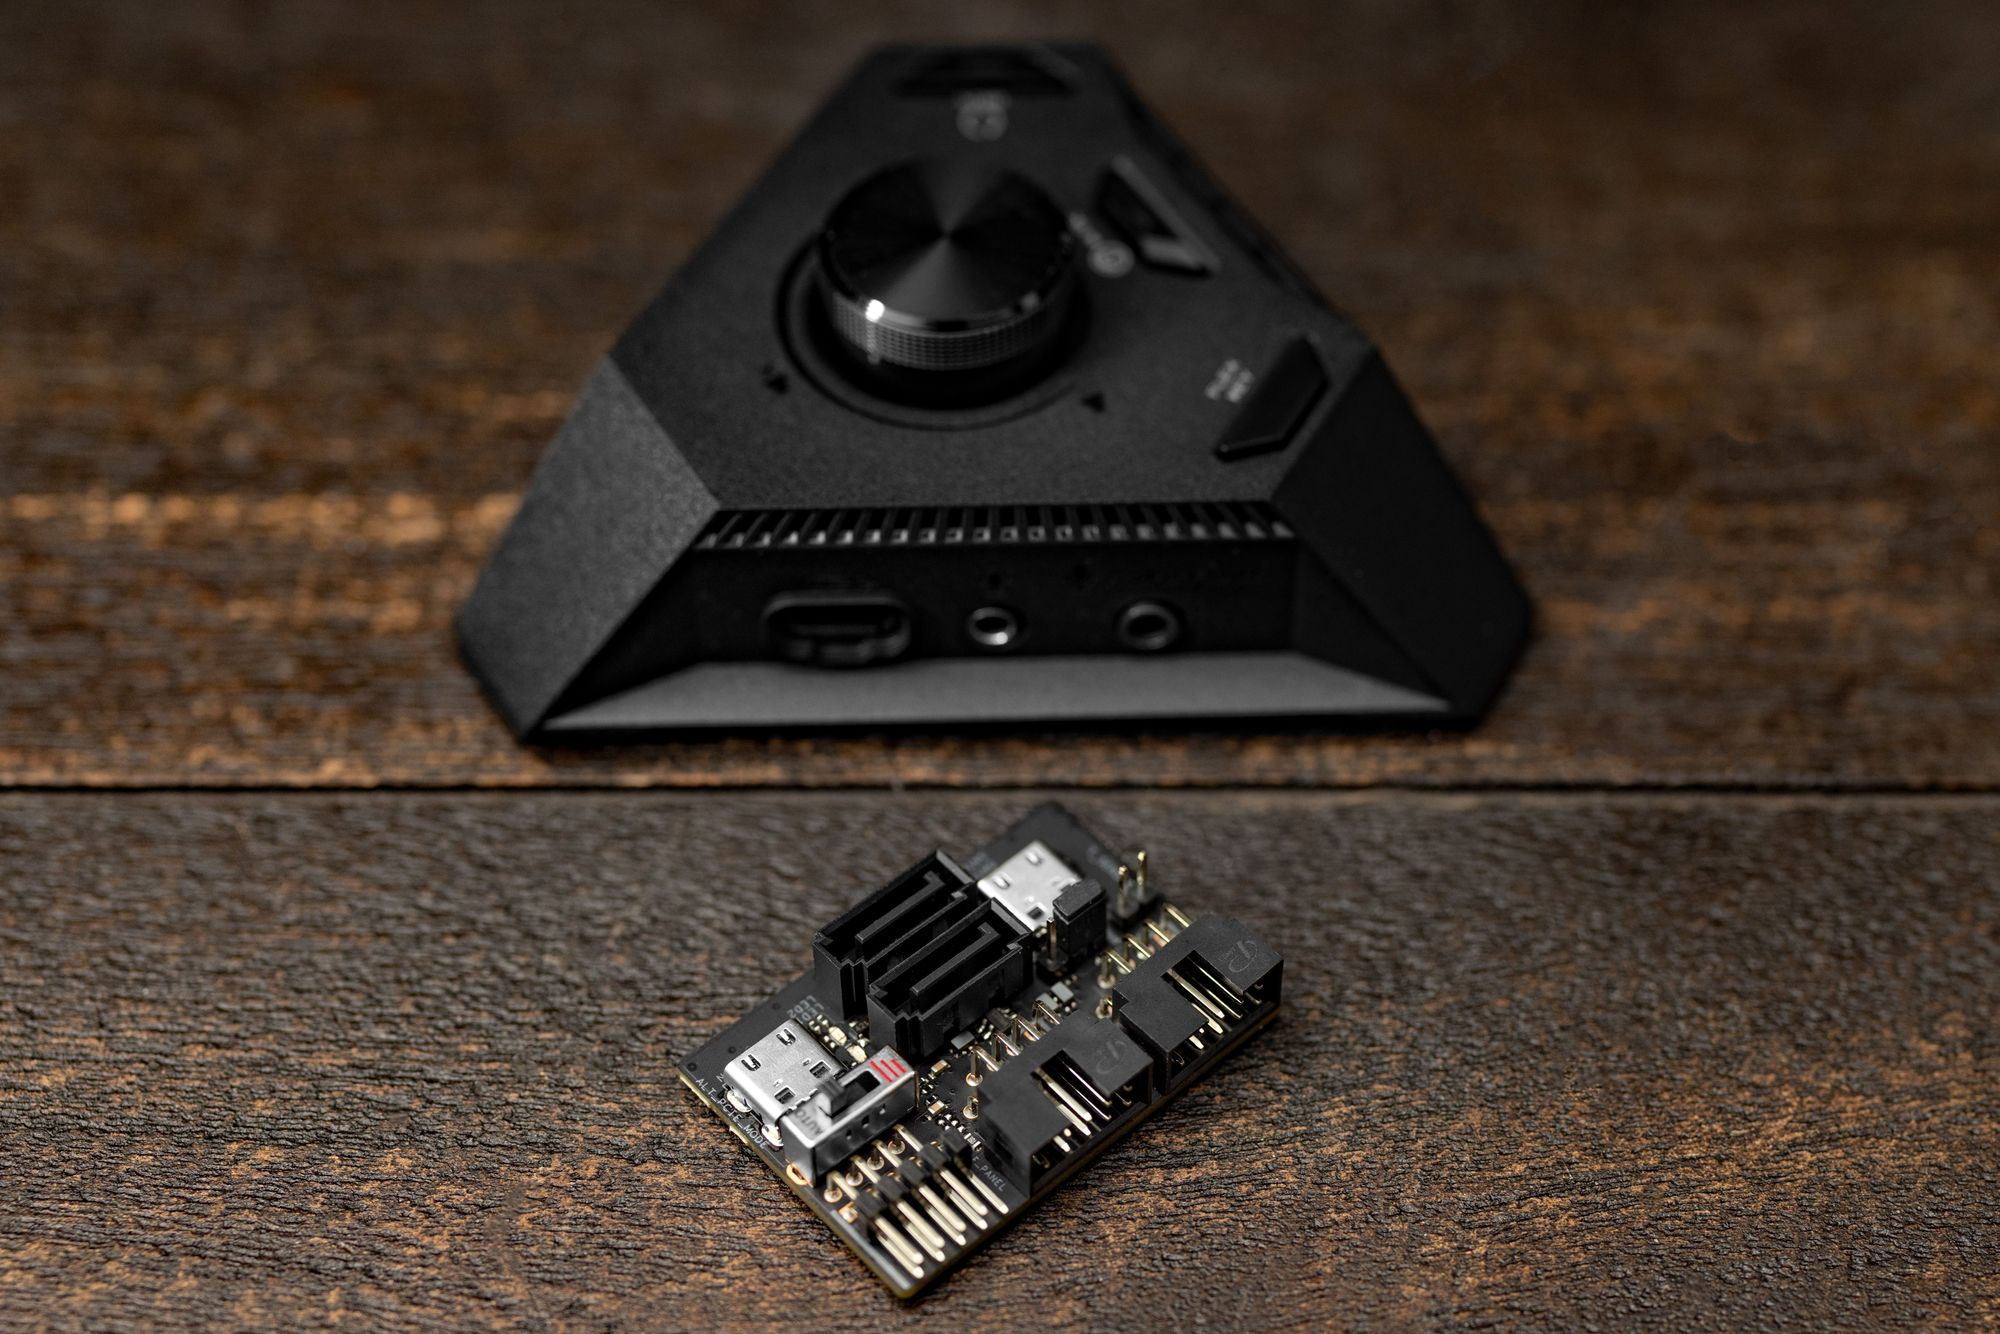
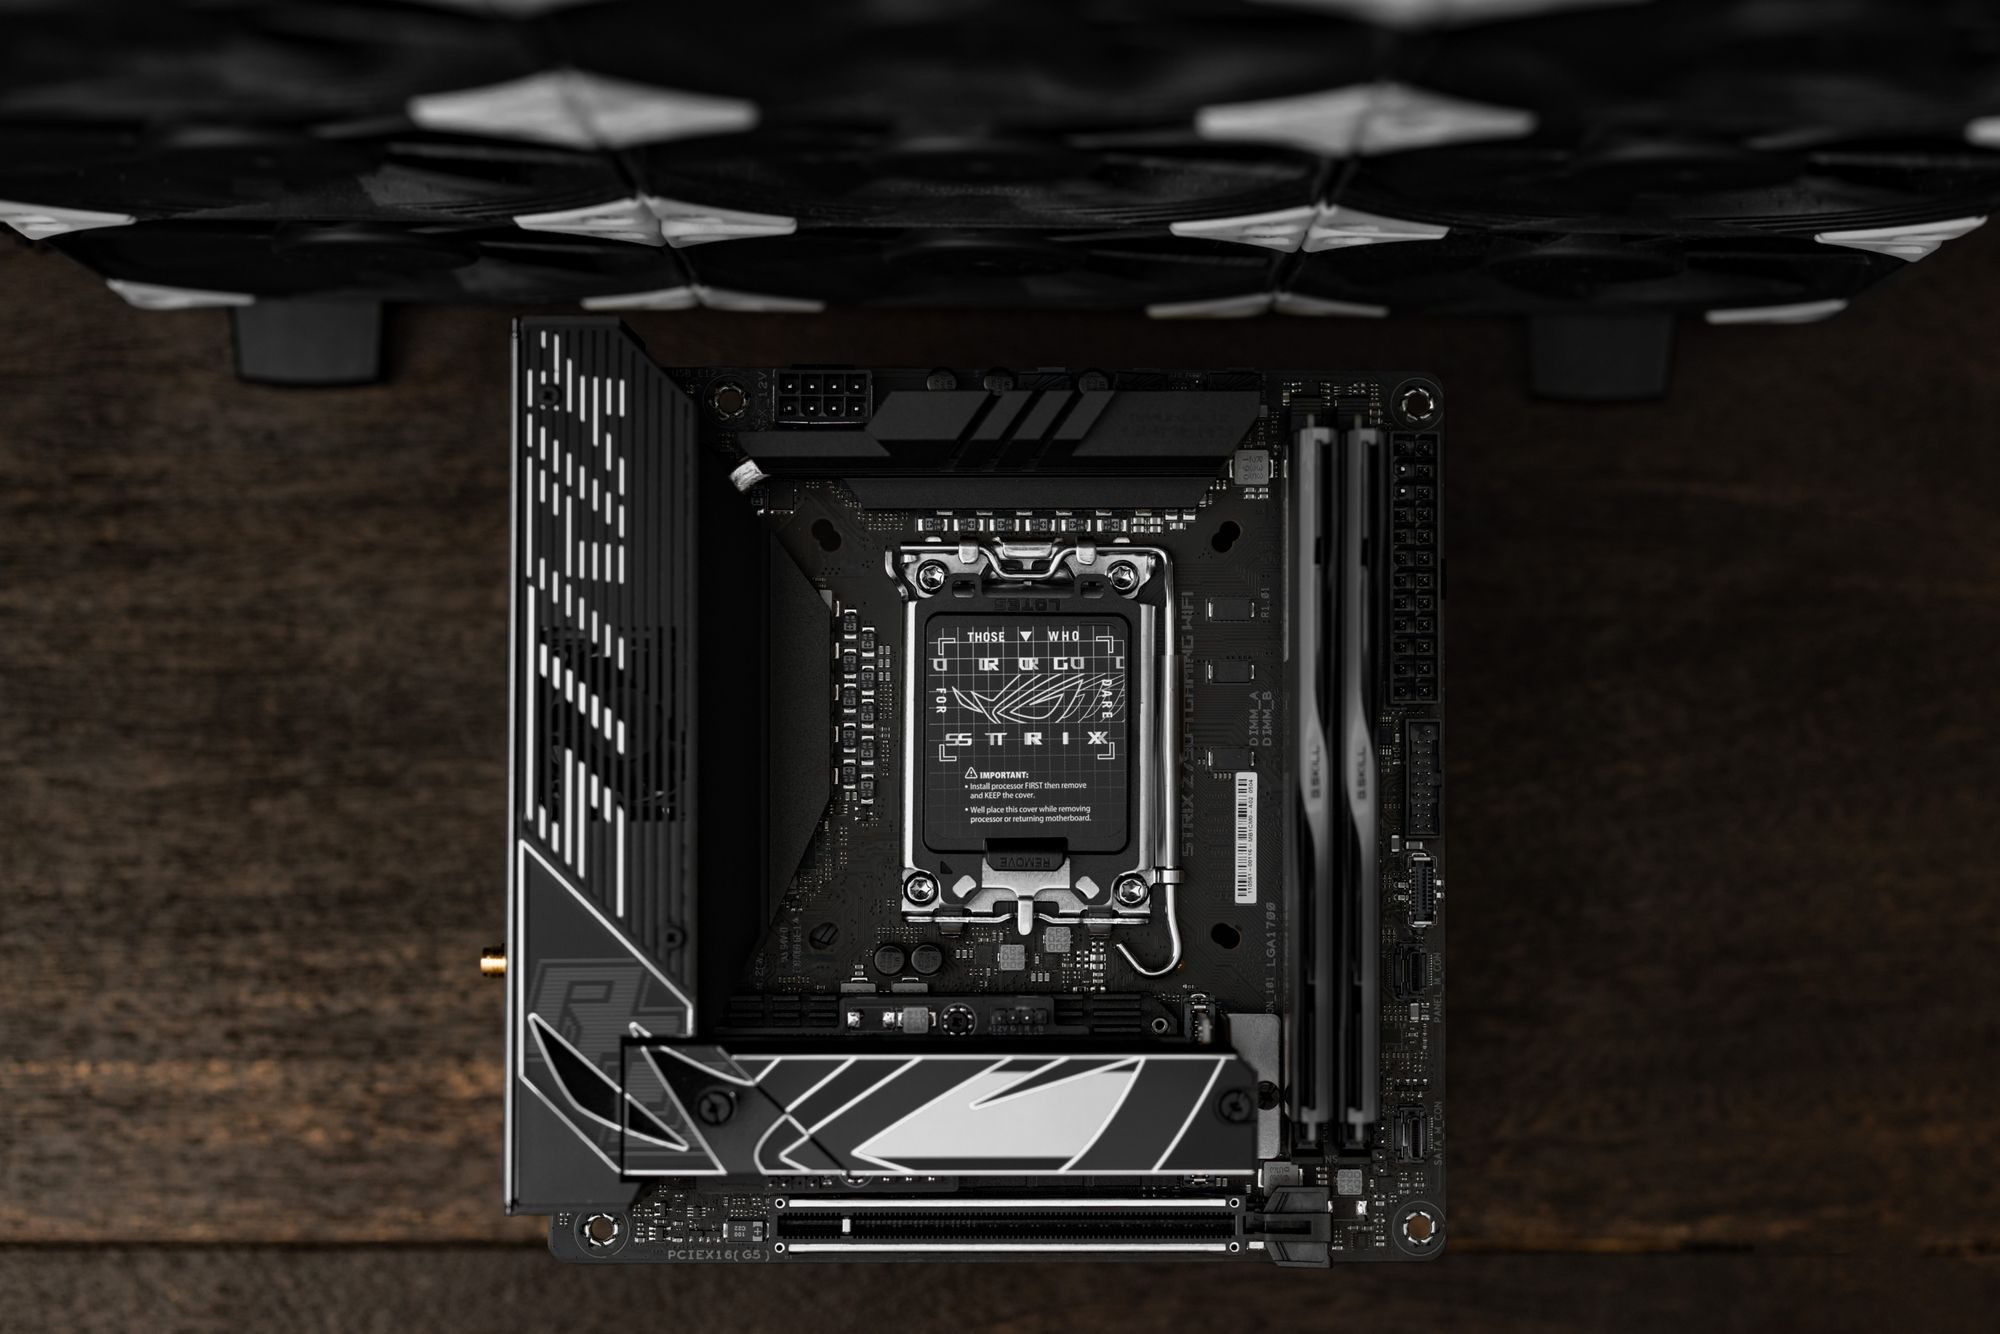

ASUS uses what they call the ROG STRIX HIVE to offload debug LEDs, Audio, Flex Keys, BIOS Flashback and an extra Type-C port. After my initial setup and testing, I leave it unplugged, but magnetically attached to the case. I use an external DAC for audio, so I have no use for it being connected day-to-day.
Outside of the price, the only major fault I have is a lack of metal backplate on the board. The motherboard has A LOT of SMDs on the rear. More than any ITX board I’ve seen prior. Lots to go wrong during any point of the building process. My other ITX STRIX boards have it at half the price, and it really seems like a miss here. The other minor gripe is lack of 10GbE. For the price… come on. Most of my NASes do saturate a 10GbE link.
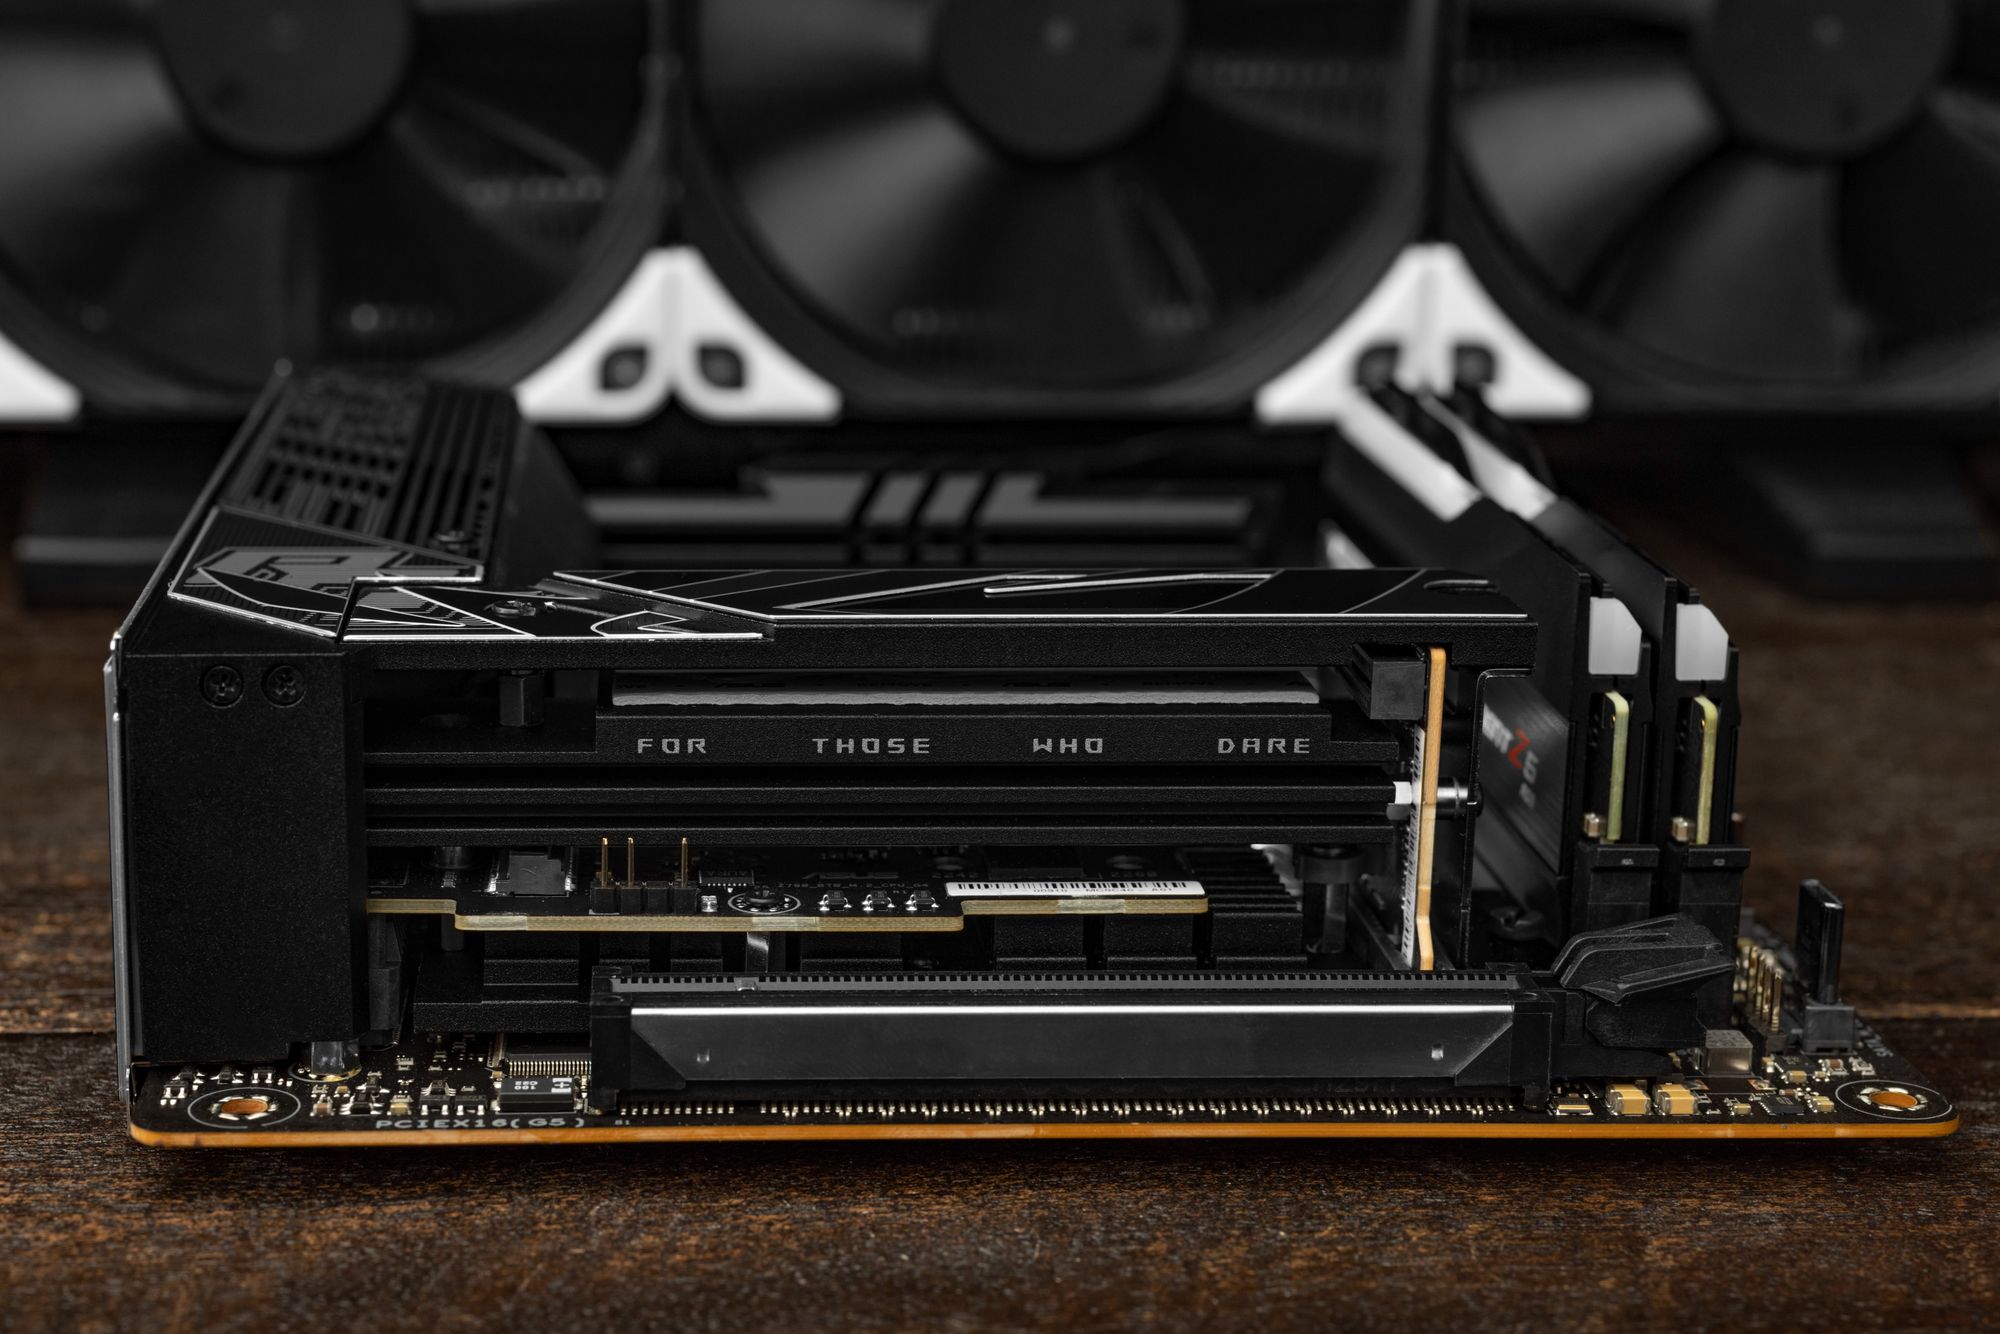
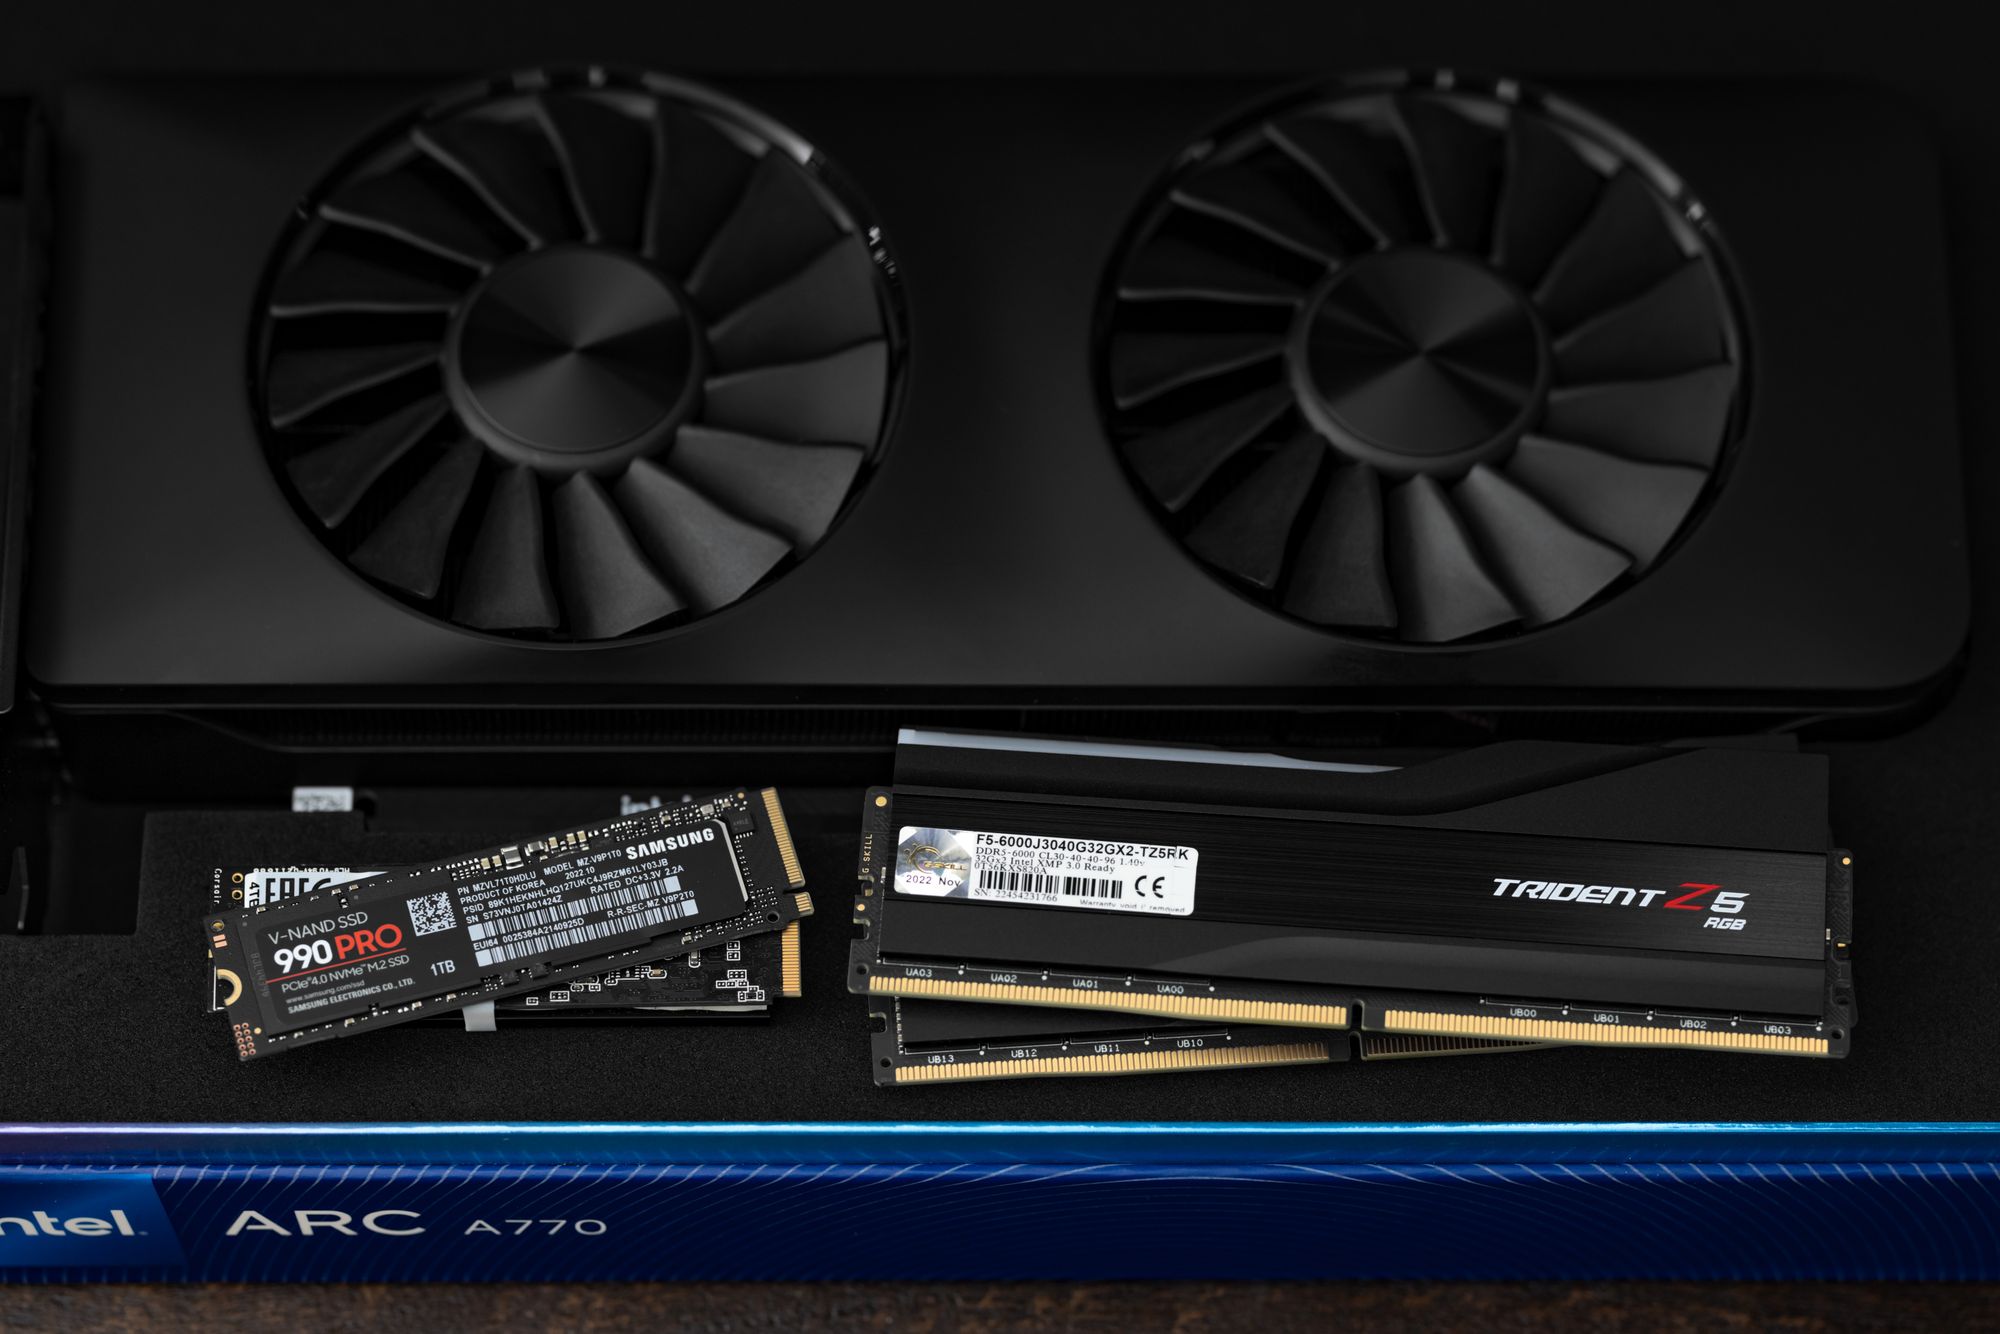
For RAM, I chose the Trident Z5 6000 CL30 64GB kit. I did not feel like doing a ton of memory research, so I just made sure to pick a Hynix based kit that I wouldn’t really need to prod much to get stable at decent clocks. My only gripe about the kit is it not being able to remember that I want RGB off when switching to Linux. It’s intermittent, but annoying.
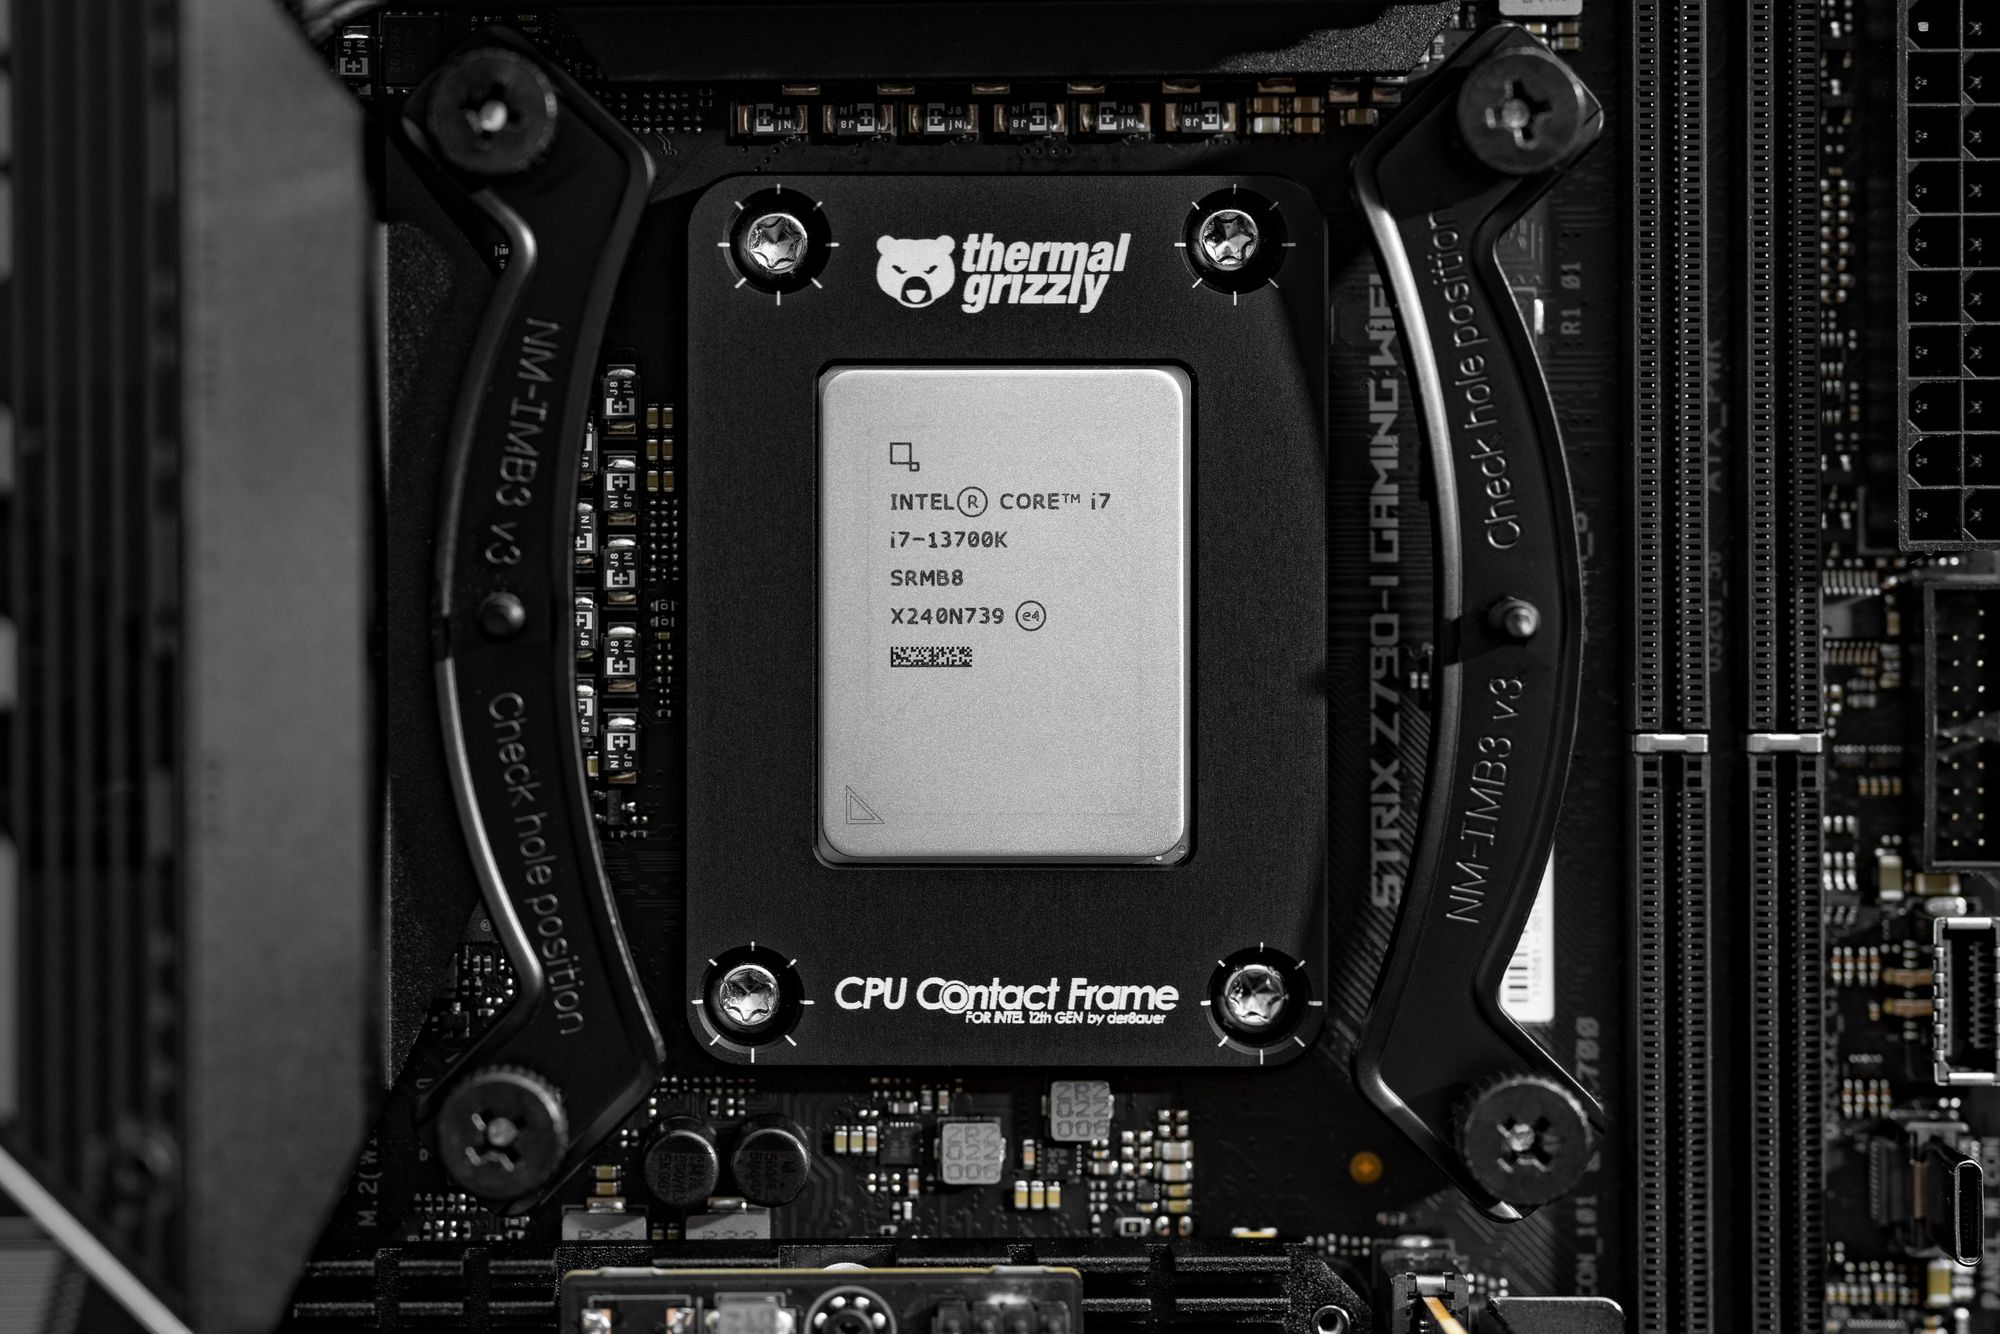

I used the Thermal Grizzly Contact Frame for the 13900K. I did not take stock temperatures, so I cannot say what the difference is, or if there is one (YMMV). I just know that I am happy with the temps and don’t need to worry about damage over time. I also bought the Thermalright frame, but I do like supporting der8auer. Most of the time I run the system with limits enforced in BIOS (253W max). This sees regular boosts of up to 5.8GHz and temps around 50C under average workloads. Temps don’t get too far over 80C under max load (Prime95 small FFT), but with the way power limits and boosting work, it’s hard to pinpoint how long worst case scenario temps last under non-synthetic loads. I’m not a PC reviewer, so long term testing like that just isn’t something I can provide.
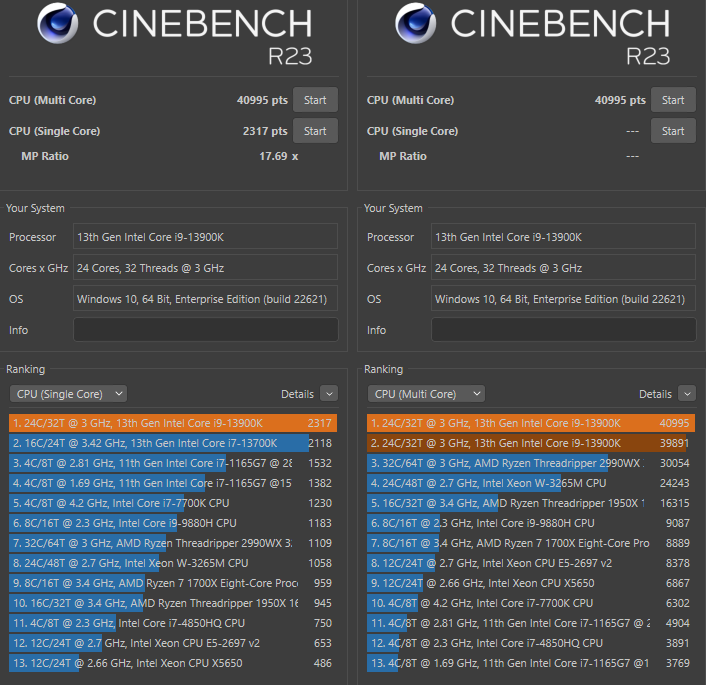
When I did let the CPU cut loose in 6GHz+ land, it was to see if I could break 40K in Cinebench. I did. 40,995 multi-core and 2317 single. These passes chugged a remarkable 324 watts just on CPU. This is something I’ve only seen with my daily driver 3970X occasionally with PBO enabled.
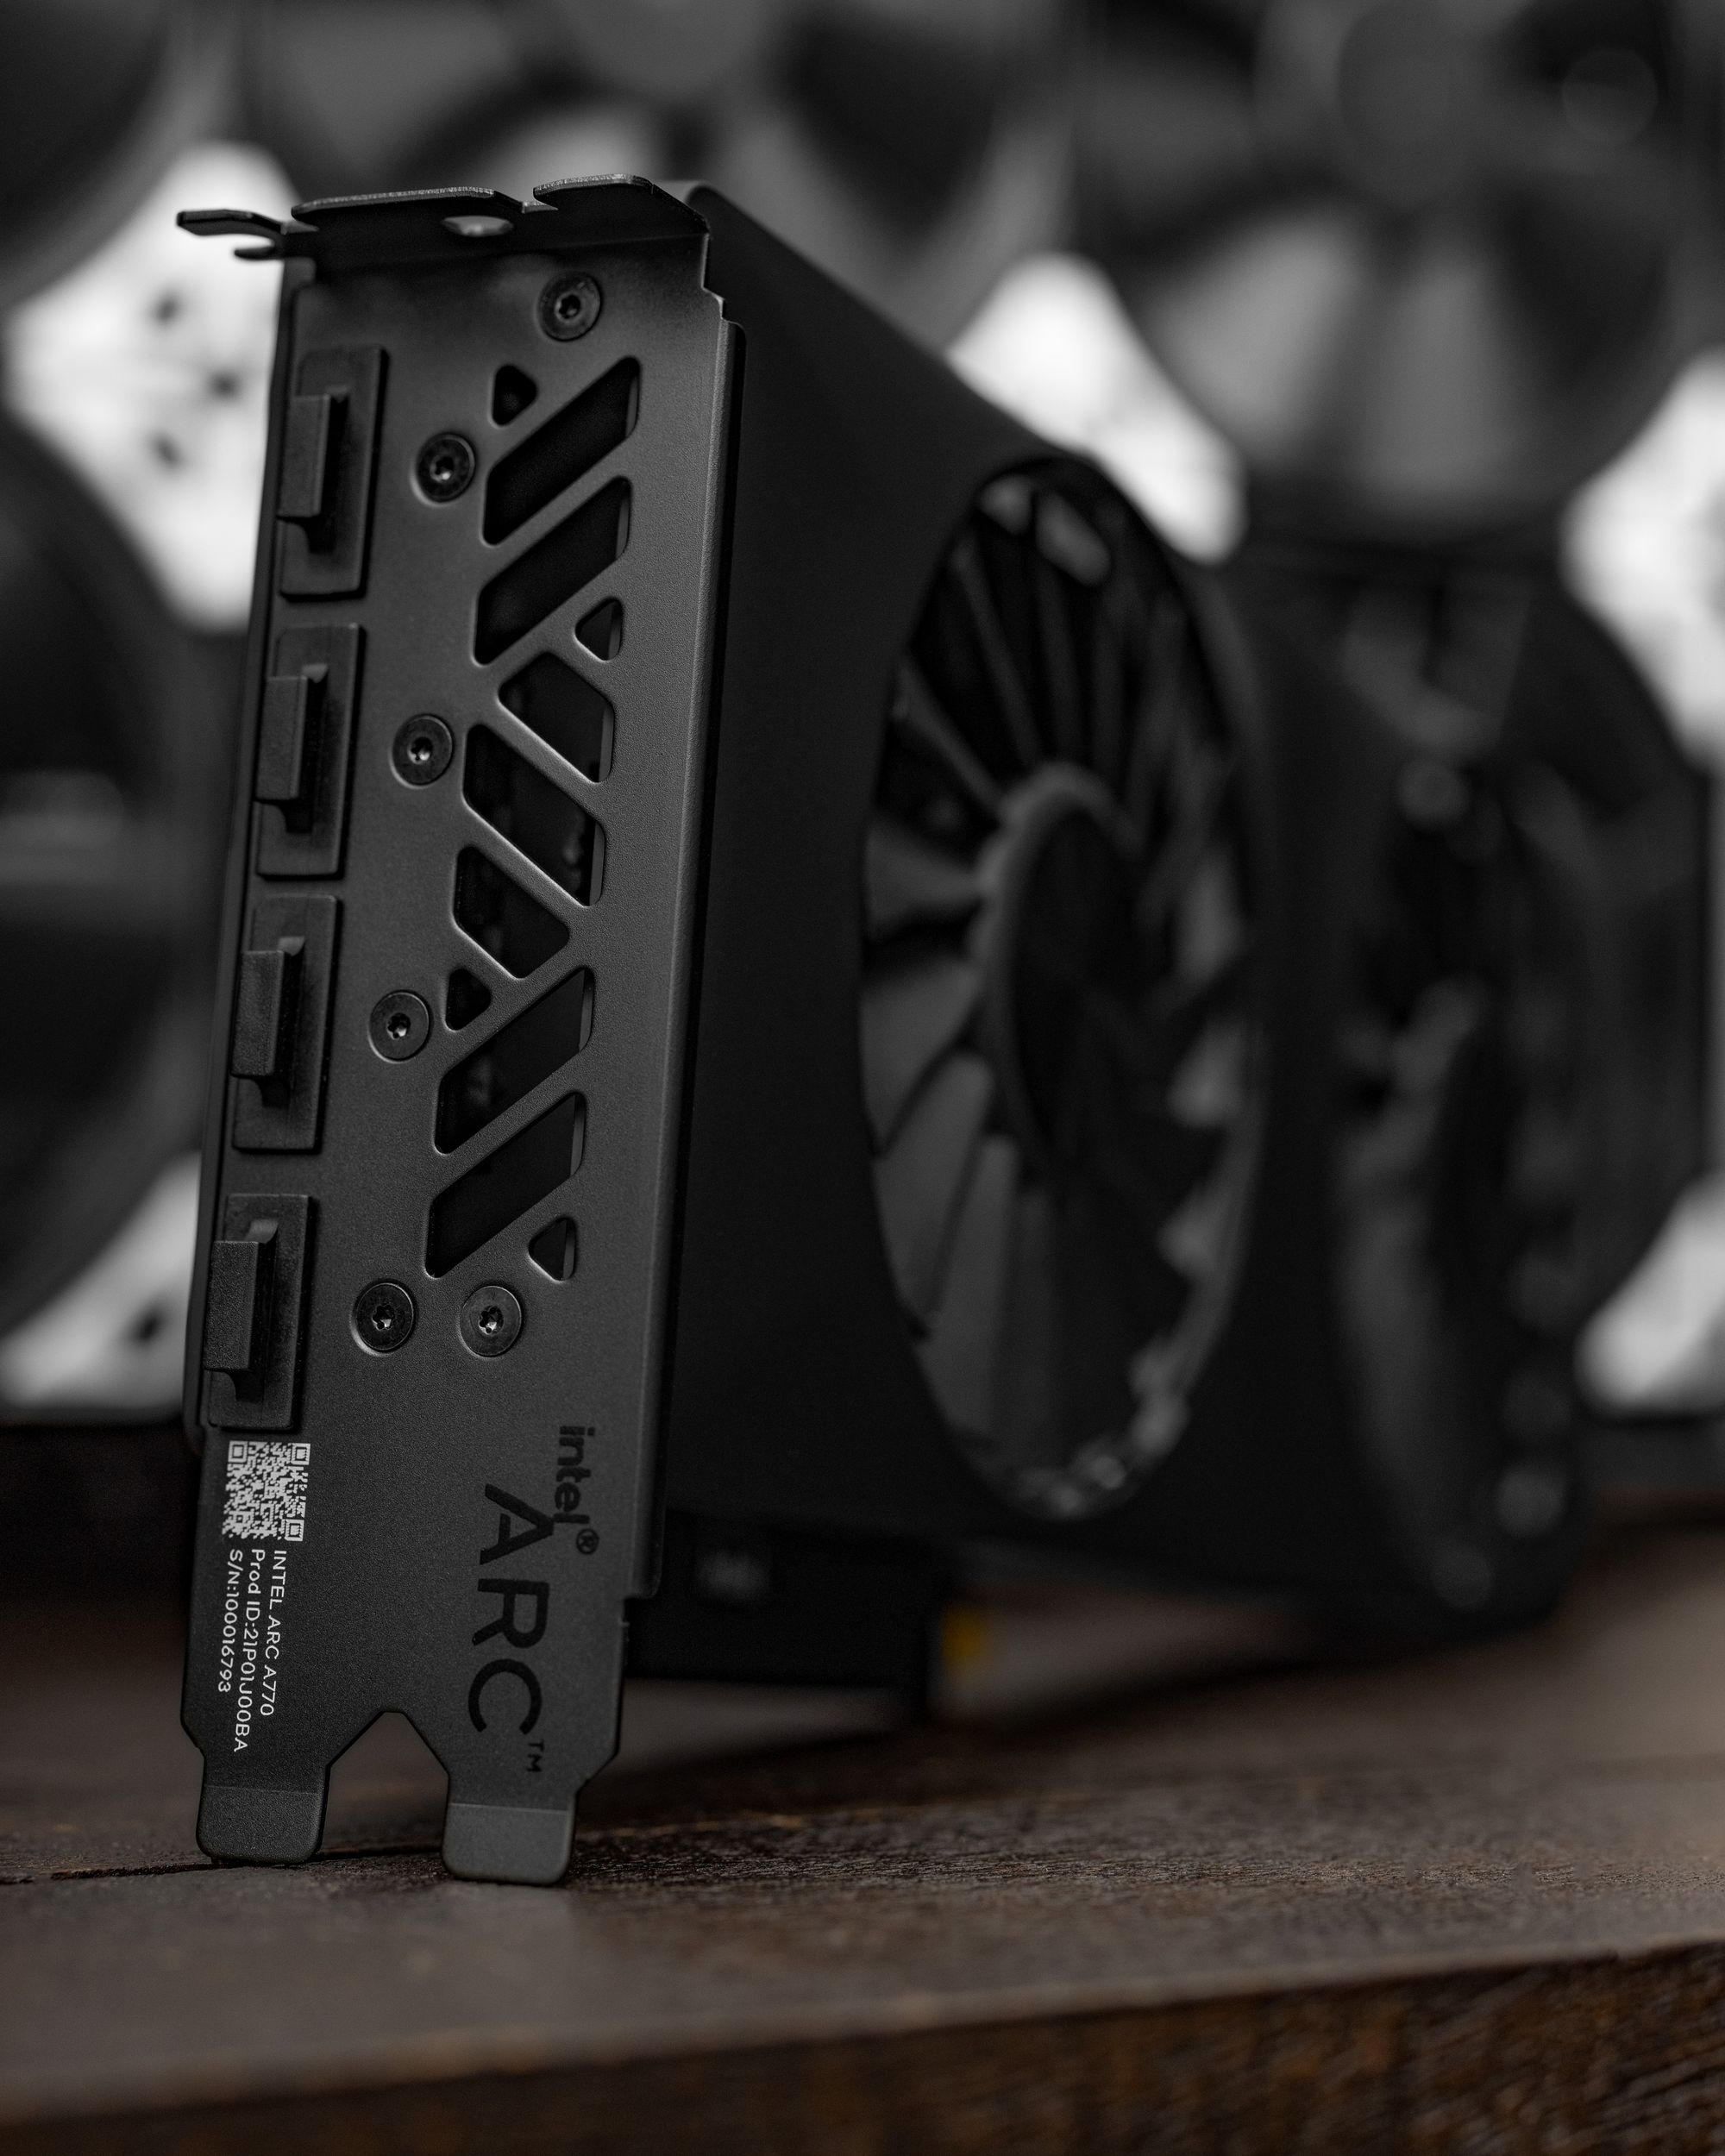
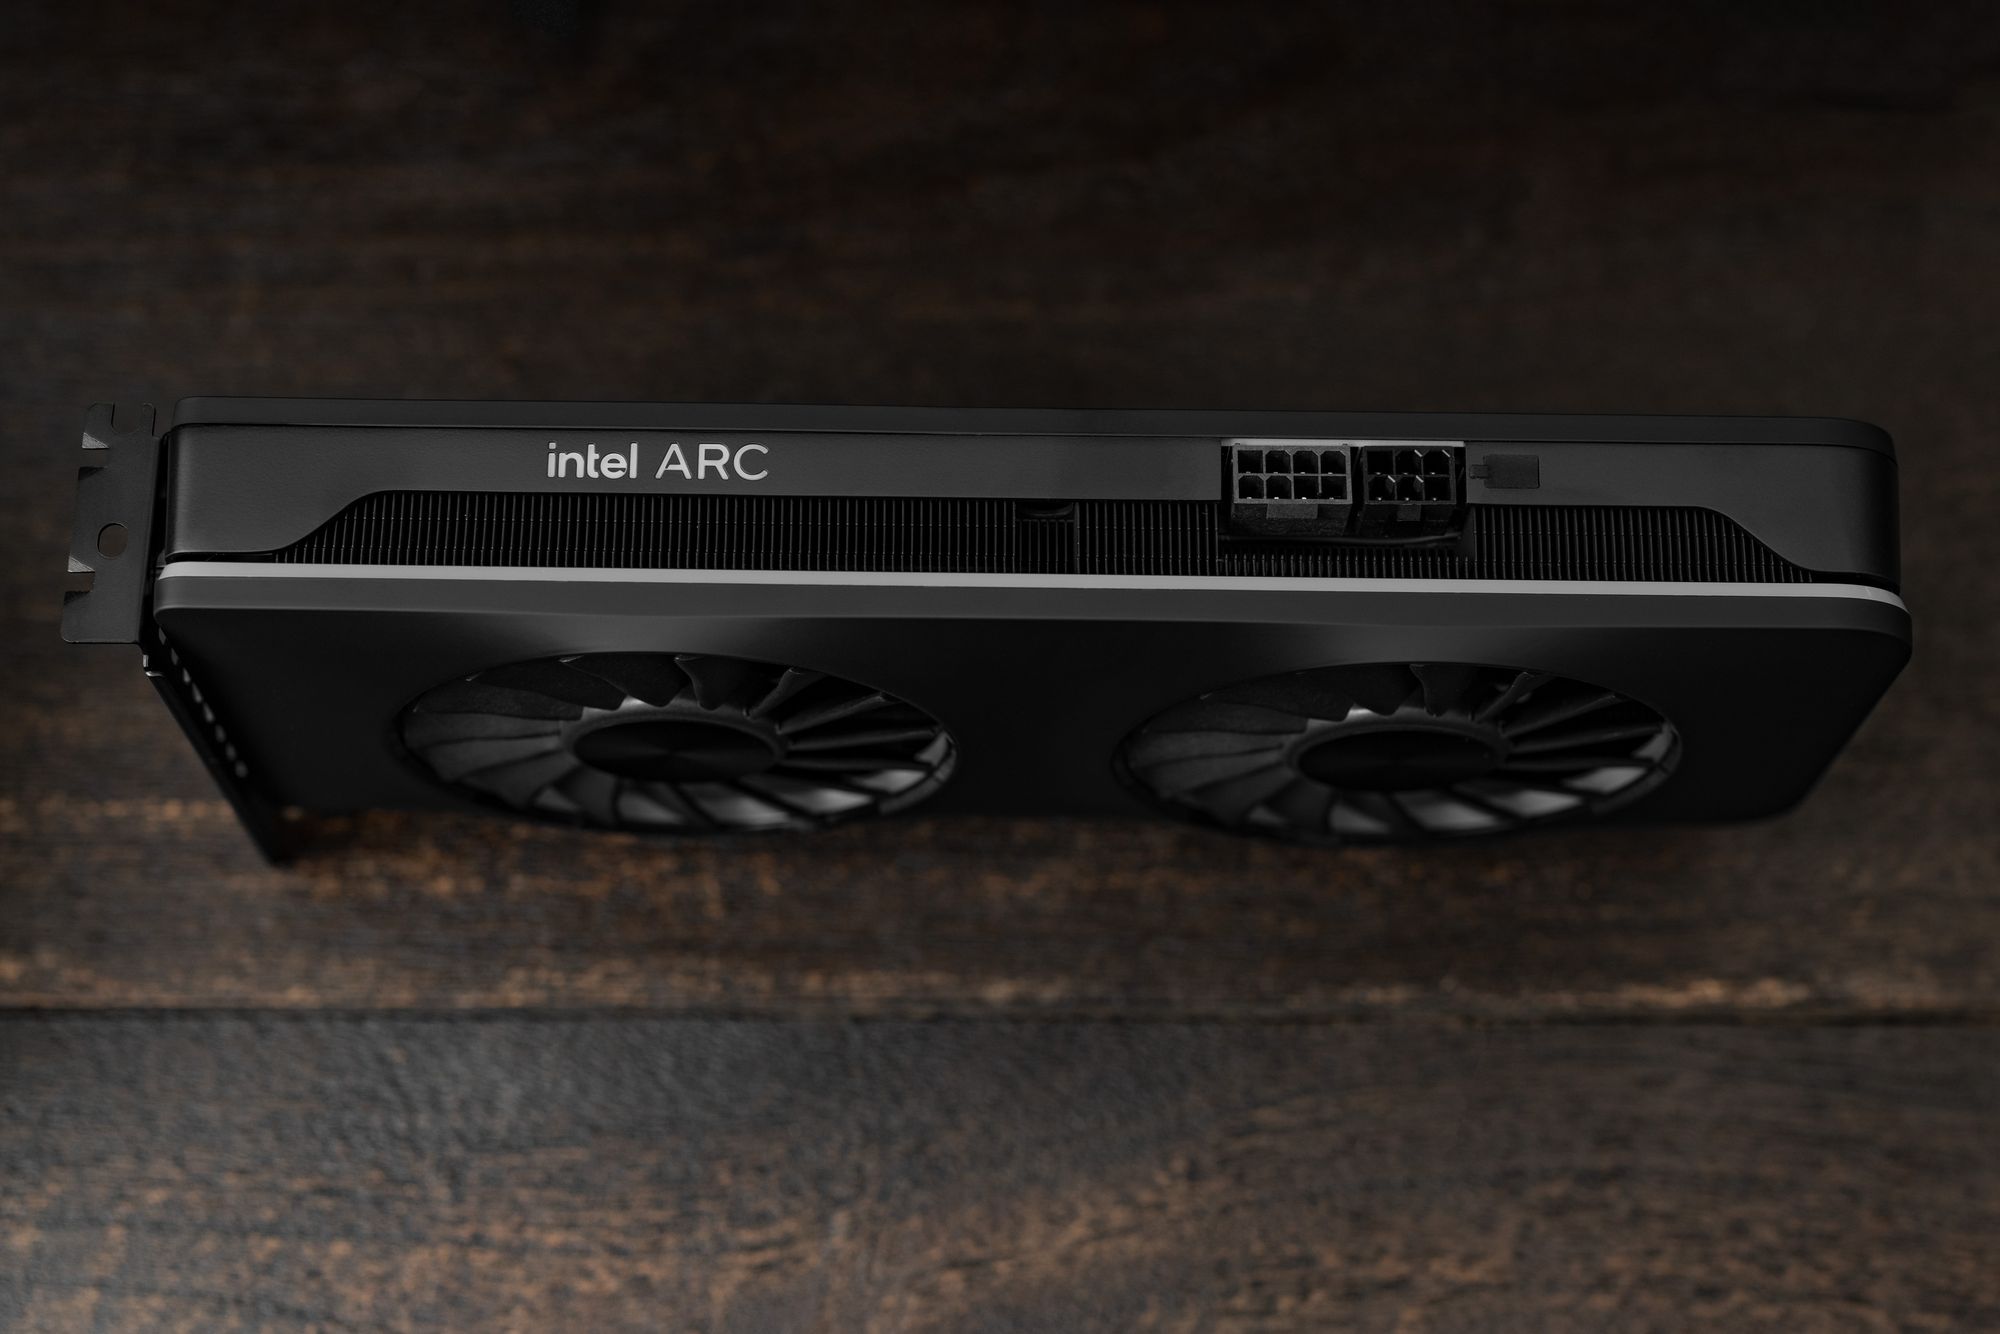
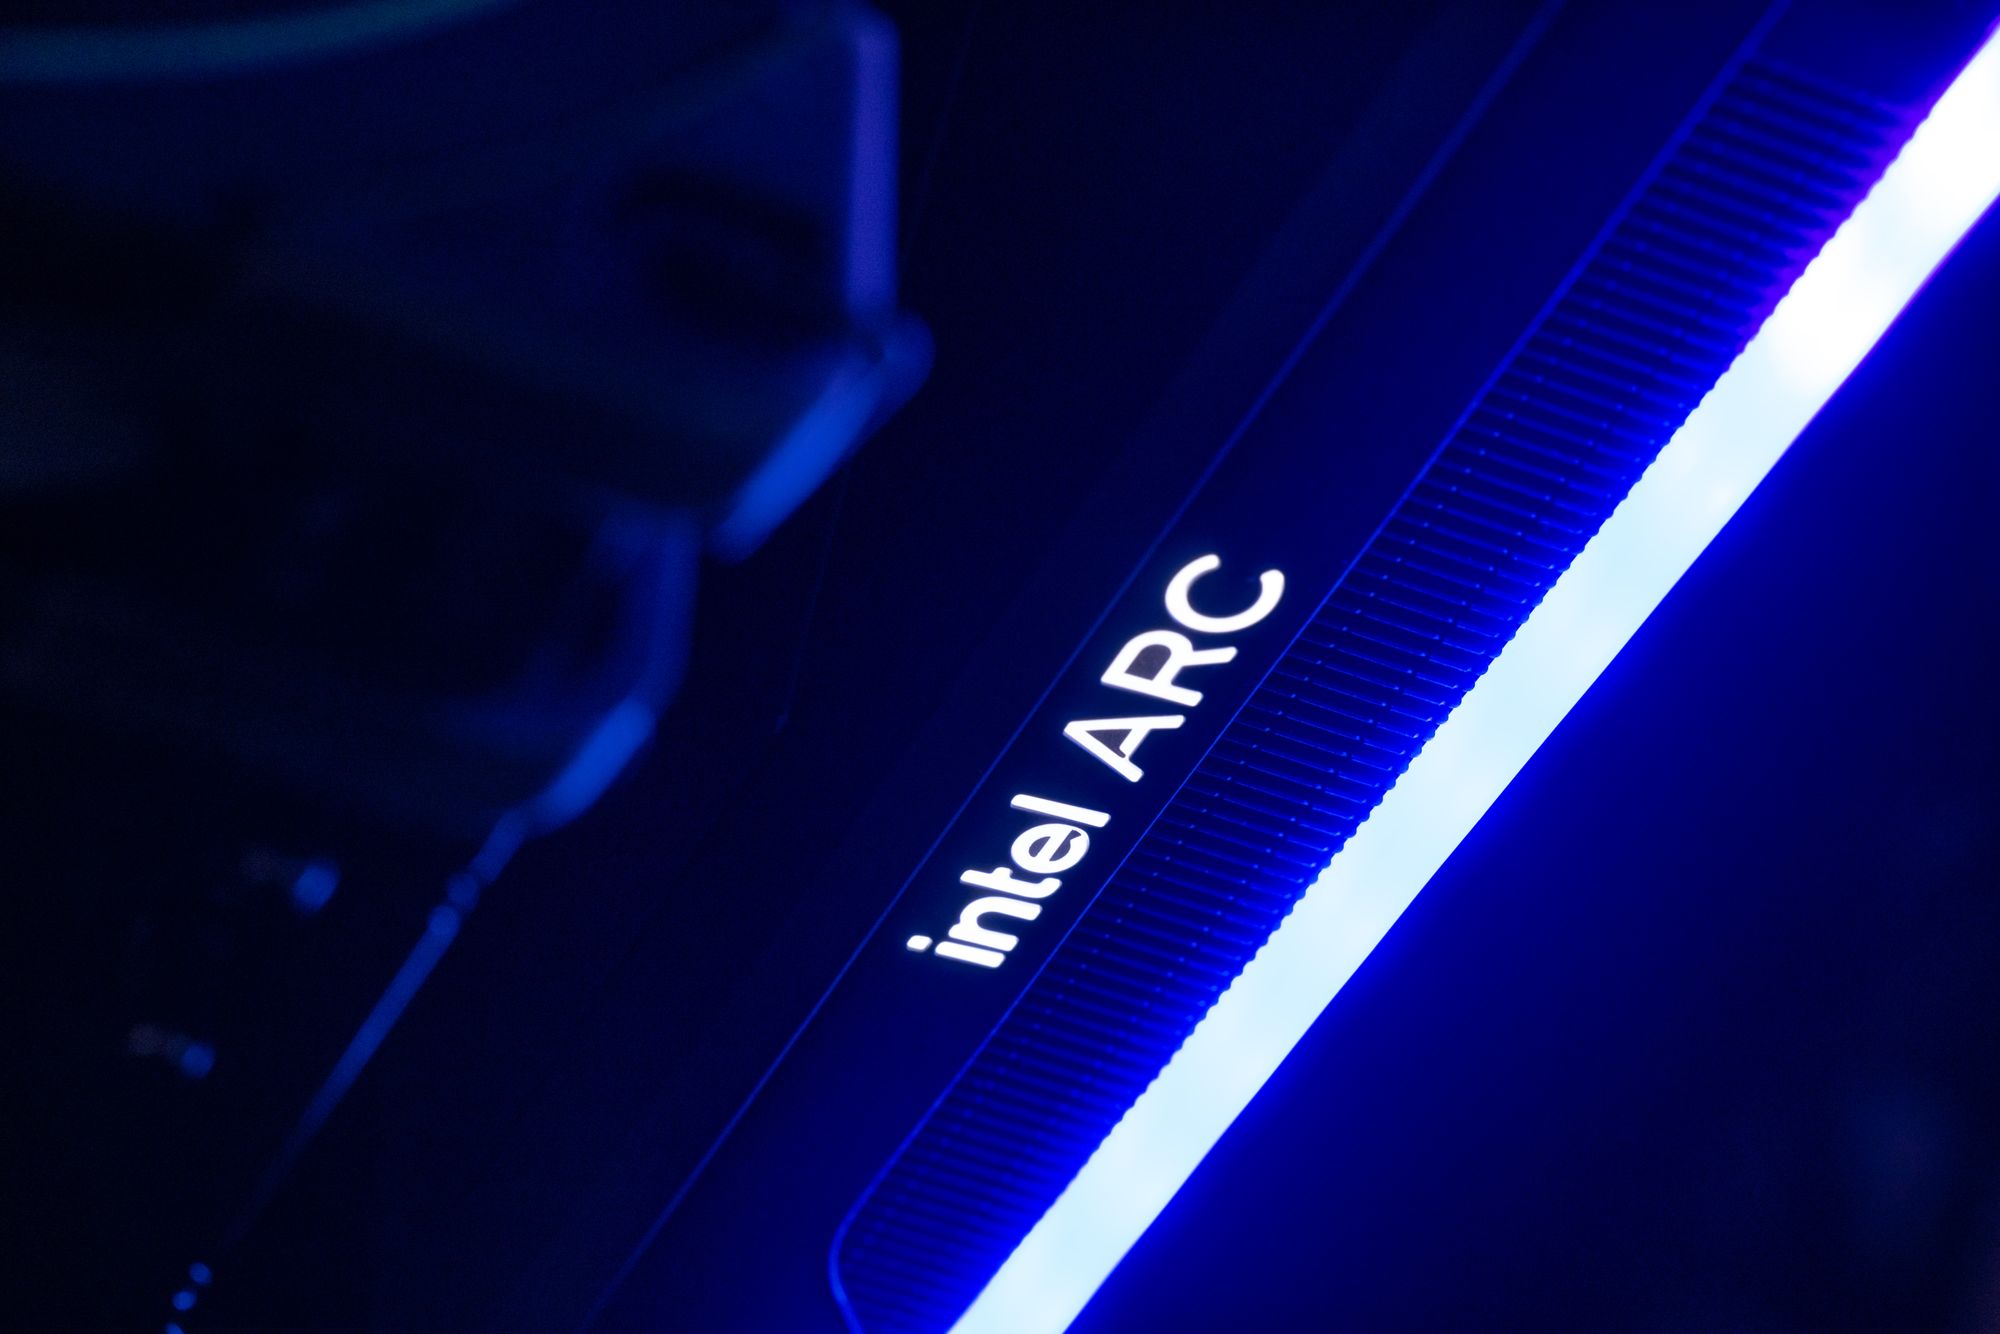
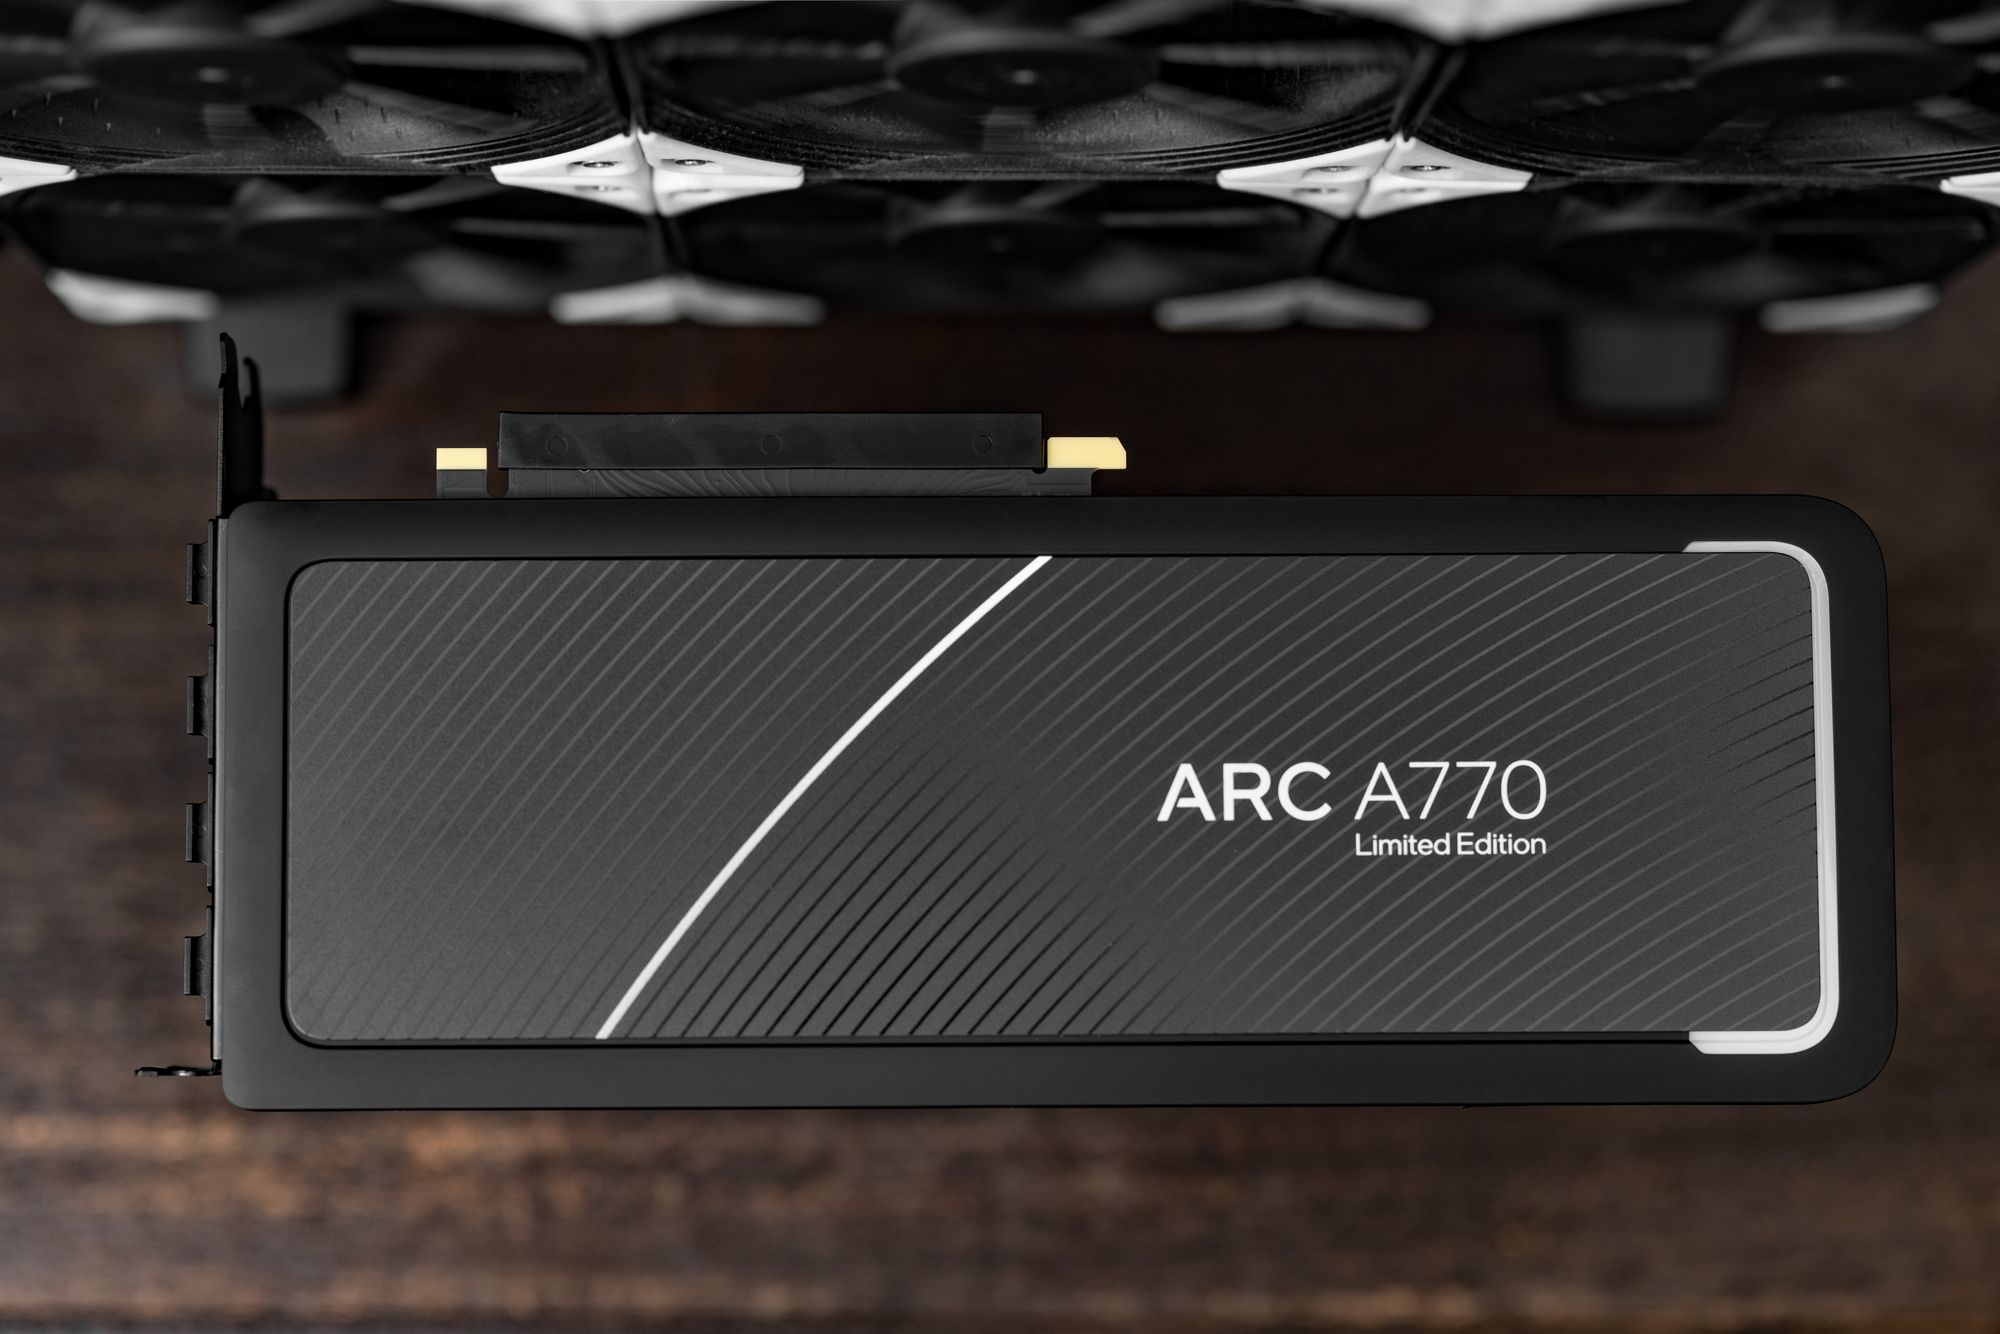
The A770
It’s a beautiful card. Its looks are mature, classy, understated, and sleek. The focus of the card’s design is around hidden hardware. This lends a lot to the looks, to the dismay of Gamers Nexus. This means yes, there is some double-sided tape and a complicated disassembly. I knew this going into the build, and the tradeoff was worth it to me. The separate IC2 to USB cable to control RGB annoys me to no end, but I simply plugged it in once to turn off the RGB, and back into the box it went.
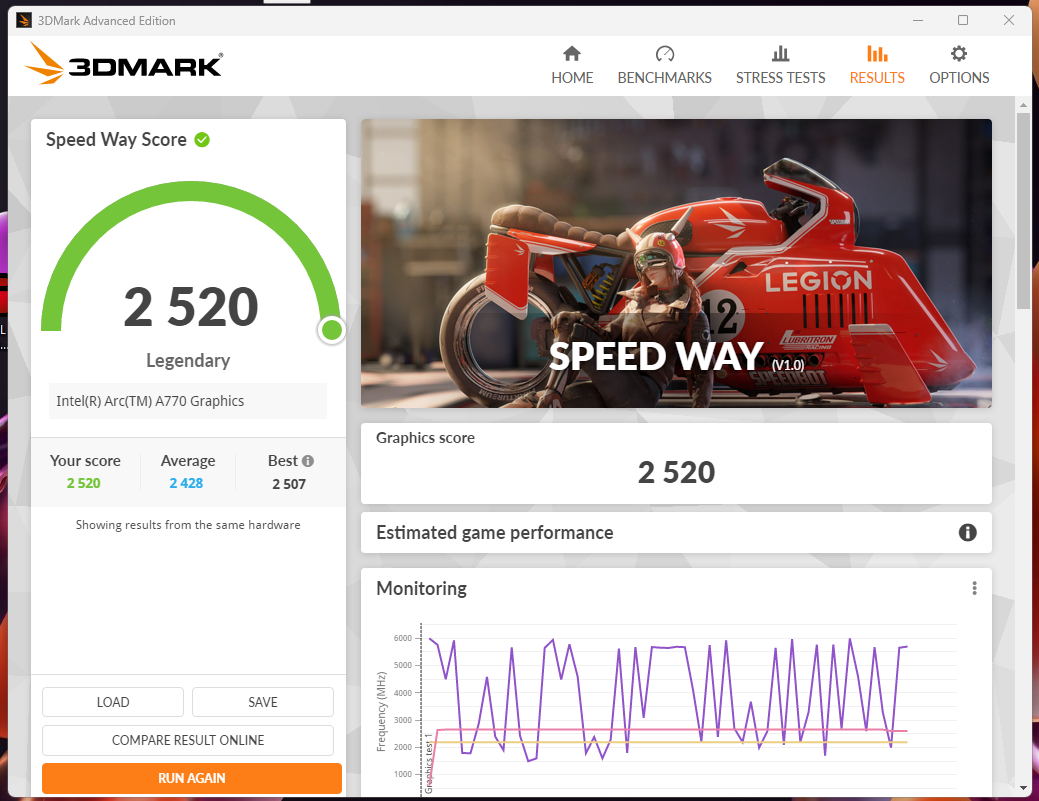
I did say this is not a gaming build, but I couldn’t get an A770 and NOT play around with it a bit. It’s the 3rd player in a longstanding duopoly. I started with 3DMark to see where the card stood and where it could go from there. The answer is not very far. The sliders in ARC Control allow you to increase the temperature limit, but the card hits a power wall long before that kicks in. The first slider is some mixture of frequency and voltage adjustment. What does it do exactly? I have no idea. I just know that I played around with it in various intervals and my card likes 55% for short-term bench tests. The voltage offset didn’t seem to do anything in my monitoring. Given how few results there are in the 3DMark database, I got a few Steam achievements for setting tops scores, so that was nice.
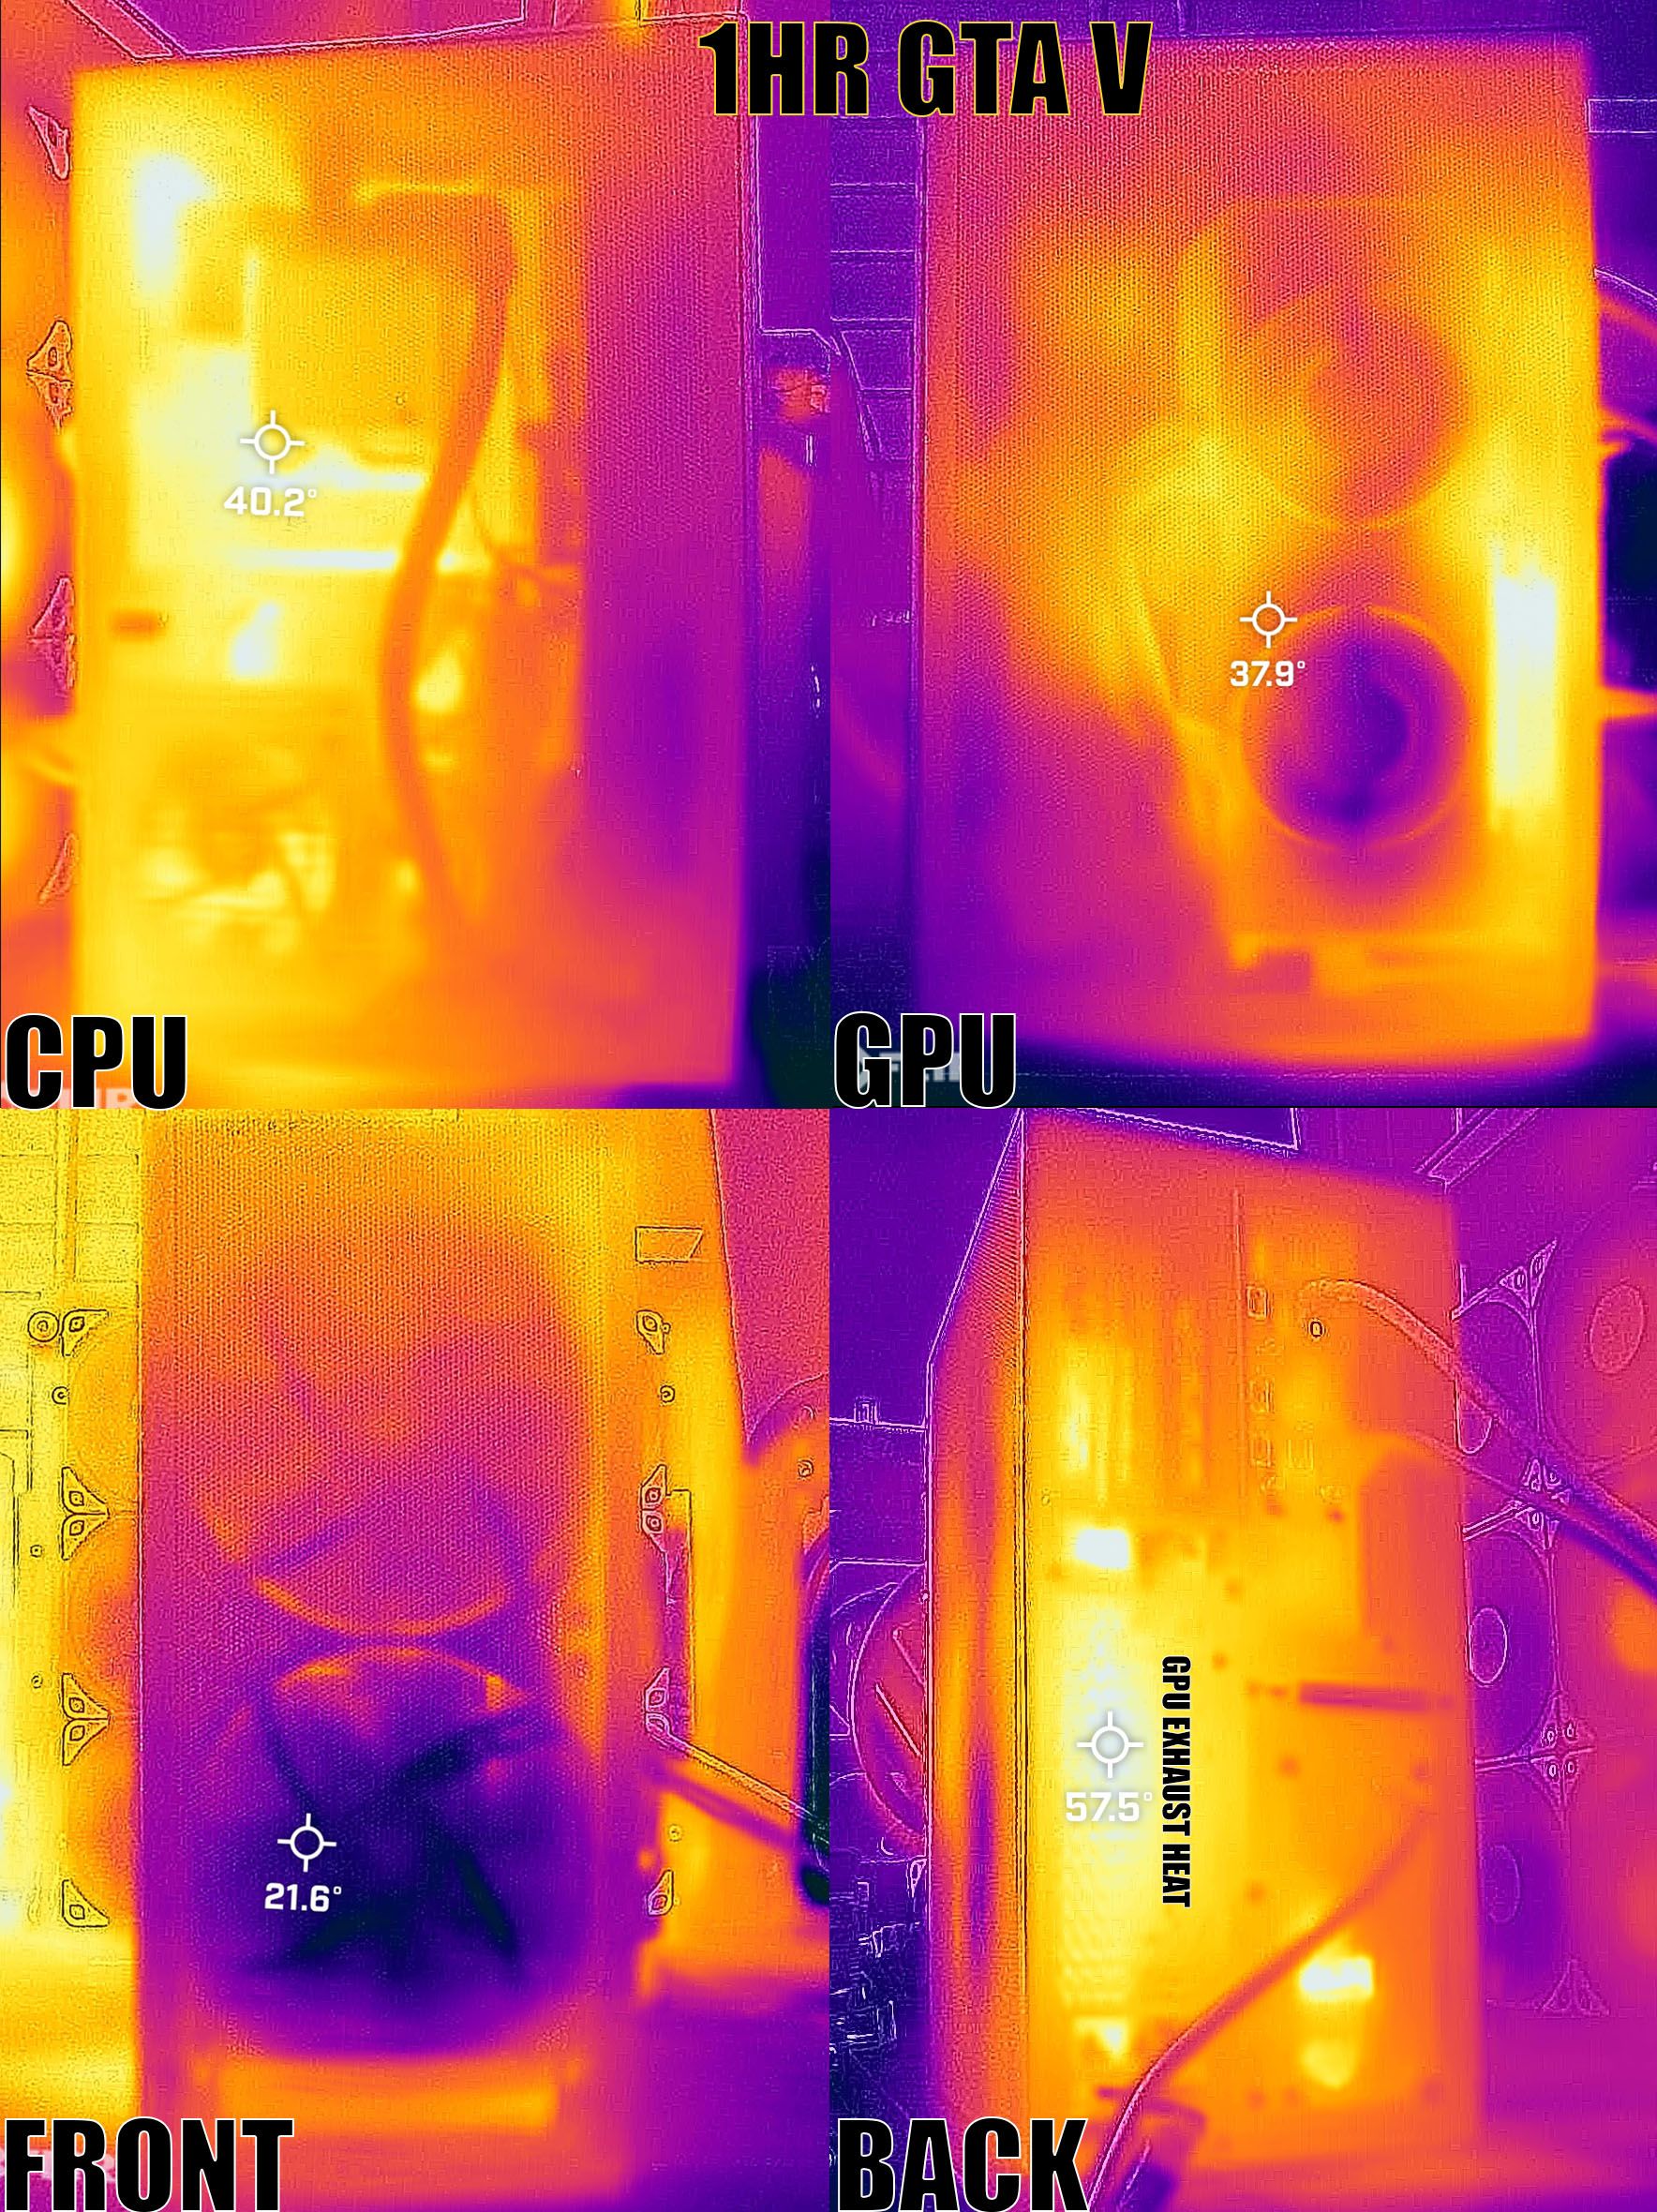
The only game I play with any consistency is GTA V. It’s not ideal for ARC, but HAS been ideal for seeing driver improvements in just a few short weeks in DX11. I’m not a tech reviewer by any means, so my numbers are largely useless, but I’ll post some results of an hour or so of GTA V.
Averages observed w/ a 45% “GPU Performance Boost” slider bump and max power/temp limits
- Power: 200W
- Core Temps: 72C
- Core Clock: 2537
- Memory Clock: 2187
- Fan RPM: 1780RPM
- FPS (XBOX Games Bar): 120
The Intel ARC Control is weird. It leans more AMD Adrenaline than GeForce Experience, but it’s… an overlay. One click and it goes poof. I don’t get it. With all the driver improvements, I figured they would do something about this, but they are staying the course it seems.
In Linux, after setting a kernel option of "i915.force_probe=", the A770 simply worked. The upcoming 6.2 Kernel will remove the need for the kernel option, then it’s just plug and play after that. There’s not much more I can report on from a Linux standpoint at this stage. I may try gaming in the future, but now that the holidays are over, it’s full-time bill paying mode. The fun and games are over until mid-March when things calm down again.
PiKVM
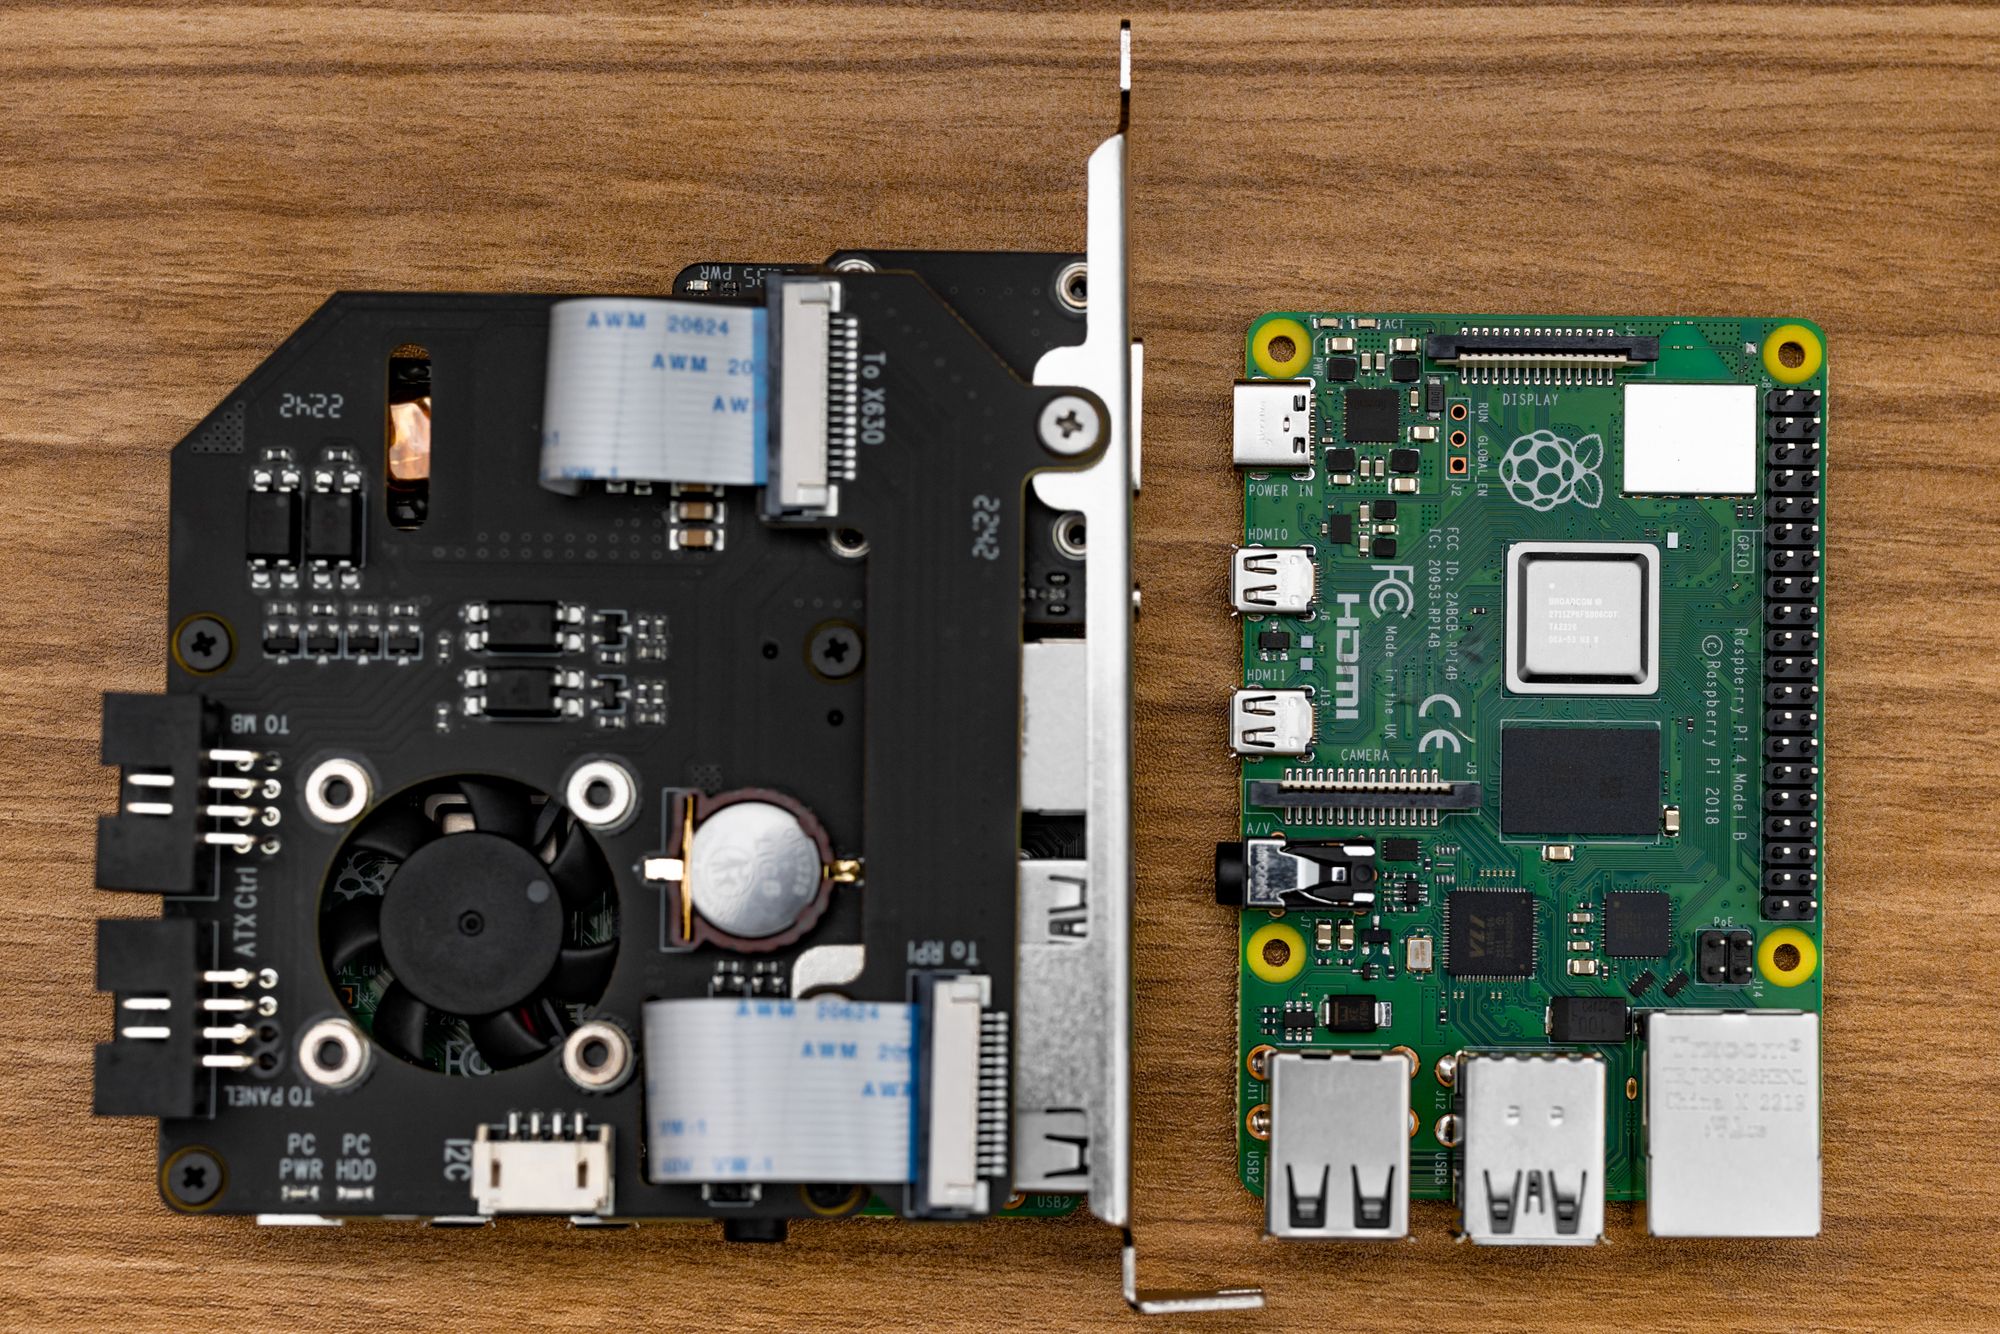
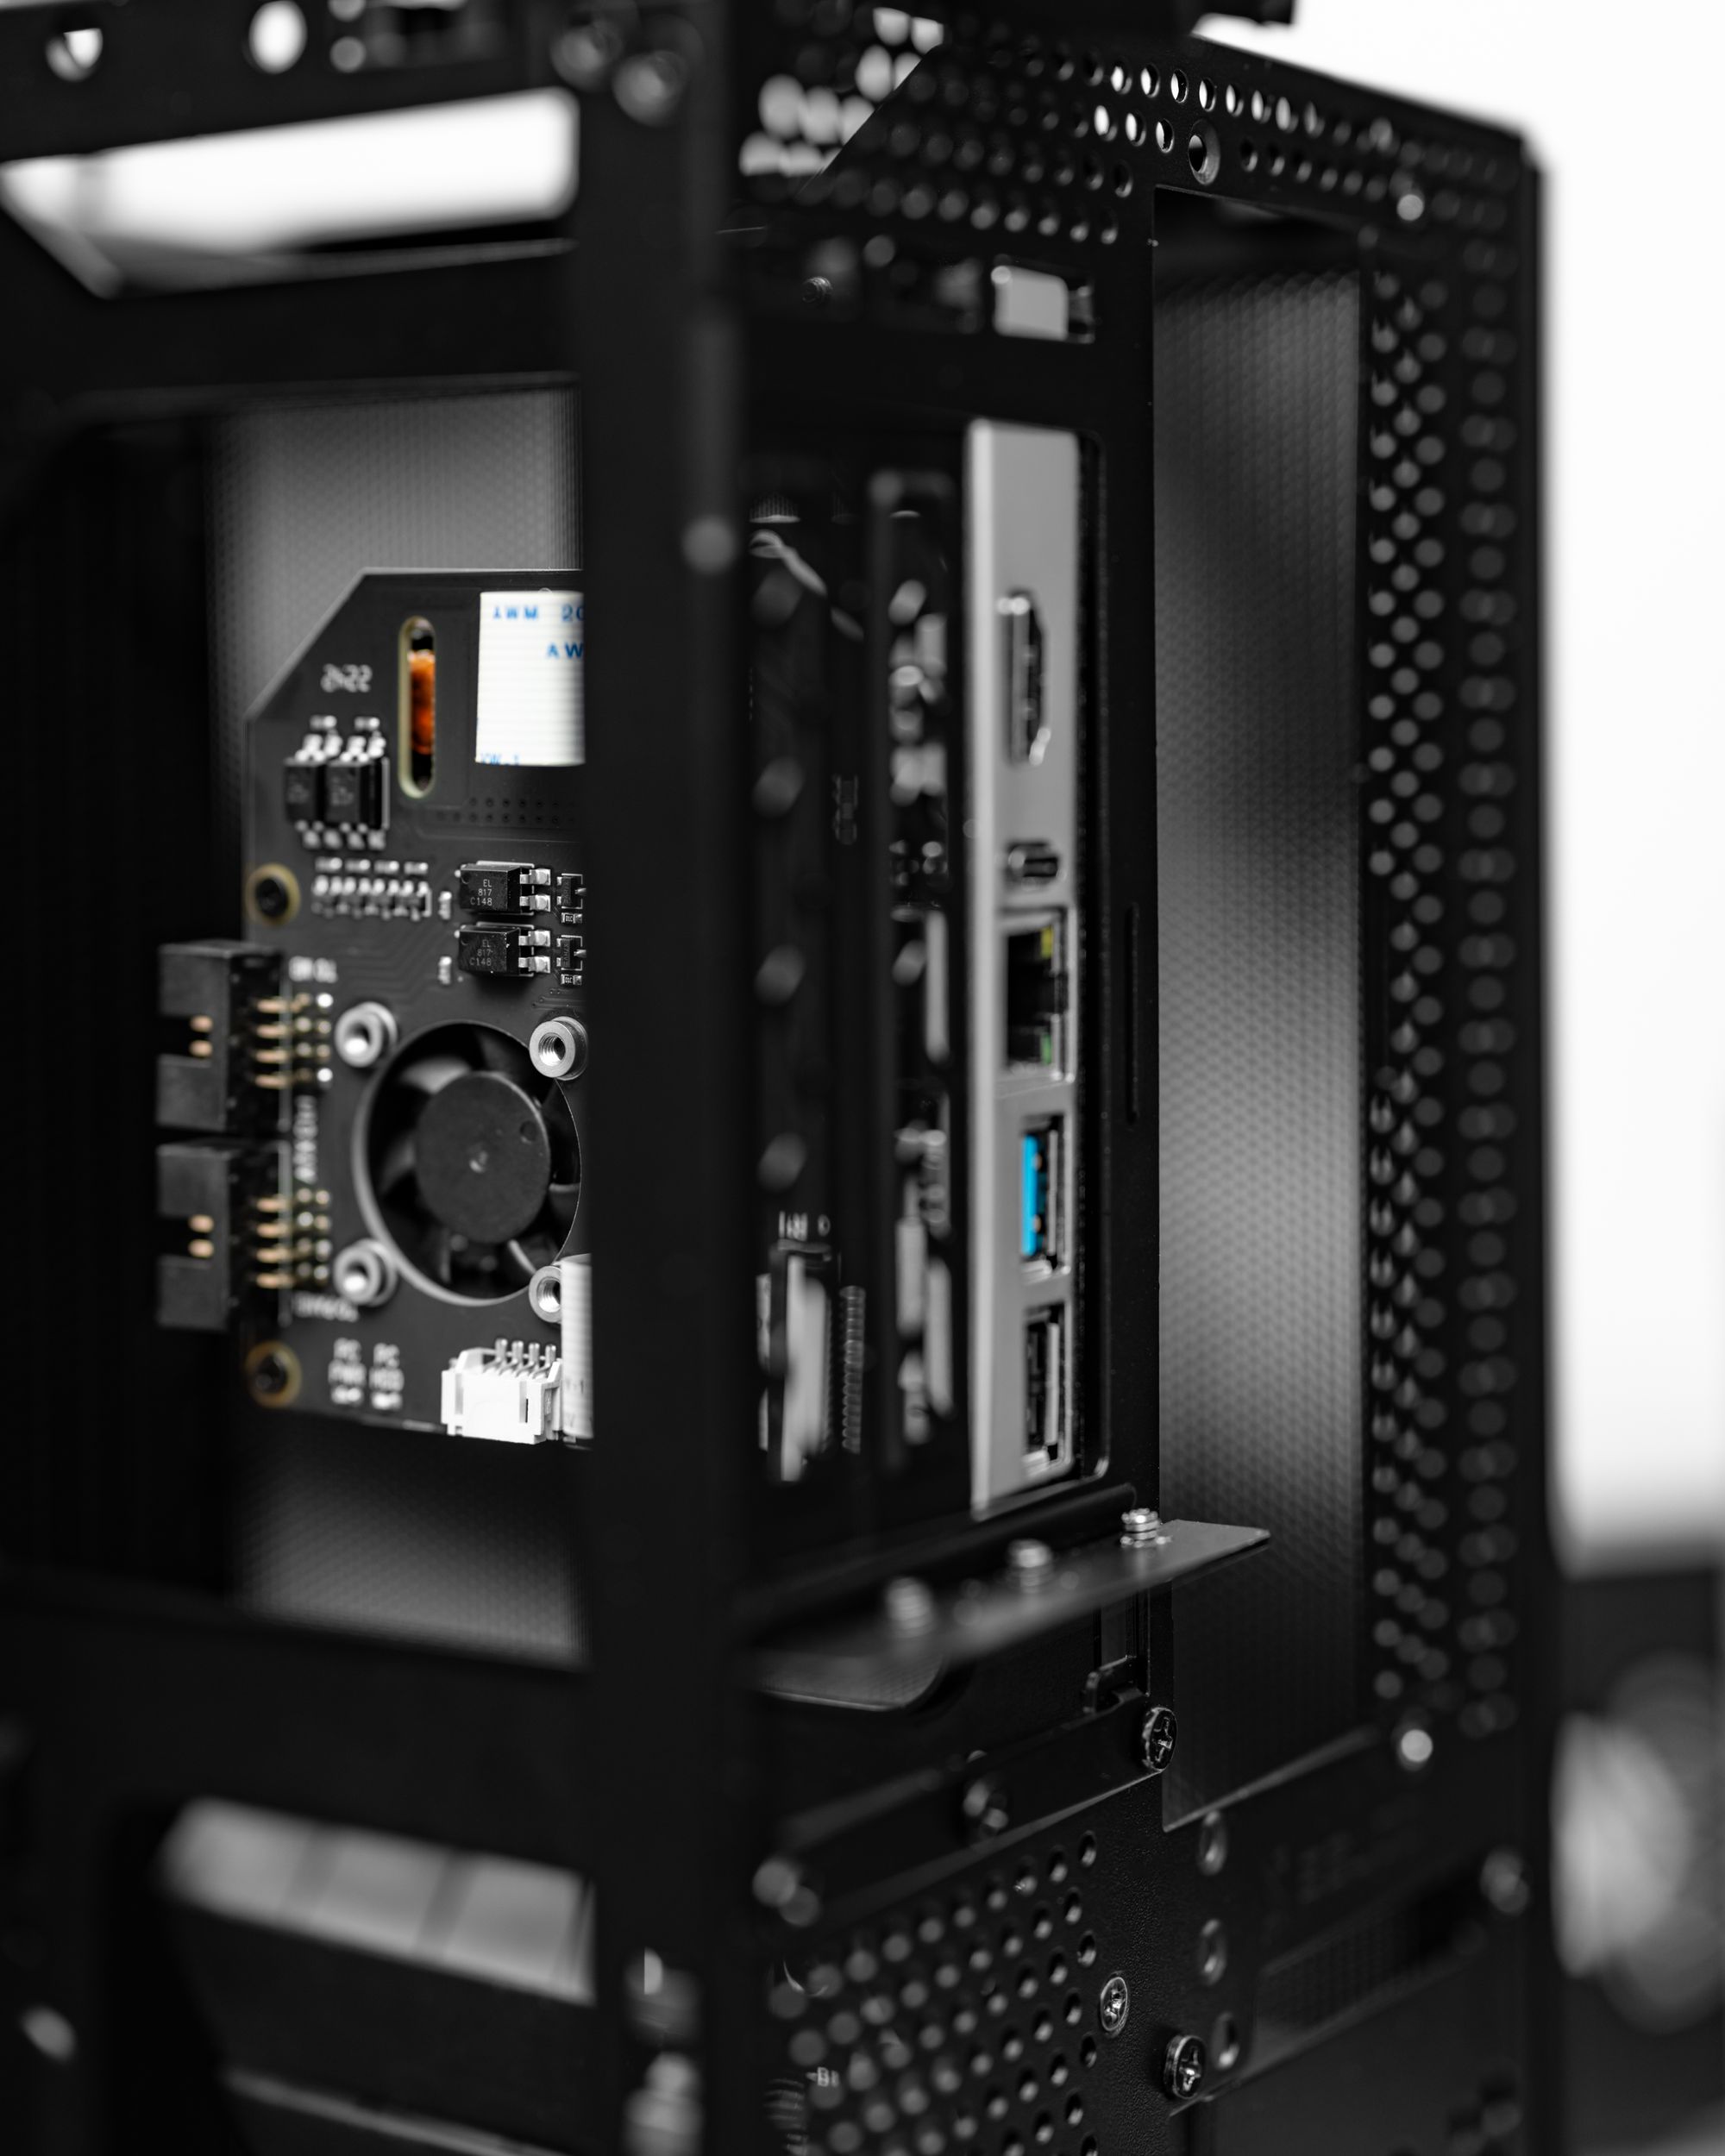
PiKVM is a project that combines open-source software with a Raspberry Pi and capture hardware to bring an IPMI-like level of control to your system. You have the ability to pass audio through the browser interface, remote-mount ISOs stored on the Pi, setup TailScale for secure remote access, and other game-changing things that would cost thousands in commercial/enterprise solutions. I have a few of them at this point made by the original project creator Maxim Devaev, but I also have a “PCIe” version of the hardware made by Geekworm. It doesn’t actually interface via PCIe, but it does fit juuuuuuust behind the GPU and sits in one of the rear IO slots. The Geekworm version supports PoE, so the setup is one less cable for me. It has ATX power and reset control via front IO pin intercept. Wiring that up was cleaner than normal because ASUS includes short, black splitters in the motherboard box.
Future Plans
Blackhaus was a “simple” build for me, so I don’t plan to change much about it during its life of service. The only thing I might do for the sake of OCD is custom cables. All of the custom cable makers shut down for the holidays, so I just ran the sleeved Corsair SF cables as cleanly as I could. I de-pinned the 6+2 PCIe cable to cut it down to just 6 pins, then removed the extra Molex connections, leaving just 1 for the Barrow pump.
Comments?
Leave us your opinion.